


For Warranty Information and the most up-to-date version of this User’s Guide, go to www.culinairbydpi.com Customer Service: 1-888-999-4215
Copyright © 2012 Digital Products International (DPI, Inc.) All other trademarks appearing herein are the property of their respective owners. Specications are subject to change without notice.
Cleaning and Maintenance
To download this User’s Guide in English, Spanish,
or French, or to get answers to frequently
asked questions, visit the support section at:
www.culinairbydpi.com
Para descargar este Manual del Usuario en
inglés, español y francés, o para obtener
respuestas a preguntas frecuentes,
visite la sección de apoyo en
www.culinairbydpi.com
Pour télécharger ce guide de l’utilisateur en
anglais, espagnol ou français, ou pour obtenir
des réponses à des questions fréquemment
posées, consultez la rubrique d’assistance sur
www.culinairbydpi.com
International Support
Warning: To avoid electric shock always unplug your unit before cleaning.
Ignoring this warning may result in death or injury.
Caution: Before using cleaning products, always read and follow
manufacturer’s instructions and warnings to avoid personal injury or product
damage.
General: Prepare a cleaning solution of 3-4 tablespoons of baking soda mixed
with warm water. Use sponge or soft cloth, dampened with the cleaning
solution, to wipe down your unit.
Rinse with clean warm water an dry with a soft cloth.
Do not use harsh chemicals, abrasives, ammonia, chlorine bleach,
concentrated detergents, solvents or metal scouring pads. SOME of these
chemicals may dissolve damage and/or discolor your unit.
Cleaning the Wine Cooler
Occasionally there may be power interruptions due to thunderstorms or other
causes. Remove the power cord from AC outlet when a power outage occurs.
When power has been restored, re-plug power cord to AC outlet.
Power Interruptions
For long vacations or absences, unplug the unit, empty contents from unit,
and clean the unit and door gaskets according to “General Cleaning” section.
Prop doors open, so air can circulate inside. When moving always move the
unit vertically. Do not move the unit lying on its side.
Vacation and Moving Care
Troubleshooting
Wine Cooler does not operate:
Check if unit is plugged in.
Check if there is power at the AC outlet, by checking the circuit breaker.
Wine appears too warm:
Frequent door openings.
Allow time for recently added wine to reach desired temperature.
Check gaskets for proper seal.
Adjust temperature control to colder setting.
Wine temperature is too cold:
If temperature control setting is too cold, adjust to a warmer setting.
Wine Cooler runs too frequently:
This may be normal to maintain constant temperature during high
temperature and humid days.
Door may have been opened frequently or for an extended period of time.
Check gasket for proper seal.
Check to see if the door is completely closed.
Moisture build up on interior or exterior of the wine cooler:
This is normal during high humidity periods.
Prolonged or frequent door openings.
Check door gaskets for proper seal.
Wine Cooler door does not shut properly:
Level the wine cooler. Check for blockages, e.g. wine bottles, shelves.
This appliance is not intended for use by persons (including children) with
reduced physical, sensory or mental capabilities, or lack of experience
and knowledge, unless they have been given supervision or instruction
concerning use of the appliance by a person responsible for their safety.
Children should be supervised to ensure that they do not play with the
appliance.
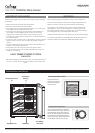
Installing Water Tray
Placement
Unpacking your Wine Cooler
1. Remove all packaging material. This includes the base and all adhesive tape
holding the accessories inside and outside.
2. Inspect and remove any remains of packing, tape or printed materials
before powering on the unit.
Leveling your Wine Cooler
Your wine cooler has 4 leveling legs. After properly placing your unit in its
nal position, you can level it.
Install the legs by screwing in the legs into the preset screw holes. (Please
note that the leg which stands on the hinge is the shorter leg.)
Leveling legs can be adjusted by turning them clockwise to raise your unit or
by turning them counter clockwise to lower it.
Proper Air Circulation
To assure your unit works at the maximum eciency it was designed for, you
should install it in a location where there is proper air circulation and electrical
connections.
The following are recommended clearances around the wine cooler.
Sides .......................... 2 inches. (50mm)
Top ............................. 2 inches. (50mm)
Back ........................... 2 inches. (50mm)
Don’t over ll your wine cooler for proper internal air circulation.
NOTE: Allow enough space in the front of the unit to open the door to 120°.
Install Limitations
Do not install your unit in any location not properly insulated or heated. e.g.
garage, etc.
Select a suitable location for the unit on a hard even surface away from direct
sunlight or heat source, e.g. radiators, baseboard heaters, cooking appliances
etc. Any surface unevenness should be corrected with the leveling legs
located on the front and rear bottom corners of the wine cooler. Avoid
placing unit where there may be electrical interference.
Your unit is designed for free-standing installation only. It is not designed for
built-in application.
NOTE: To minimize the risk of rusting, leakage and insulation damage,
avoid placing the unit in a place where heavy moisture is present. Under no
circumstances spill or directly apply water onto or into the unit.
Installation
The purpose of the water tray is to receive the condensed water drained from
the cavity. The collected water will be self-evaporated so there is no need to
remove the water manually.
To install the water tray, simply slide in the tray along the track located on the
back of the unit beneath the cabinet.