


6
V ent Hood I ns tallation ( with sof f it )
SITE PREPARATION
This DCS Professional Vent Hood has been designed to accommodate installation into a
1) soffit structure (ceiling mount), or, for sites without a soffit structure.
2) directly into the wall through holes provided in the rear panel of the vent hood (wall mount). When
mounting the hood to a soffit, it is recommended to also utilize the rear panel holes to gain addi-
tional stability and minimize any vibration noise. We suggest that the final framing and wall finishing
be done with the vent hood at the site to more accurately locate ductwork and electrical service.
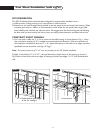
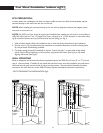
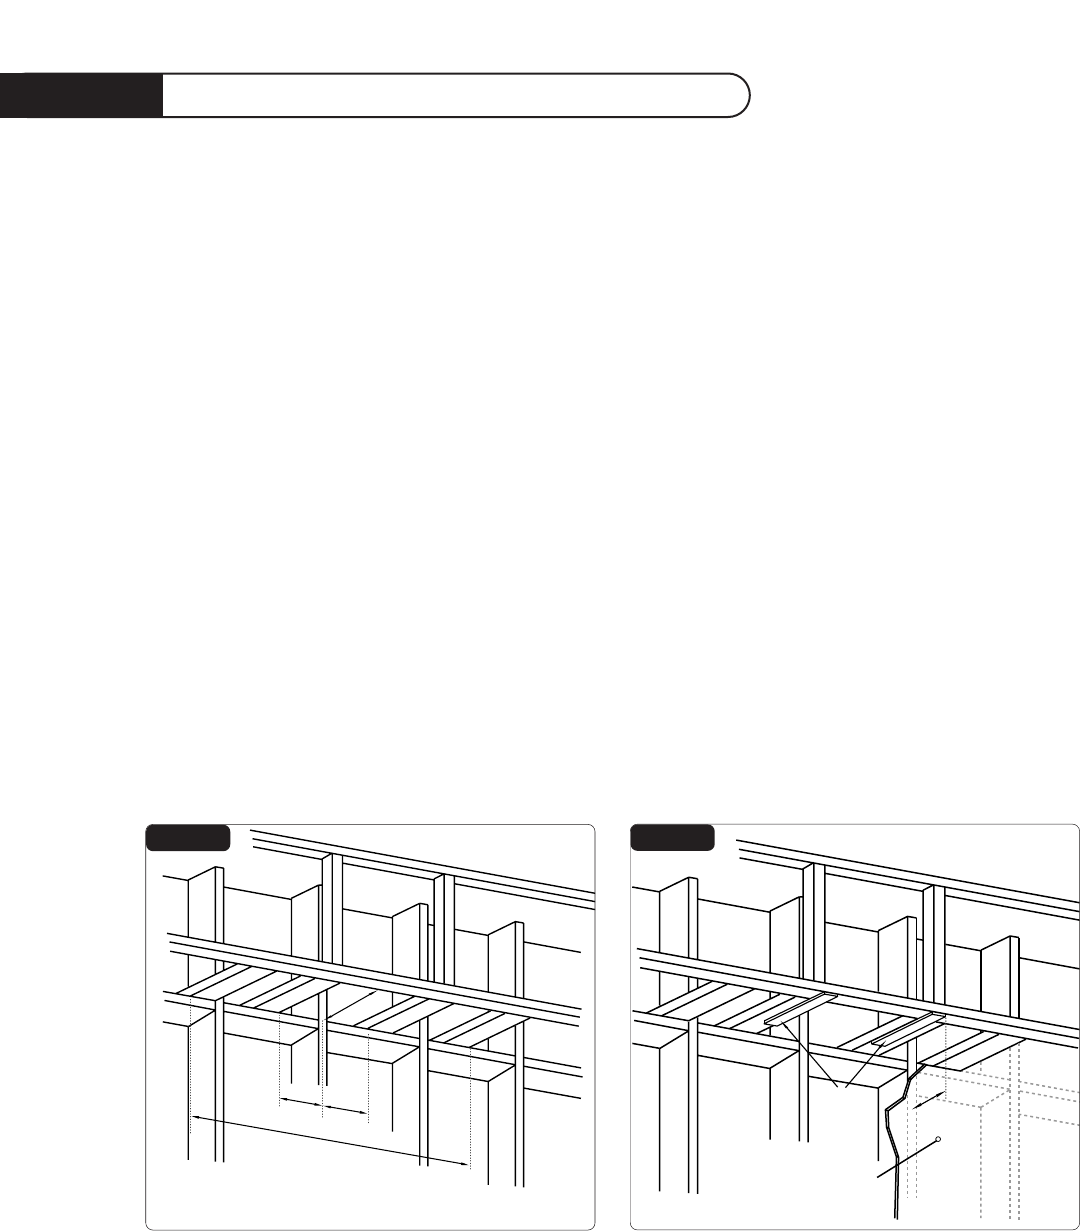
CONSTRUCT SOFFIT FRAMING
1) For a site with a soffit, use 2” x 4”s to construct the soffit framing as shown below in Fig. 1. Note
that a minimum opening of 10” is needed to accommodate the ductwork. With the centerline of
the installation marked, nail down the 2” x 4”s (wide side down) so that their inner edges are those
specified from the centerline. -see Figs.1 & 3 pg.7
Note: The second (outer) set of 2” x 4”s are not necessary on the 30” Models installation.
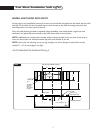
2) Make 2 wood shims (2” x 10-1/2” x drywall thickness). Attach them to the framing as shown in
Fig.2. Mount shims flush with inner edges of framing and with front edges 11-1/2” from finished back
wall.
"A"
"A"
HOOD WIDTH
10"
Minimum
"A" = Center line to inner edge
of 2 x 4's. -see fig.4.
Finished Drywall
11-1/2"
SHIMS
FIG.01
FIG.02