6
Do not use the chassis or vehicle frame as one of the
conductors. Connect two wires at the refrigerator and route
to the DC supply.
12.INSTRUCTION FOR
MOUNTING DOOR PANEL
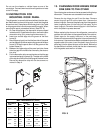
The refrigerator is normally delivered without the door pan-
els. Before starting the mounting work, check that the panel
dimensions are in compliance with those given in the Table
on this page and the instructions are read thoroughly. When
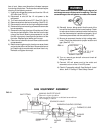
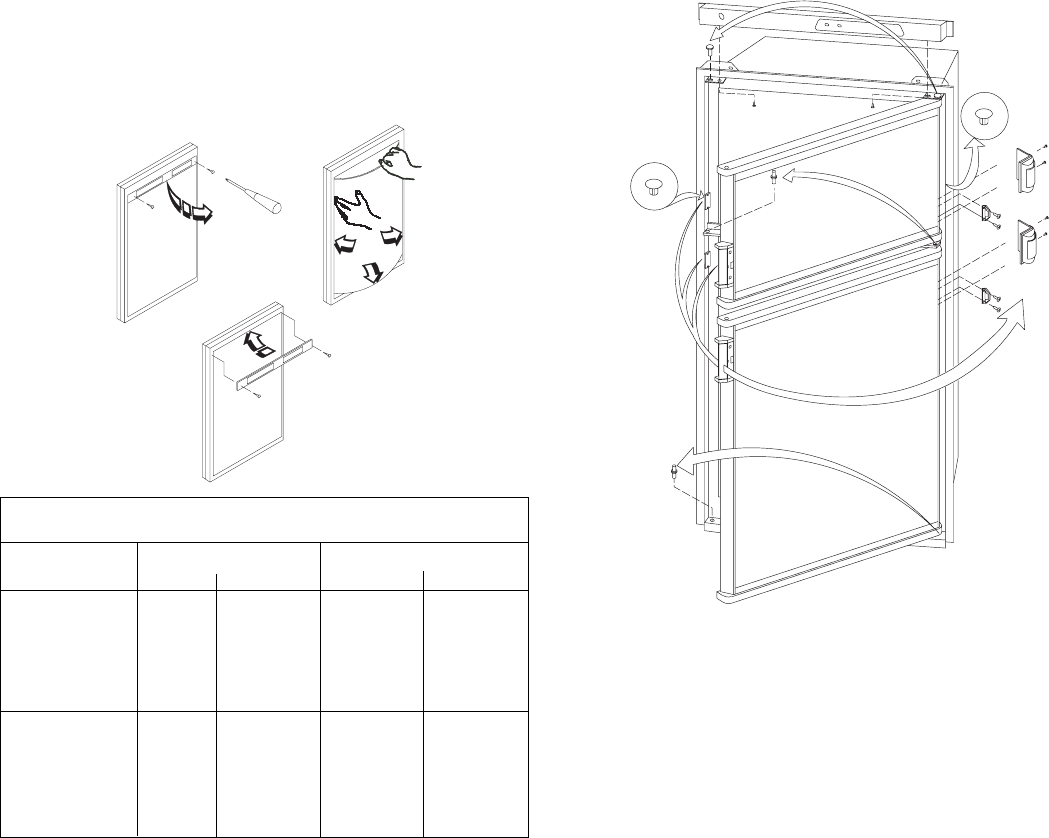
mounting the panel, proceed as follows. (See FIG. 8)
A. On new refrigerators, the decoration strips are taped
inside the door. If installed on the door, remove the door
decoration strip (2) by removing its two screws (1).
B. Insert one vertical edge into the groove of the door
frame (3).
C. Bend the panel gently so that the free side of the panel
can be slipped into the corresponding groove of the door
frame (4). Slide the panel down into the groove of the
bottom frame (5).
D. Between the upper edge of the panel and door frame
there is a gap which should be covered by the decora-
tion strip.
E. Put the decoration strip across the door so that the gap
is covered and push it upward (6). The tabs on the inside
of the strip should fit behind the flange of the door frame.
Secure the decoration strip with the two screws re-
moved in Step A.
PANEL DIMENSIONS
MAX. THICKNESS 5/32" (4 mm)
Refr. Models HEIGHT WIDTH
TYPE MAX. MIN. MAX. MIN.
RM2612
upper mm 306 304 515 513
inch 12-3/64 11-31/32 20-9/32 20-13/64
lower mm 819 817 515 513
inch 32-1/4 32-5/32 20-9/32 20-13/64
RM2812
upper mm 378 376 563 561
inch 14-7/8 14-51/64 22-11/64 22-3/32
lower mm 897 895 563 561
inch 35-5/16 35-15/64 22-11/16 22-3/32
FIG. 8
1
1
1
1
2
3
4
5
6
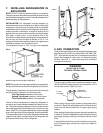
13. CHANGING DOOR HINGES FROM
ONE SIDE TO THE OTHER
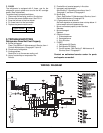
Open the top door and remove the two screws holding the top
decoration. The screws are accessible from beneath.
Remove the top hinge pin and lift out the door. Remove
center hinge pin and lift out the lower door. Unscrew the
bottom hinge pin. Remove the plastic cap from the opposite
lower hinge and place it in the hole just "left empty" by the
lower hinge pin. Screw the lower hinge pin in the hole from
which the plastic cap was removed.
Before replacing the doors on the refrigerator, remove the
catches and move them to the opposite side of the cabinet.
Plastic caps for the empty holes are in the parts bag.
Remount the doors and the hinge pins in the reverse order of
their removal. Unscrew the handles and refasten them on the
opposite side of the door. Insert the plastic caps (from the
parts bag) into the holes left open on the doors. Before the
top decoration is refitted, check that the door closes easily
and the gasket seals well on all sides.
FIG. 9


