


13
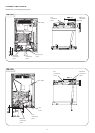
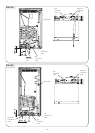
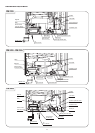
CROSS-SECTIONS
The D+ (alternator) is a signal cable and therefore 1-1.5 mm
2
is suffi cient. Connection to 12V + and - must be done with a
10 mm
2
wire if the total wire length (+ and - wire together) is
maximum 12 m. If longer leads are needed, bigger dimensions
are required.
MOUNTING INSTRUCTIONS
REPOSITIONING THE HINGES
The refrigerator is equipped with reversible doors. A special
door reversing kit must be used to reverse the doors. For further
information, contact your dealer.
MOUNTING THE DOOR PANEL
Door panels can easily be fi tted or changed. RM 2455, RM
2555 and RM 4605 are delivered with door panel(s) wheras
RM 2355 is delivered without.
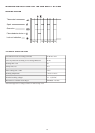
Before starting the mounting work, read the instructions thor-
oughly and check that the panel dimensions are in compliance
with those given in the following table:
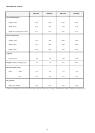
Dimensions (mm)
Height
Width
Thickness max.
RM 2355
641±1
497±1
4
RM 2455
826±1
526±1
4
RM 2555
982±1
526±1
RM 4605
402±1 mm
(upper door)
525 ±1 mm
4
826±1 mm
(lower door)
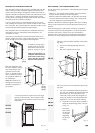
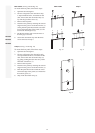
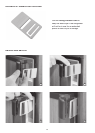
We recommend that the panel is mounted before
the refrigerator is installed in the enclosure. The
lower decoration strip and parts bag are taped
inside the door.
To mount the door panel, follow these steps:
Slide the panel from the bottom of the door
into the grooves on the vertical edges of the
door.
Push the panel upwards. Take the two plastic
panel stops from the parts bag and put them
in the two holes at the lower door frame.
Put the decoration strip across the door and
fasten it with three screws from the parts
bag.
1.
2.
3.
ELECTRICAL CONNECTION
The electrical installation must be carried out by authorised
personnel.
NOTE!
For mains voltage operation, it is important that
the circuit to and in the motorhome is effectively earthed.
The refrigerator is equipped with a three-prong (grounding)
plug for your protection against shock hazards and should be
plugged directly into a properly grounded threeprong recep-
tacle. DO NOT cut off or remove the grounding prong from
this plug.
If the supply cord is damaged, it must be replaced by the manu-
facturer, its service agent or similarly qualifi ed persons in order
to avoid a hazard.
230-240V SUPPLIES
Check that the voltage stated on the data plate is the same as
the main voltage in use (230-240V).
NOTE!
Electrical leads must be routed and secured so that
they cannot come into contact with hot or sharp parts of
the refrigerator.
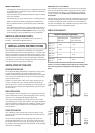
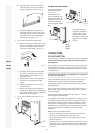
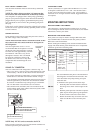
The free length of the cord is 1 m. It is
recommended that the receptacle is located
on the left side of the refrigerator (viewed
from the rear) and approximately 150 mm
from the fl oor. This allows easy access
through the vent door. The cord should
be routed to avoid direct contact with
the burner cover, fl ue cover or any other
components that could damage the cord
insulation.
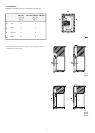
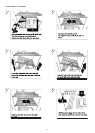
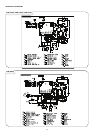
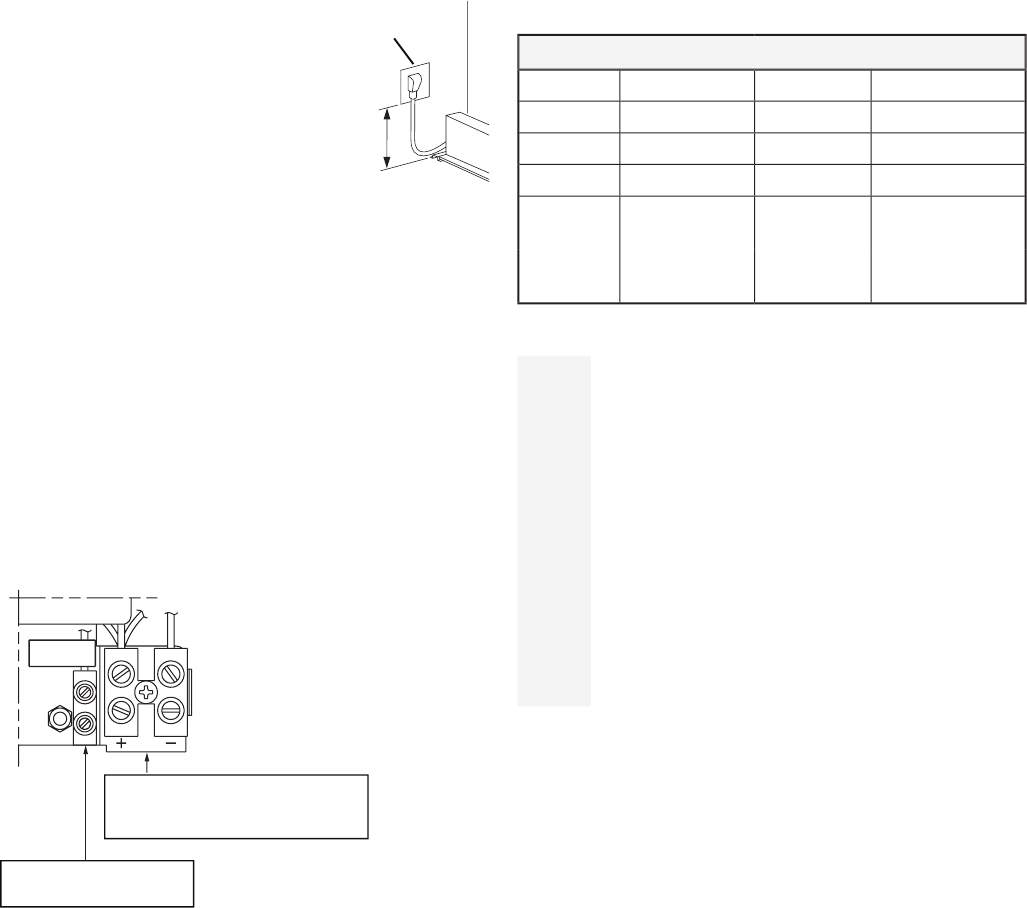
12V AND “D+” CONNECTION
The 12V connection of the refrigerator is shown in Fig. 19.
The (+12V) and (-) pole have to be connected directly to the
“house battery”. Do not use the chassis for the return lead.
12V supply must not be connected to a voltage controller or
similar device as the AES itself monitors the DC voltage.
+12V should be permanent attached, and must not be cut out
when the ignition key is turned off. All connections should
be screwed or soldered to keep voltage drop to a minimum.
The 12V DC heater is fused with a 30 A in-line fuse.
The connection D+ (alternator) has to be connected to the
corresponding outlet of the vehicles electrical system, either
a 12V or a 24V DC alternator.
NOTE!
Only 12V DC can be connected to the PCB.
Please consult a specialist, if you are not familiar with the 12V
electrical system in your motor home.
•
•
•
•
RM 2355
230-240V AC
recep
tacle
100-
150m
m
Fig. 18
D+ signal from either a
12V
or a 24V DC alternator
D+D+
Only 12V DC to the PC board.
Under
no circumstances can 24V DC
be
connected to the PC board.
Fig. 19