1110
EACH USE
THE EXTERIOR WALLS GET VERY HOT WHEN IN USE. USE OVEN GLOVES TO
REMOVE ANY STORED OBJECT ON TOP OR INSIDE OF THE OVEN.
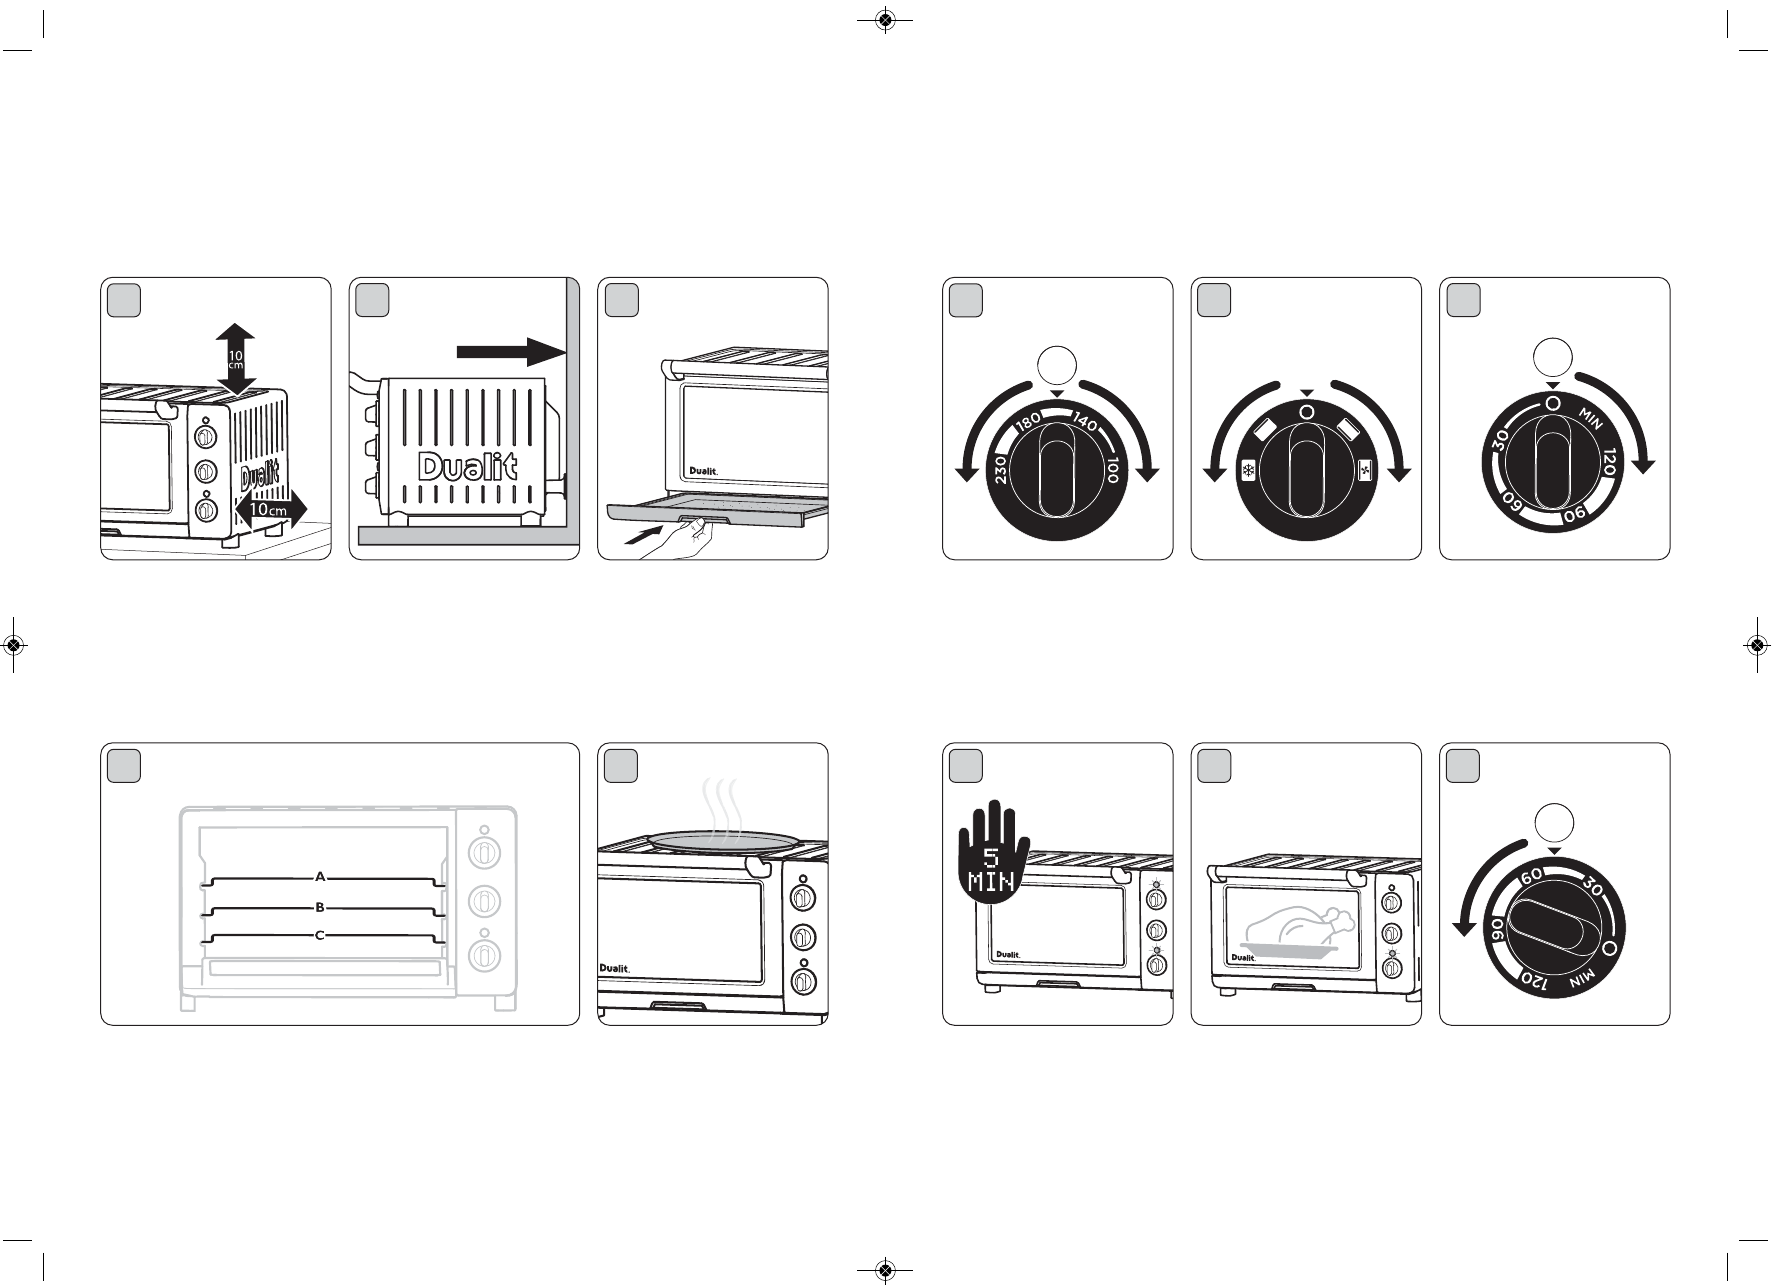
Turn the temperature dial to
select the required
temperature.
Turn the function dial to
select grill, defrost, bake or
convection.
The timer is the main
ON/OFF switch. Turn the dial
to the required amount of
time. The red light will
illuminate when the timer is
running.
1
2
3
SELECT
TEMPERATURE
SELECT
FUNCTION
SET TIMER
4
PREHEAT
Ensure the oven door is
closed. Preheat the oven for
five minutes. The temperature
light will turn off when the
set temperature is reached.
The oven is now ready for
cooking.
5
COOK
Follow cooking instructions
on food packaging or
receipe, always check the
food is cooked properly.
When the timer reaches ‘0’
the bell will ring and the
oven will turn off.
6
TURN OFF
If you need to turn the oven
off before the timer has
finished, set the function dial
to ‘OFF’ and turn the timer to
‘0’. You will hear the bell.
SETTING UP
TURN THE OVEN ON FOR THE FIRST TIME IN A WELL VENTILATED ROOM, A
“NEW” SMELL MAY BE GIVEN OFF, THIS WILL DISSIPATE AFTER A FEW USES.
Before plugging in your Mini
Oven, place on a flat surface.
Leave at least a 10cm gap
above and to the side of the
oven. Never place on a
heat-sensitive worktop or
below a flammable surf ace.
Place the Mini Oven firmly
against the back wall.
Ensure that the crumb tray is
clean and seated in place.
Empty after each use and
keep clean.
1
2
3
POSITION OVEN
SPACING
CRUMB TRAY
4
RACK POSITIONS
IMPORTANT: Always use the wire rack in the orientation
shown above.
The rack can be positioned at three different heights. The
ideal position will be effected by the food item, temperature
and setting (refer to page 8 for a guide on cooking rack
positions).
5
PLATE WARMING
When in use, place plates on
top of the oven to warm.
The exterior walls get very
hot when in use. Use oven
gloves to remove any plates
on top of the oven.
IB-CMO18-C_Layout 1 02/09/2011 09:21 Page 10


