


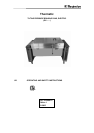
OPERATING INSTRUCTIONS
Page 6 62.9696.01
4. AUTOMATIC CONTROL
The automatic controls can be fitted with more or fewer func-
tions.
The following instructions explain all the possible functions.
4.1 Setting the clock
The clock time is shown on the display (AZ).
Switch on the control system switch (S) by turning them from
position 0 to I.
Then press and hold down buttons (ZT) and (Q). After the
second acoustic signal, the clock time can be set by turning
the knob (Z).
Turn right = increase
Turn left = reduction
Smallest change = 1 minute
After the time has been set, the buttons (ZT) and (Q) can be
released again.
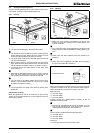
4.2 Starting
The pan must be in the horizontal position prior to starting, or
the power supply must be disconnected.
4.3 Automatic cooking
Switching on
Switch on the control switch (S) turn from position 0 to I. This
switches on the temperature pre-setting function. The lamp
(LS) lights up.
0 = Off
I = On
Set the desired cooking temperature (flashing nominal
value) with the temperature selection knob (T) on the display
(AT).
Turn right = increase
Turn left = reduction
Smallest change = 1°F
Programming the cooking time, the starting time and
steam condensation in the compartment (or only one func-
tion). The starting-time programme only exists as an option.
Pressing the button (DT) switches on the programme for the
cooking time (flashing nominal value). The desired cooking
time is set with the cooking time knob (D) on the display (AD).
Turn right = increase
Turn left = reduction
Smallest change = 1 minute
The lamp (LD) only lights up when the desired temperature
has been reached and the cooking time expires.
Pressing the button (ZT) switches on the programme for the
starting point (flashing nominal value).
Set the desired starting time with the starting time knob (Z) on
the display (AZ)
Turn right = increase
Turn left = reduction
Smallest change = 1 minute
The acoustic signal will sound three times and the lamp (LZ)
will light up when the starting time has been reached.
Steam condensation (optional) is pre-programmed by press-
ing button (V).
The following pre-programmed nominal functions
• Cooking temperature
• Cooking time
• Starting time
• Steam condensation
are all activated by pressing the button (TT).
The following displays
• Cooking temperature (AT)
• Remaining cooking time (AD)
• Clock time (AZ)
indicate the current value.
The lamp (LT) will continue to flash until the nominal cooking
temperature is reached. It then stays on permanently.
When illuminated, this lamp (LV) indicates that steam conden-
sation is switched on. When cooking is completed, steam con-
densation will start automatically and will remain in operation
until the pressure in the appliance has been reduced to nor-
mal. The lamp (LV) will flash during the cooling phase.
4.4 Shutting down
An acoustic signal sounds when cooking is over. This is
acknowledged by pressing the button (Q).
The power supply is then switched off.
All activated functions are subsequently switched off:
• Press the pre-set temperature button (TT) for some sec-
onds.
Lamp (LT) extinguishes.
• Press the cooking time button (DT).
Lamp (LD) extinguishes.
• Press the starting time button (ZT).
Lamp (LZ) extinguishes.
(Starting-time programme exists as an option)
• Press the button for steam condensation (V).
The lamp (LV) will extinguish.
• Switch off the Soft button (R), if this was activated.
• Switch off the control switch (S).
Turn from position I to 0.
Lamp (LS) extinguishes.
• Switch off the power isolator (H) (only available as an
option).
• Turn from position I to 0.
0 = Off
After cooking has been completed, the control switch (S) is
switched off.
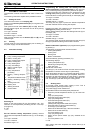
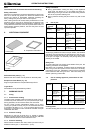
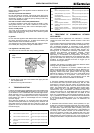
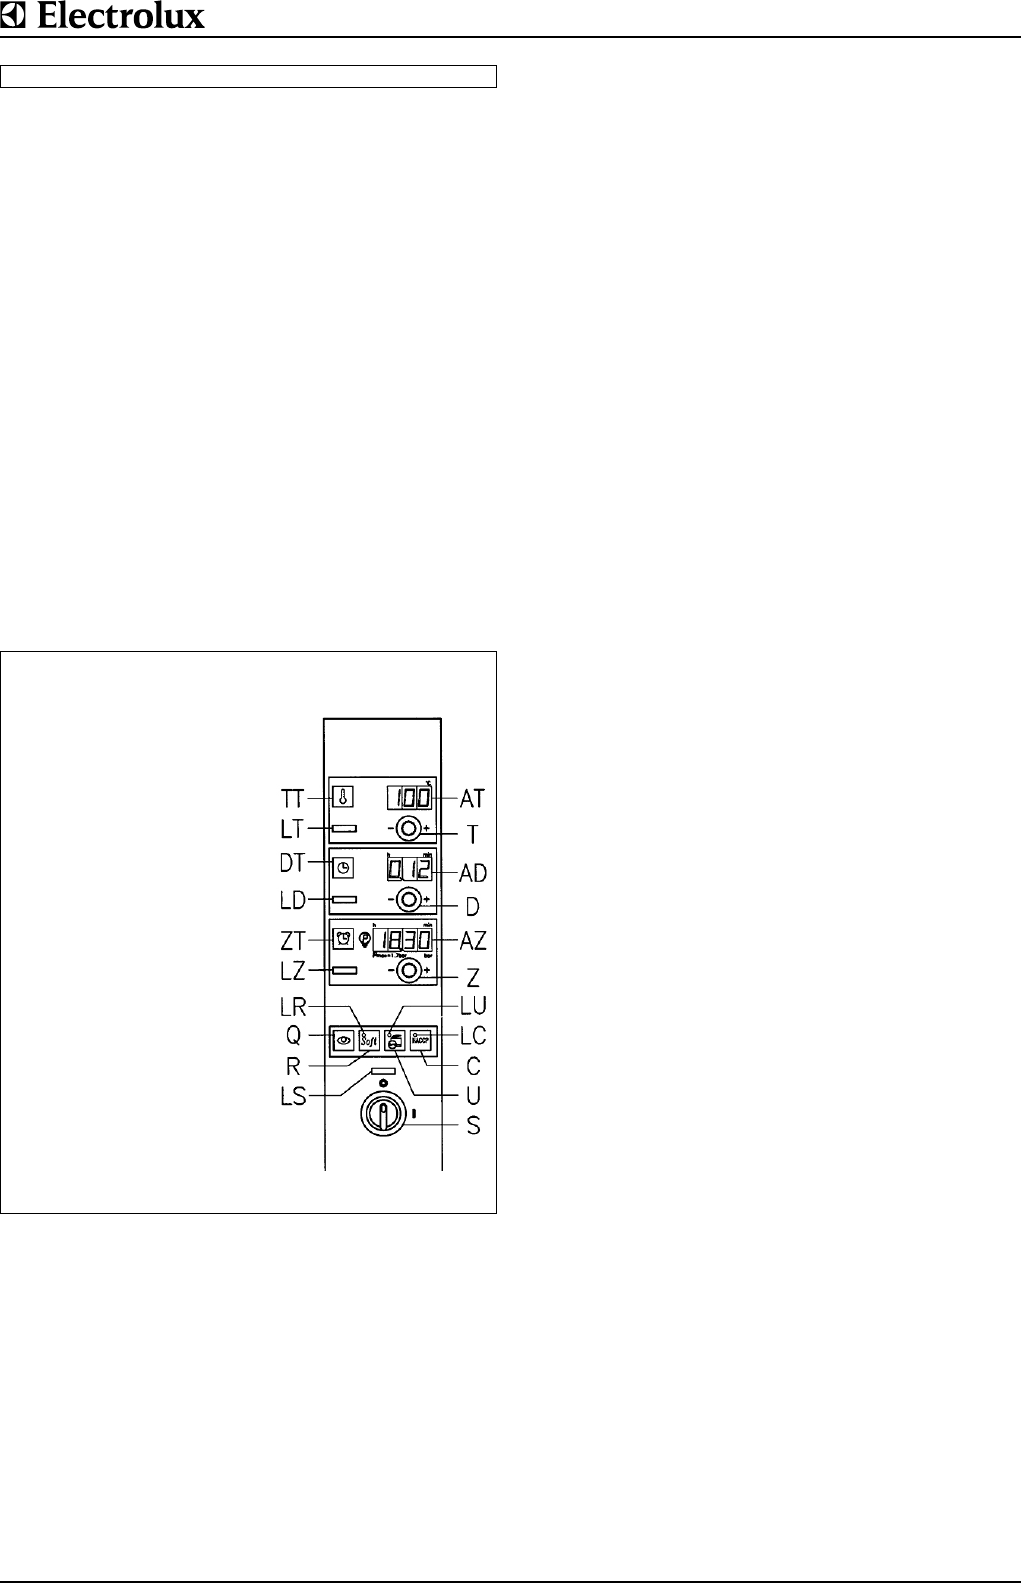
150 LT 15 50 28
TT Button, activation of settings
LT Lamp, cooking temperature
DT Button, cooking time
LD Lamp, cooking time expires
ZT Button, starting time
LZ Lamp, starting time
LR Lamp, soft settings
Q Button, acoustic signal
R Button, soft
LS Lamp, temperature
pre-setting
AT Display, cooking tempera-
ture
T Temperature selection knob
AD Display, remaining cooking
time
D Cooking time knob
AZ Display, time
Z Starting time knob
S Control switch
Fig. 2 Right console