


7 - INSTALLING THE CONDITIONER
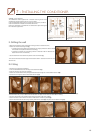
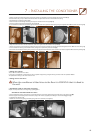
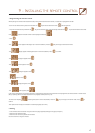
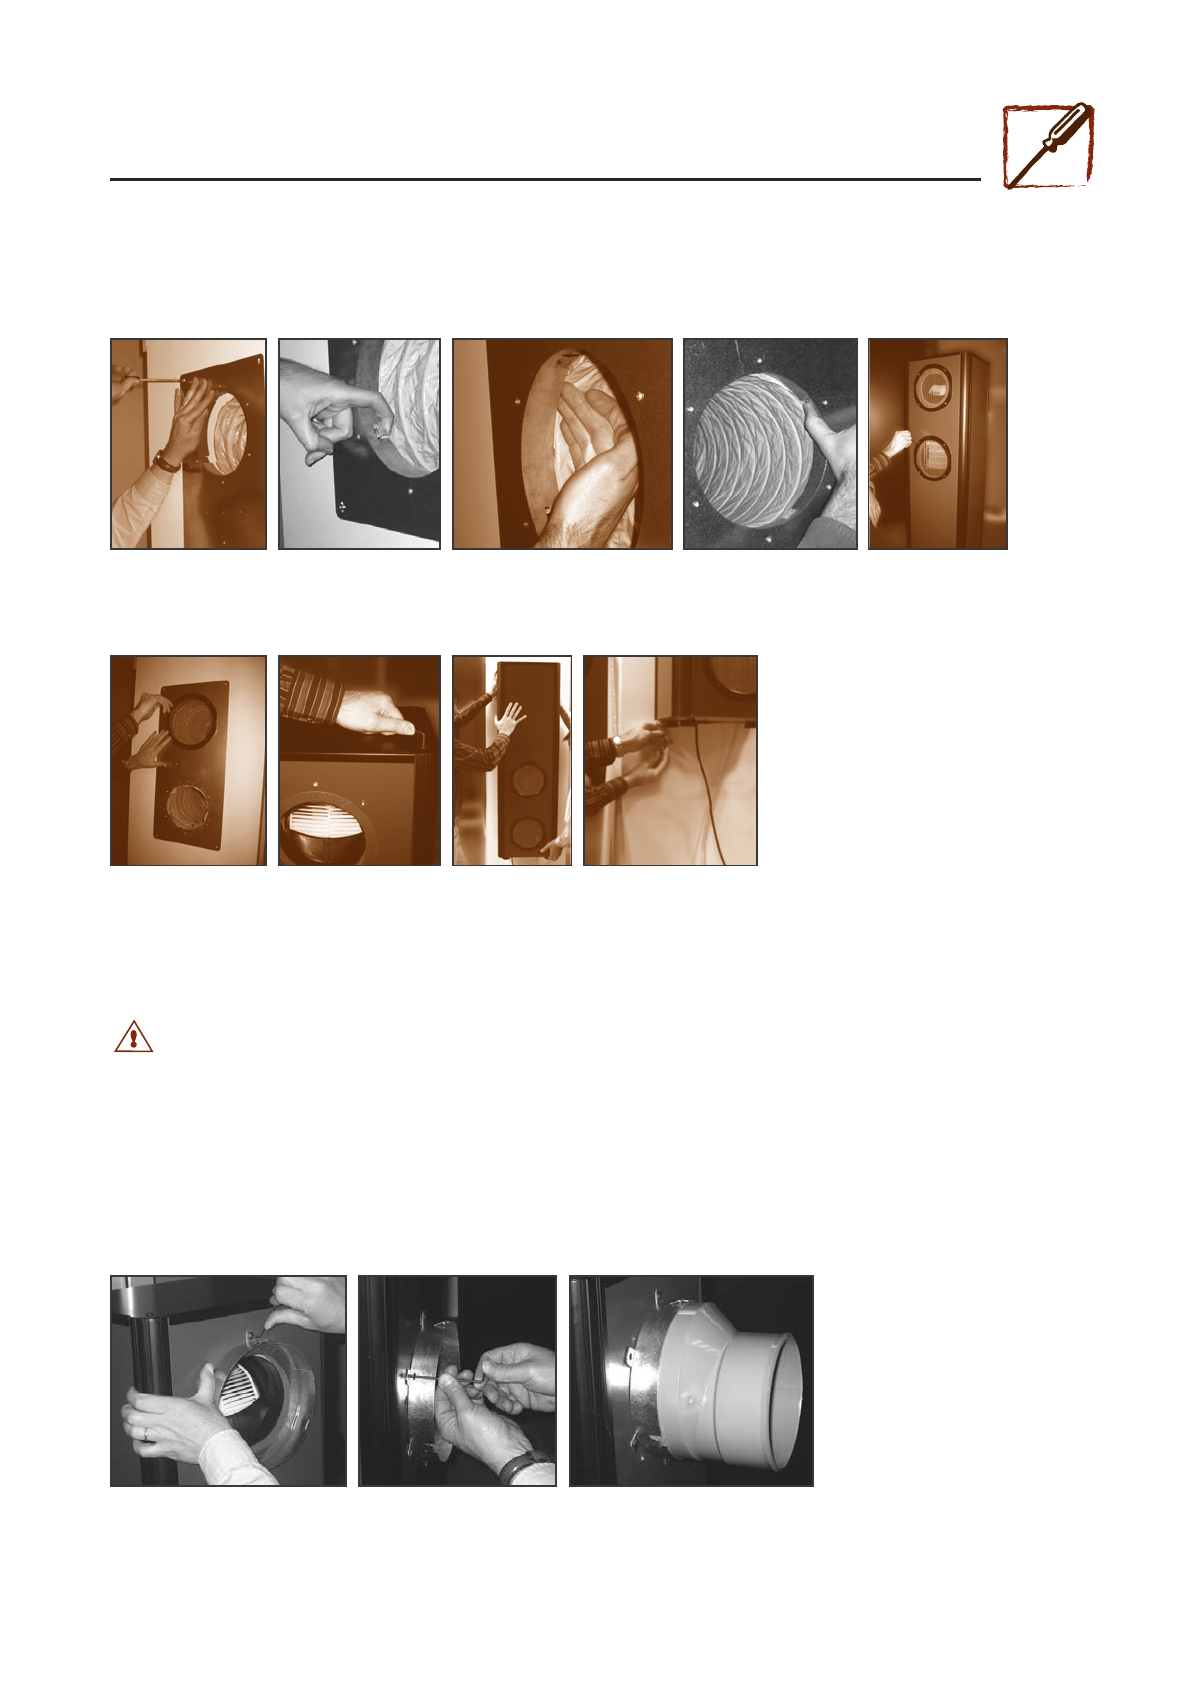
- Position and t the aesthetic front panel to the wall (screws not supplied). Use screws suitable for the wall material (11).
- We recommend that you put a bead of silicone between the panel and the wall to ensure eective sealing.
- Fold the ange’s 4 supports inwards (12).
- Place the ducts onto the anges ensuring that they are well secured on the supports (13).
- Push the 4 supports towards the outside of the ange (14).
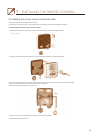
- On the side of the conditioner to be placed against the wall unscrew the 2 grids from the housing using the supplied Hex wrench and retain the screws.) (15).
- Using the screws retained in the last instruction, screw the 2 grids onto the aesthetic front panel (16).
- Unscrew the 2 screws on the top of the conditioner using a Hex wrench (supplied), on the side to be placed against the wall. Retain the two screws (17).
- Fix the conditioner housing to the metallic
frame, taking care to press rmly onto the foam (18).
- Screw down the conditioner housing using 2 screws at the top (those retained earlier) and 2 screws at the bottom (supplied in the accessories packet) (19).
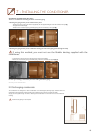
• Fitting onto a door:
You can t the conditioner onto a door.
In this case, it is ESSENTIAL to check that the door is capable of supporting a weight of 46 kg and that it does not produce vibration.
The procedure for tting is the same as for the wall.
• Fitting close to the floor:
When the conditioner is tted close to the oor it is ESSENTIAL that it is xed to
the wall.
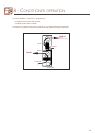
• Conditioner with air extraction via piping:
Repeat the steps described at the beginning of paragraph III.
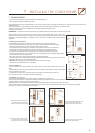
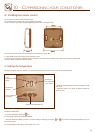
Conditioner housed outside the cellar:
- On the conditioner housing, unscrew the 2 grids (openings that will not be placed against the wall) using a Hex wrench (supplied).
- Where the grids were located, position and screw, using a Hex wrench (supplied) the 2 anges* onto the housing (1) and(2).
- Fit together the reducer* (3).
- Position the air extraction piping (standard piping, 160 mm in diameter, not supplied).
*Consult your EuroCave distributor
(11)
(16)
)3()2()1(
(17) (18) (19)
(12) (13) (14) (15)
12