


10
TOLL FREE: 1-800-798-7398
www.ninjakitchen.com
11
English
10 Unplug the appliance after use.
IMPORTANT: Never run the appliance
empty.
CAUTION: Use extreme caution when
processing hot foods or liquids to avoid
accidental scalding or burns. Do not
process food or liquid that is hotter than
180°F/82°C. Allow very hot ingredients
to cool before processing.
When processing hot foods or liquids,
always open the spout cap to vent the
steam. Keep hands and other exposed
skin away from the opening to prevent
possible burns or scalding.
WARNING: Secure the appliance while in
use by pressing down on the lid with one
hand.
WARNING: Never leave the appliance
unattended while in use.
6 Press power button ( ) or the selected
button a second time to stop the
attachment from turning or press a
different button to change the speed.
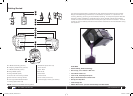
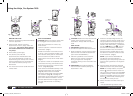
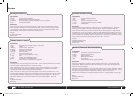
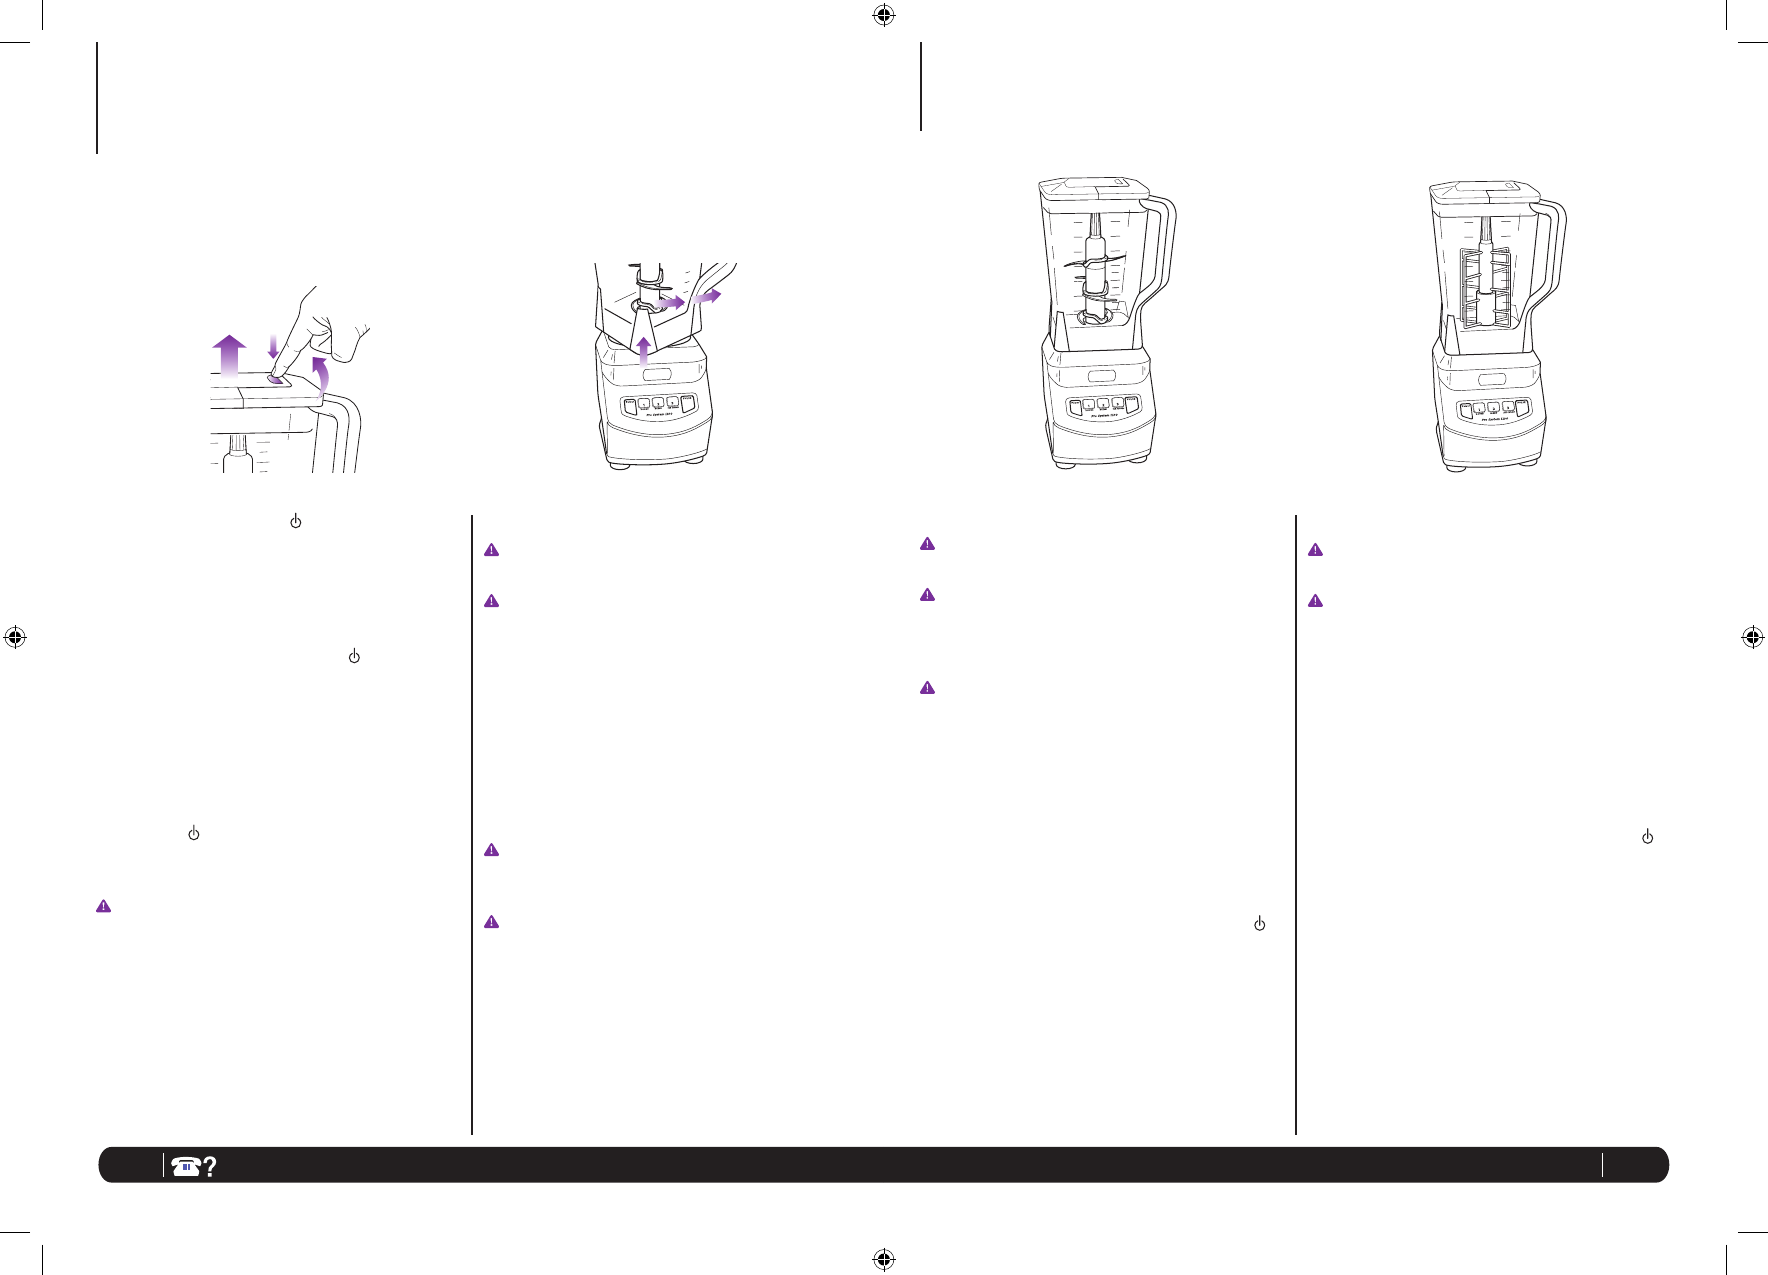
7 If the ingredients stick to the side of
the container, stop the appliance by
pressing the power button ( ) and wait
for the attachment to stop turning. Then
remove the lid by pressing the release
button, lifting the handle up and pulling
straight up. (Fig. 6) Use a spatula to
dislodge the pieces, replace the lid and
continue processing.
8 To remove the container, press the power
button ( ) to turn the appliance 'Off'.
Wait for the attachment to stop moving
before removing. (Fig. 7)
CAUTION: Never remove the container
while the appliance is still running.
9 Depending on the consistency of the
contents in the container, open the
pouring spout cap and use the spout
to empty liquid contents. For thicker
consistencies, or for removing dough
from the bowl, remove the lid and
attachment carefully (by its shaft), then
empty contents from the container.
Using the Ninja
™
Pro System 1100 - cont'd
Fig. 6
Fig. 7
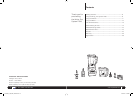
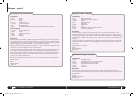
Using the Pitcher
USING THE WHIPPING ATTACHMENT
IMPORTANT: Accessories are not
interchangeable.
IMPORTANT: DO NOT attempt to
operate the appliance without the lid on.
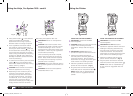
1 Holding the whipping attachment by
the shaft, place it onto the gear shaft
inside the container. Ensure that the
attachment fits snuggly around the gear
shaft and that it is standing straight.
2 Add the ingredients and secure the
pitcher lid onto the pitcher. (Fig. 9)
3 Plug the power cord into the electrical
outlet and press on the power button ( ).
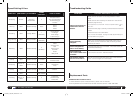
NOTE: Please refer to ‘Speed Settings
& Uses’ chart for suggested uses and
speeds.
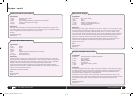
USING THE 6-BLADE ASSEMBLY
IMPORTANT: Accessories are not
interchangeable.
CAUTION: Blades are sharp! Use extreme
caution when handling the blade
assemblies. Always hold them by the
shaft.
IMPORTANT: DO NOT attempt to
operate the appliance without the lid on.
1 Holding the 6-Blade assembly by
the shaft, place it onto the gear shaft
inside the container. Ensure that the
attachment fits snuggly around the gear
shaft and that it is standing straight.
2 Add the ingredients and secure the
pitcher lid onto the pitcher. (Fig. 8)
3 Plug the power cord into the electrical
outlet and press on the power button ( ).
NOTE: Please refer to ‘Speed Settings
& Uses’ chart for suggested uses and
speeds.
Fig. 8 Fig. 9
NJ602W_30_IB_ENG_100426.indd 10-11 10-05-03 11:38 AM