4
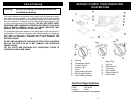
• Power “On” Light - It is illuminated whenever the oven is turned on.
• Bake Tray - For toasting, baking and general cooking for
casserole dishes and standard pans. Used also for broiler drip pan to
prevent spattering that could result in smoke and flare ups.
• Broiler Tray - For use in broiling and roasting meat,
poultry, fish and various other foods. ups.
• Tray Handle - Allows you to pick up the bake rack, drip pan and
broiler rack when they are hot.
Caution: Always use extreme care when
removing broiler tray, bake tray
cookie sheet or any hot
container from a hot oven.
Always use the tray handle, or
an oven mitt when removing hot
items from the oven.
Using Your Convection Toaster Oven
WARNING: TO AVOID RISK OF INJURY
OR BURNS, DO NOT
TOUCH HOT SURFACES
WHEN OVEN IS IN USE.
ALWAYS USE OVEN MITTS.
Toasting with Convection
Large capacity oven allows for toasting 4 to 6 slices of bread, 6 muffins,
frozen waffles or frozen pancakes.
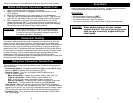
When toasting only 1 or 2 items, place
food on the bake rack in the center of the oven.
Operation
• Set the temperature control to 450°F.
• Turn the function control to Toast/Convection.
• Place food to be toasted on the Bake Rack.
• Ensure crumb tray is in place.
• Turn the time control to desired darkness. (light to dark).
• Bell will ring to signal the end of the Toast cycle.
Note:
Bake rack should be positioned in the middle of the oven
with the indentations pointing down.
7
Grill
Please note that the grill function is the same as broiling but without the
convection feature. For best results, it is recommended that you preheat the
oven for 15 minutes on 450°F.
Operation
• Set temperature control to 450°F.
• Turn function control to grill.
• Preheat the oven.
• Place the broiler rack on the drip pan.
• Place the food on the broiler rack and slide into the top rack support guide
or middle rack support guide depending on the thickness of the food that
you are cooking.
• Food should be placed as close as possible to the top heating element
without touching it.
• Set temperature control to the appropriate temperature.
• Brush food with sauces or oil, as desired.
• Turn time control to position ‘Stay On’.
• It is advisable to leave the door slightly ajar.
• Turn food over midway through the prescribed cooking time.
• When grilling is complete, turn the Time Control to ‘OFF’.


