


Important Safeguards ………………………………………………………….....
Special Safety Instructions ……………………………………………………...
Main Components ………………………………………………………………..
#1 Using for the First Time ……..….…………………………………………….
- Prior to First Use, Clean the Unit Thoroughly …….………………………..
#2 Filling the Stainless Steel Container With Oil …………..………………….
- Using Solid Fat …………..……………………………………………………
#3 Installing the Control Panel Into Its Place ……..…………………………….
#4 Using the Deep Fryer …………………...……………………………………..
- Pre-Heating ………………….………………………………………………….
- Filling the Frying Basket ……….………………………………………………
- Frying Food …………………………………….……………………………….
#5 At the End of Cooking ………………….………………………………………
#6 Frying Tips ……………………………..………………………………………..
#7 Filtering and Changing the Oil ………………………………….…………….
#8 Cleaning Instructions ……………………….………………………………….
1
1
3
4
4
5
5
5
5
5
6
6
6
7
8
8
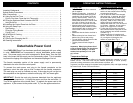
Detachable Power Cord
Your EURO-PRO Deep Fryer has been specifically designed with your safety
in mind. EURO-PRO has incorporated a unique detachable power supply
cord. This power supply cord cord is designed to “Break Away” from the fryer
body in the event that the supply cord is inadvertently pulled. This is intended
to prevent the tipping of the appliance and hazardous spillage of hot oil.
The female receptacle portion of the power supply cord is permanently
attached to the rear of the the control panel.
To connect the male power cord plug to the female receptacle on the
appliance, orient the male plug so that it mates with the female receptacle.
The male plug can only be inserted one way. If the male plug will not go into
the receptacle on the appliance, rotate the male plug 180° and insert again.
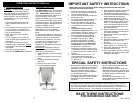
IMPORTANT
: Should the male plug become detached from the appliance
during use, it is important to: 1) Unplug the power cord from the wall outlet. 2)
Turn off the appliance at the control panel. 3) reattach the power cord to the
appliance. 4) Re-connect to the power outlet. 5) Turn the appliance back on.
OPERATING INSTRUCTIONS cont.
7
• Do not mix different oils or new and
old oil together.
• Replace oil regularly. In general, oil
will be tainted fast when frying food
containing a lot of protein, (such as
poultry, meat and fish). When oil is
used mainly to fry potatoes and is
filtered after each use, it can be used
up to 8 to 10 times, but do not use
the same oil for more than 6 months.
• Always replace all oil as soon as it
starts foaming when heated or when
color becomes dark or when it has a
rancid smell or taste or becomes
syrupy.
• Make sure that the food to be fried is
dry.
• Remove loose ice from frozen food
before frying. Rinse and pat dry.
• To cook evenly, pieces should be the
same size and thickness.
• Thicker pieces will take longer to
cook.
6. Frying Tips
Important: When frying frozen food
such as French Fries, you should not
exceed 1.25 lb. (568 gr.). For best
results, limit quantity to 1 Lb. (454
gr.) or less.
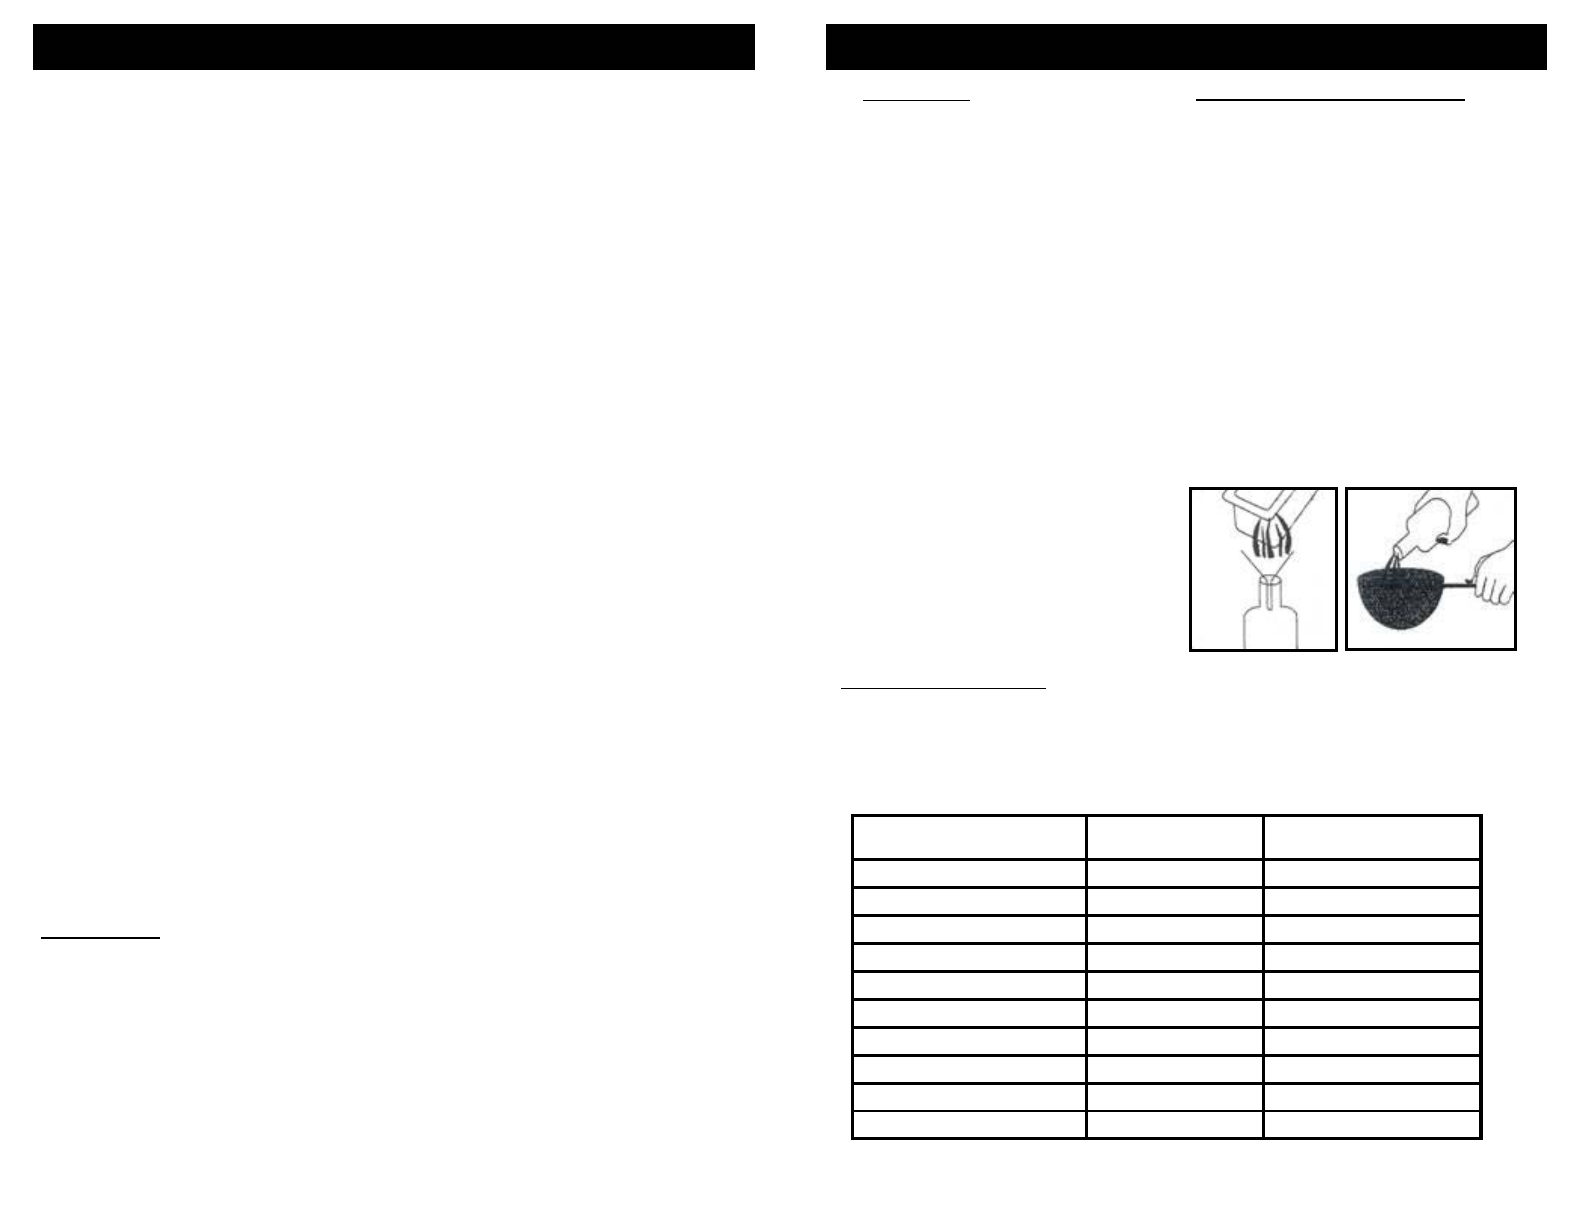
The following cooking times reflect only the approximate time needed to fry one
basket 1/2 full. The exact time may be different depending on actual quantity,
personal cooking preferences, size and thickness of pieces, etc...
Temperature Settings
In general, use lower settings for delicate foods (vegetables, fish) and higher settings
for frozen foods, French Fries and Chicken.
Food Cooking Time Temperature
French Fries 6-9 minutes
375°F
Fish Fillets 3-5 minutes
320°F
Chicken Fingers 6-8 minutes
350°F
Chicken Pieces 13-20 minutes
350°F
Fried Zucchini 3 minutes
320°F
Fried Mushrooms 3 minutes
320°F
Onion Rings 3 minutes
320°F
Donuts 3-5 minutes
350°F
Apple Beignets 4 minutes
350°F
Shrimp 4-6 minutes
320°F
• Make sure the deep fryer is unplugged
and the oil has cooled before cleaning
or storing the deep fryer.
• The oil does not need to be changed
after each use. In general, the oil will
be tainted rather quickly when frying
food containing a lot of protein (such
as poultry, meat or fish). When oil is
mainly used to fry potatoes and is
filtered after each use, it can be used 8
to 10 times. However, do not use the
same oil for longer than 6 months.
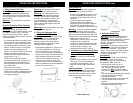
• To filter the oil first make sure the oil
has cooled and then empty the oil from
the oil container into another container
or bottle. Fig. 7
Wash and dry the oil container and
basket. Refill the oil container with the
oil, pouring the oil through a wire
strainer or paper filter. Fig. 8
Fig. 8
7. Filtering & Changing The Oil
Fig. 7
CONTENTS
2