


3
The Ninja Master Prep is an indispensable kitchen tool that is perfect for blending,
chopping, mixing or pureeing when preparing your favorite recipes. For best results, be
sure to carefully read all the instructions contained in the manual before using this
appliance.
OPERATING INSTRUCTIONS
400 Watt Power Head
The 400 watt power head operates on
120V., 60 Hz. electrical power. Never
allow the power head to become wet
when plugged into an electrical outlet.
WARNING: The power head should
never be immersed in water or any
other liquid.
CAUTION: Make sure that the power
head is unplugged from the electrical
outlet and that the blades have stopped
turning before attaching or removing
any accessory.
Using the Master Prep Pitcher
CAUTION: Blades are sharp! Use
extreme caution when handling the
blades. Always hold them by the
hub.
IMPORTANT: Never run the
appliance empty.
1. Place the master prep pitcher on a
clean, dry, level surface.
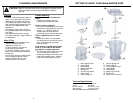
2. Holding the lower blade by the shaft,
place it onto the spindle pin inside
the master prep pitcher and then
carefully slide the upper blade onto
the shaft of the lower blade. Make
sure that the upper blade slides
down into the slots of the lower
blade shaft. (Fig. 1, Fig. 2) Make
sure that when you are inserting the
upper blade, the blades are on the
bottom.
Fig. 1 Fig. 2
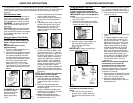
WARNING: Do not try
to place the blades
onto the power head
and then into the
Master prep pitcher.
(Fig. 3)
Fig. 3
3. Add the ingredients to be processed
into the master prep pitcher.
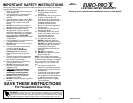
4. Place the pitcher splash guard onto
the top of the master prep pitcher.
(Fig. 4)
5. Place the power head on top of the
pitcher splash guard making sure
that it is securely in place. (Fig. 5)
Do not attempt to operate the
appliance without the safety splash
guard in place.
Fig. 4 Fig. 5
6. To start the appliance, press on the
On/Off Pulse button located on the
top of the power head. To stop the
appliance, remove your fingers from
the On/Off Pulse button. In order to
obtain a better quality of chopping,
operate the appliance by using the
“pulse” method. If the ingredients
stick to the side of the master prep
pitcher, stop the appliance, remove
the power head and the splash
guard. Use a spatula to dislodge the
pieces and then replace the splash
guard and the power head. Continue
processing.
NOTE: Do not operate the appliance
continuously for more than 20
seconds at a time or when empty.
7. Hold the master prep pitcher firmly
while depressing the On-Off/Pulse
button to ensure the unit stays in
place.
8. Make sure that the blades have
stopped completely before removing
the splash guard.
9. Remove the blade assembly by its
shaft before you empty the contents
of the master prep pitcher.
10.Never add ingredients into the
master prep pitcher before placing
the blade assembly in first.
shaft
spindle
OPERATING INSTRUCTIONS
4
Using the Master Prep Bowl
CAUTION: Blades are sharp! Use
extreme caution when handling the
blades. Always hold them by the shaft.
IMPORTANT: Never run the appliance
empty.
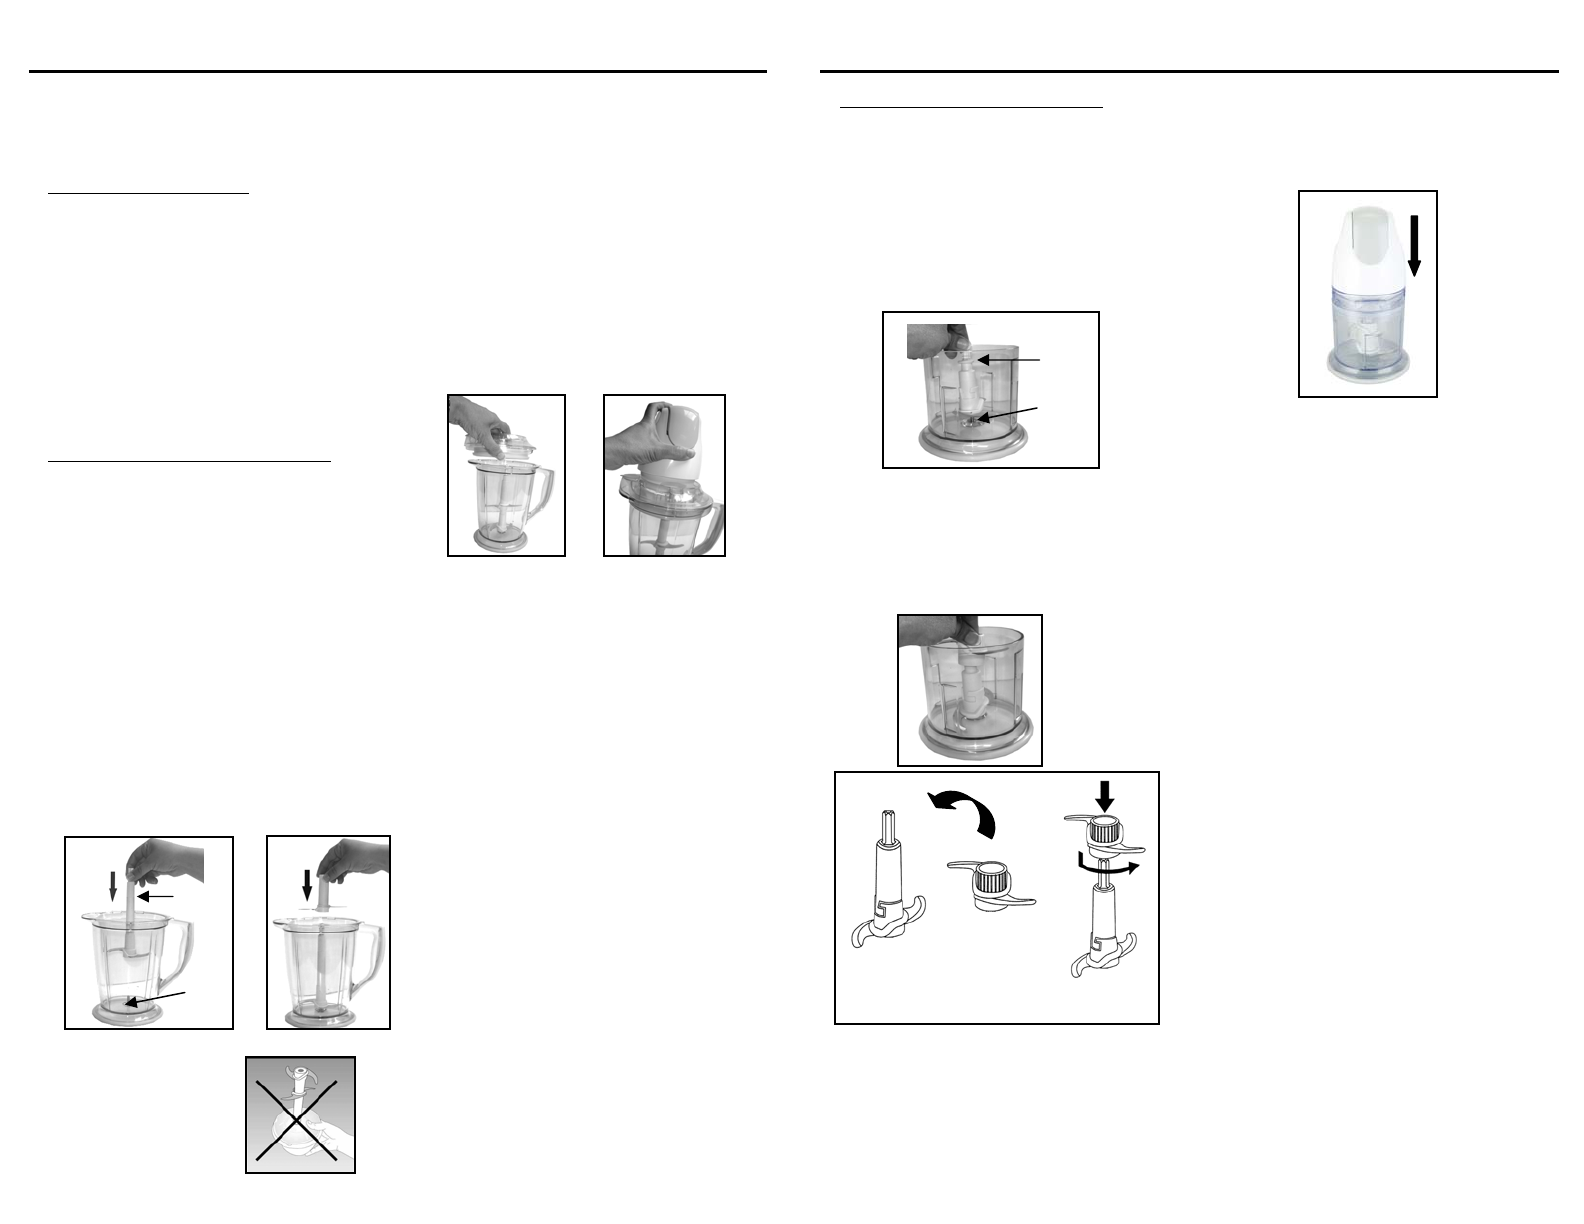
1. Place the master prep bowl on a clean,
dry, level surface.
2. Holding the lower blade by the shaft,
place it over the spindle pin inside the
master prep bowl. (Fig. 6)
3. Carefully insert the upper blade over
the lower blade rotating it until it
locks onto the lower blade.
(Fig. 7, Fig. 8)
IMPORTANT: Always assemble the
blades inside the container.
shaft
spindle
Fig. 6
Upper
Blade
Fig. 8
Lower
Blade
Blades
Assembled
Fig. 7
CAUTION: Be careful not to hold by
the blades as the blades are very
sharp.
4. Place the food that you want to
process into the master prep bowl
and place the splash guard on the
bowl.
NOTE: Do not add more than 2 cups dry
or 1 cup liquid ingredients as this will
strain the motor and may cause overflow.
5. Place the power head on the master
prep bowl. (Fig. 9)
6. Plug the power cord into the electrical
outlet.
7. To start the appliance, press on the
On/Off Pulse button located on the
top of the power head. To stop the
appliance, remove your fingers from
the On/Off Pulse button. In order to
obtain a better quality of chopping,
operate the appliance by using the
“pulse” method. If the ingredients
stick to the side of the master prep
bowl, stop the appliance, remove the
power head and the splash guard.
Use a spatula to dislodge the pieces
and then replace the splash guard
and the power head. Continue
processing.
NOTE: Do not operate the appliance
continuously for more than 20
seconds at a time or when empty.
Be careful not to over process. For
coarsely chopped foods, use repeated
short pulsing action until the desired
consistency is reached.
8. Hold the master prep bowl firmly while
depressing the On-Off/Pulse button to
ensure the unit stays in place.
9. Make sure that the blades have
stopped completely before removing
the splash guard.
Fig. 9