


&
'
'
(
( ) *'&
+ ,
'
&
&
' '
&
(
( (
,+)bb
&%'bb
©&+bbbVm#
*%bb
'-&bb
'&*bb
'&*bb
b^c#-+%bb
bVm#-+'bb
'*bb
,+bb
)%bb
'
(
)
&
)+bb
'bb
'bb
'
&
.bb
m(
'#*bb
-.+bb
&bb
*bb
&-bb
(&&bb(&&bb
)&)bb M
&+"'%bb
-
www.fisherpaykel.com 840510 FRAMELESS CABINETRY 08.08
13
18
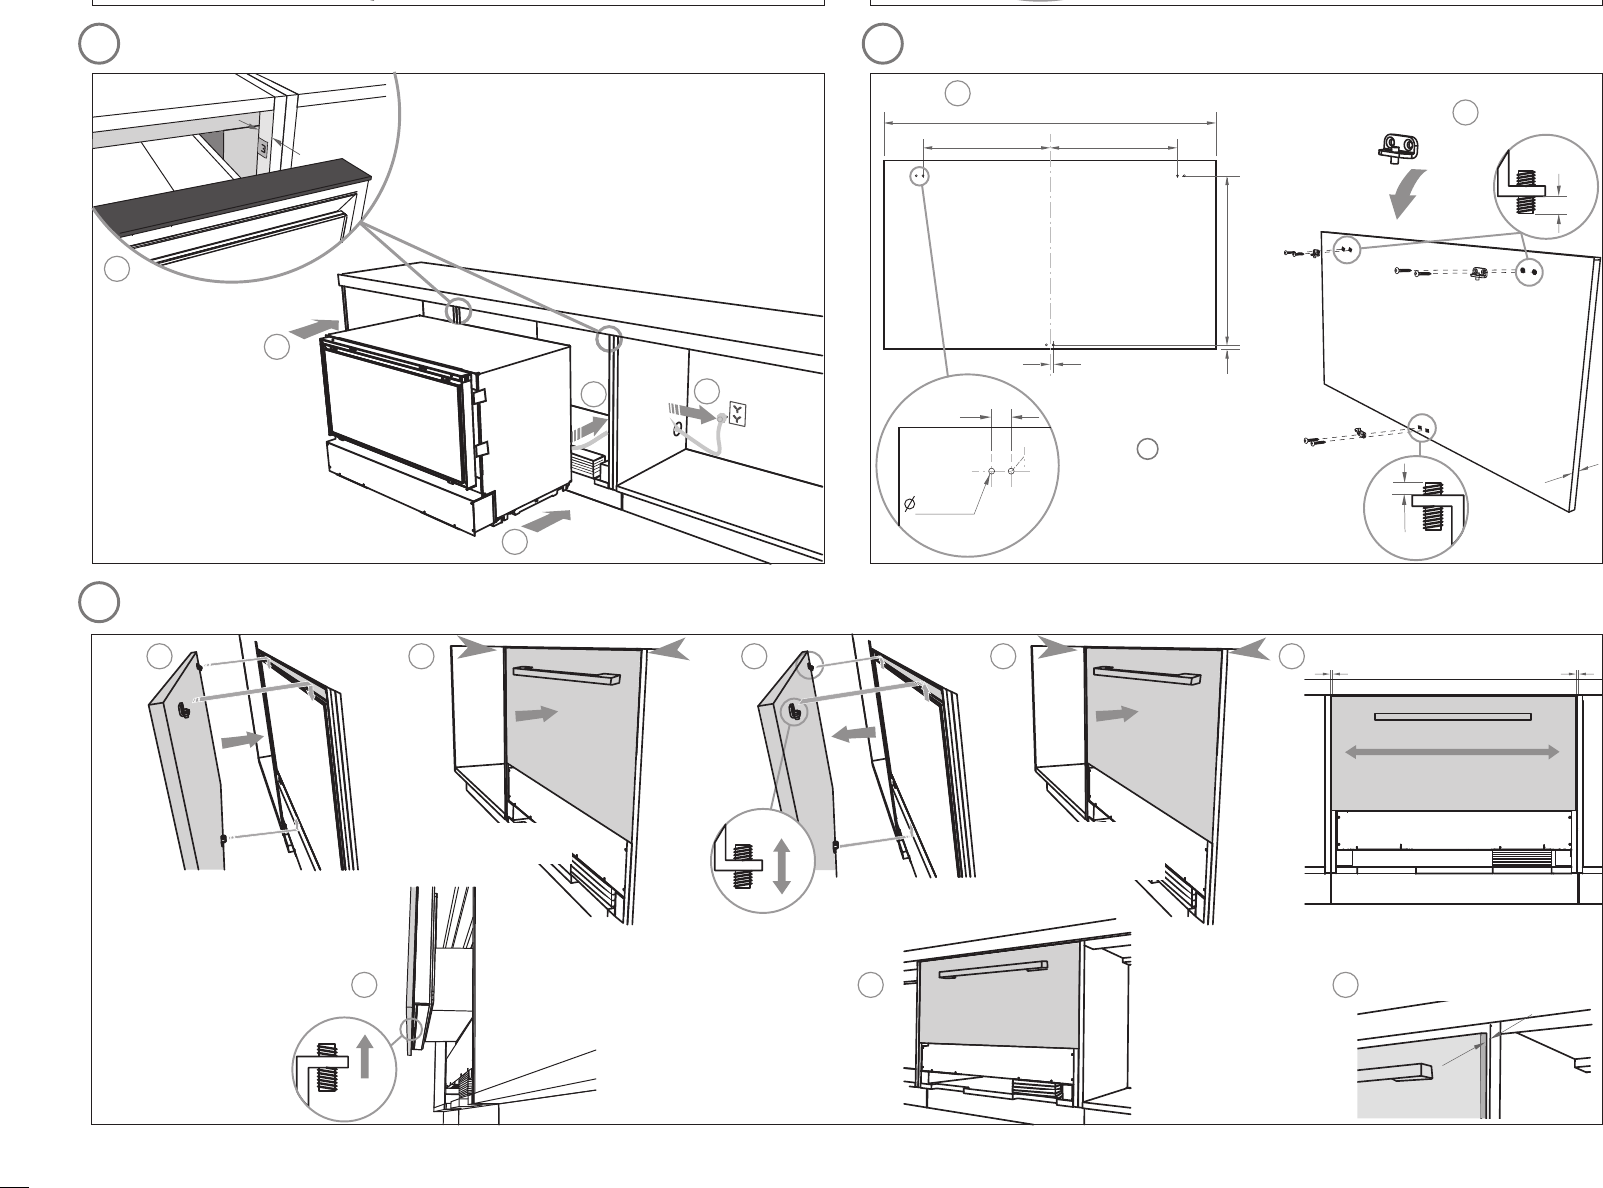
ATTACH DRAWER PANEL TO FRONT OF DRAWER
FINAL CHECKLIST
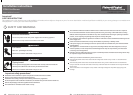
Important!
Ensure a minimum of 3 screws
per side are used. The rear screws
must always be used. Horizontal
fixing is also optional.
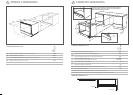
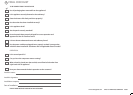
If the cabinetry does not already have cutouts, ensure the modifications below are made.
Important!
Do not screw in trim
brackets at this stage.
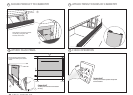
Important!
Ensure the power cord is clipped in place.
(
&
'
'bb
&
'
Hook drawer panel onto
drawer front channel
Close the drawer and
check vertical clearances
Remove the panel and
adjust the TOP
attachment hooks
as necesary
Replace panel on
drawer and confirm
vertical clearances
Slide panel to achieve
horizontal clearances
Open drawer and clamp
panel onto drawer by
tightening the BOTTOM
attachment hook
Close the drawer and ensure it is flush
with adjacent cabinetry. If not, the
product may have to be pulled back
or forward.
Important!
Ensure you check basic operation and perform
the final checklist.
Attach the false panel securely
as recommended by the cabinet
maker.
Important!
The false panel needs to be removable for
servicing.
Secure using vertical
or horizontal fixing
CREATE CUTOUTS IN FRAME
7
LOCATE & SECURE INSTALL BRACKETS
8
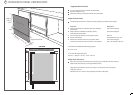
Important!
Cut outlet duct to be flush
with top of spacer blocks.
9
ATTACH OUTLET VENT DUCT
10
ATTACH POWER CORD & TRIM BRACKETS
Important!
Note correct orientation of bracket.
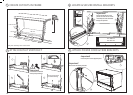
Important!
Be careful not to damage power
supply cord when pushing
product into cavity.
11
MOVE PRODUCT INTO CAVITY
12
FIT DRAWER PANEL ATTACHMENT HOOKS
Attach handle as necessary.
Ensure all screws are flush
with panel surface.
X = 194mm – E, where E
is Bottom face of Drawer
Panel to top of spacer
block, see .
6
14
SECURE PRODUCT TO CABINETRY
15
ATTACH TRIMS TO SIDES OF CABINETRY
16
ATTACH FALSE PANEL
17
CHECK OPERATION
Open drawer and secure product
to cabinetry using four Trim
brackets and screws.
TO BE COMPLETED BY THE INSTALLER
Has all packaging been removed from the appliance?
Is the appliance securely fastened to the cabinetry?
Does the drawer slide freely and close properly?
Has the outlet duct been installed correctly?
Is the appliance level?
Are the panels securely attached?
Have the panels been properly aligned for correct operation and
appearance? Are all clearances even?
Is there clearance between drawer and cabinetry frame?
Has the power cord been plugged into a properly earthed 3-prong outlet,
which has been installed in accordance with all applicable electrical codes?
OPERATION:
Is the control panel lit?
Can you hear the compressor motor running?
When a hand is placed near the toe kick, can airflow be felt under front
right-hand side of appliance?
Have you demonstrated the basic operation to the customer?
Installer’s name:
Installer’s signature:
Installation company:
Date of installation:
LEAVE THESE INSTRUCTIONS WITH THE CUSTOMER
Ensure there is clearance
between panel and cabinetry
when drawer is fully closed
*
Only with cabinetry with internal shelf
*