25
INDUCTION COOKTOP
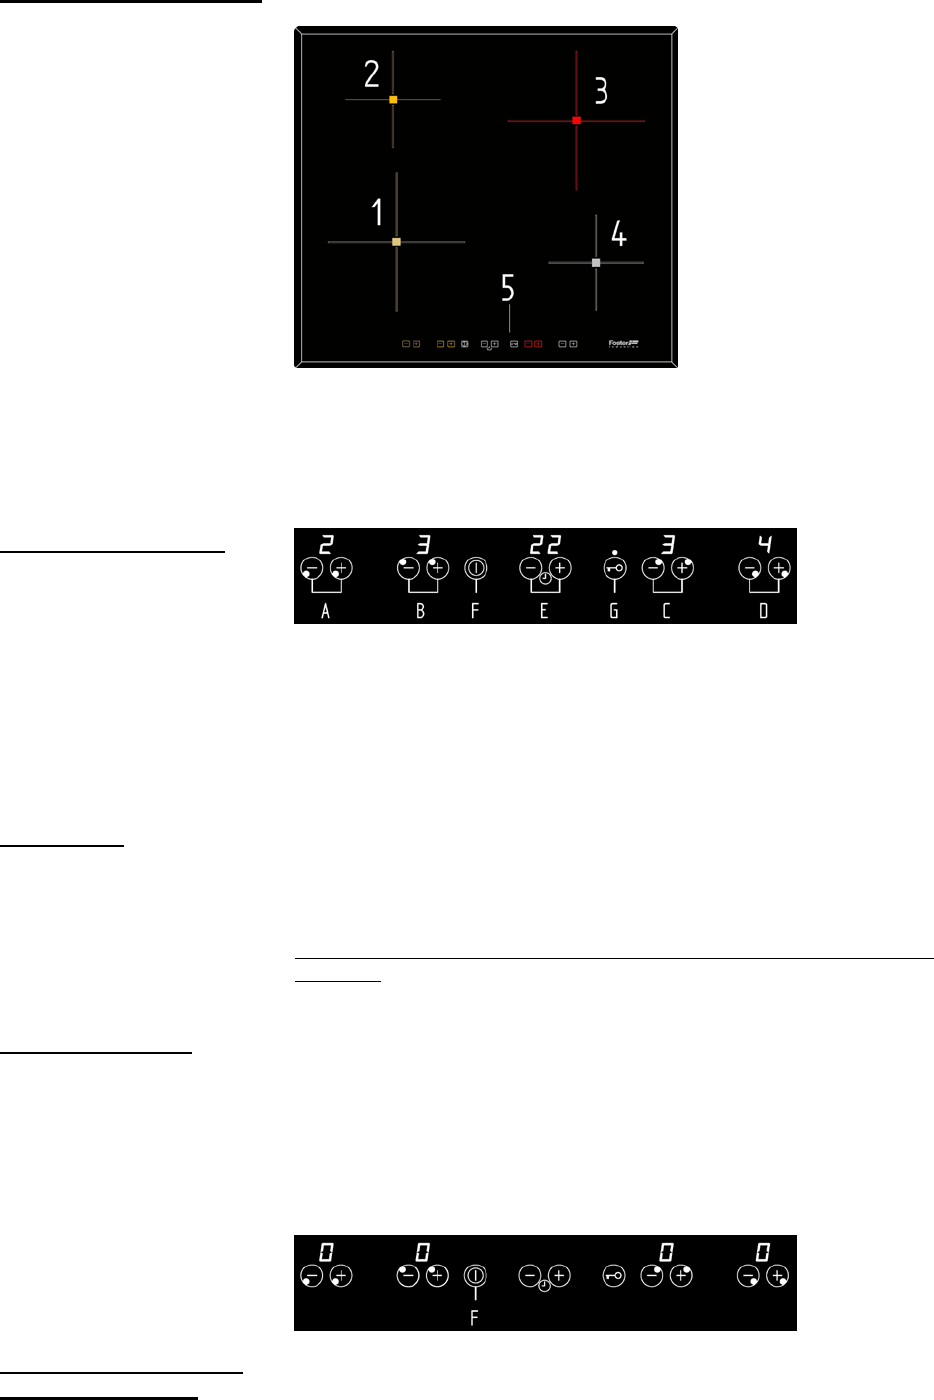
1.Induction hotplate front left
2.Induction hotplate rear left
3.Induction hotplate rear right
4.Induction hotplate front right
5.Hob control panel
Hob control elements
A.
Keys (+ e -) to increase/decrease power level of cooking zone 1
B. Keys (+ e -) to increase/decrease power level of cooking zone 2
C. Keys (+ e -) to increase/decrease power level of cooking zone 3
D. Keys (+ e -) to increase/decrease power level of cooking zone 4
E. Keys (+ e -) of timer to increase/decrease time setting (99min)
F. ON/OFF sensor to turn on/off cooktop
G. Key Lock (with LED)
Hob control
• After turning the induction hob on all displays come on for a moment. The hob
is ready for operation.
• The hob is fitted with electronic sensors which are switched on if you touch the
relevant circle for at least one second.
• Each sensor activation is followed by a sound signal.
• Avoid placing any objects on sensor surface (The hob turns off after 10
seconds).
• Always keep the sensor surface clean.
Activating the hob
When the cooktop is connected to the power supply, the key lock is always and
immediately on. To turn the cooktop on, first of all you must remove the lock by
pressing the key (G), then press the key ON/OFF (F), you will hear an acoustic
signal with the consequent turning on of the control bar.
It will not come on if the key lock function is activated indicated by a pilot light.
The heaters remain off (all the digits show »0«) until a power level is selected. If
the selection is not made in 10 seconds, and if the timers are off, the control
turns off automatically.
Selecting a power level
for a certain heater
With the control on, the first time the sensor (+) is pressed, the heater switches
on at level 1.
The sensor (+) raises the cooking level to a maximum of 9, whereas the sensor
(-) reduces the cooking level to 0 (heater off).
With the heater at position 0, the sensor (-) raises the cooking level to 9.
If the sensor is held down, the action is repeated twice every second.


