3
This Owner’s Guide provides specific operating instructions
for your model. Use the refrigerator only as instructed in this
Owner’s Guide. Before starting the wine cooler, follow
these important first steps.
INSTALLATION
• Choose a place that is near a grounded electrical outlet.
Do Not use an extension cord or an adapter plug.
• For optimal performance, it is recommended that you
install the wine cooler where the ambient temperature is
between 70 and 78 degrees fahrenheit.
•
Allow space around the unit for good air circulation.
Leave a 2 inch space on the back and sides of the
wine cooler for adequate circulation.
• Be sure the wine cooler stays in the upright position
during transport.
• Keep the wine cooler from any hazardous or combustible
agents.
NOTE: The exterior walls of the wine cooler may become
quite warm as the compressor works to transfer heat from
the inside. Temperatures as much as 30° F warmer than
room temperature can be expected. For this reason it is
particularly important in hotter climates to allow enough
space for air circulation around your wine cooler.
LEVELING
The wine cooler must have all bottom corners resting firmly
on solid floor. The floor must be strong enough to support a
fully loaded wine cooler. NOTE: It is Very Important for
your wine cooler to be level in order to function properly. If
the wine cooler is not leveled during installation, the door
may be misaligned and not close or seal properly, causing
cooling, frost, or moisture problems.
To Level Your Wine Cooler:
After removing all interior and exterior packaging materials,
use a carpenter’s level to level the wine cooler from front-to-
back. Adjust the leveling legs in front, ½ bubble higher, so
that the door closes easily when left halfway open.
CLEANING
• Wash any removable parts of the wine cooler interior,
and exterior with mild detergent and warm water. Wipe
dry. Do not use harsh cleaners on these surfaces.
• Do not use razor blades or other sharp instruments,
which can scratch the appliance surface when removing
adhesive labels. Any glue left from the tape can be
removed with a mixture of warm water and mild deter-
gent, or touch the residue with the sticky side of tape
already removed. Do not remove the serial plate.
FIRST STEPS
Important Safeguards: Do not store food in your wine
cooler as interior temperature may not get cool enough to
prevent spoilage. In summer months or areas of high
humidity, the glass door may build up moisture. To
remove the moisture, wipe it away.
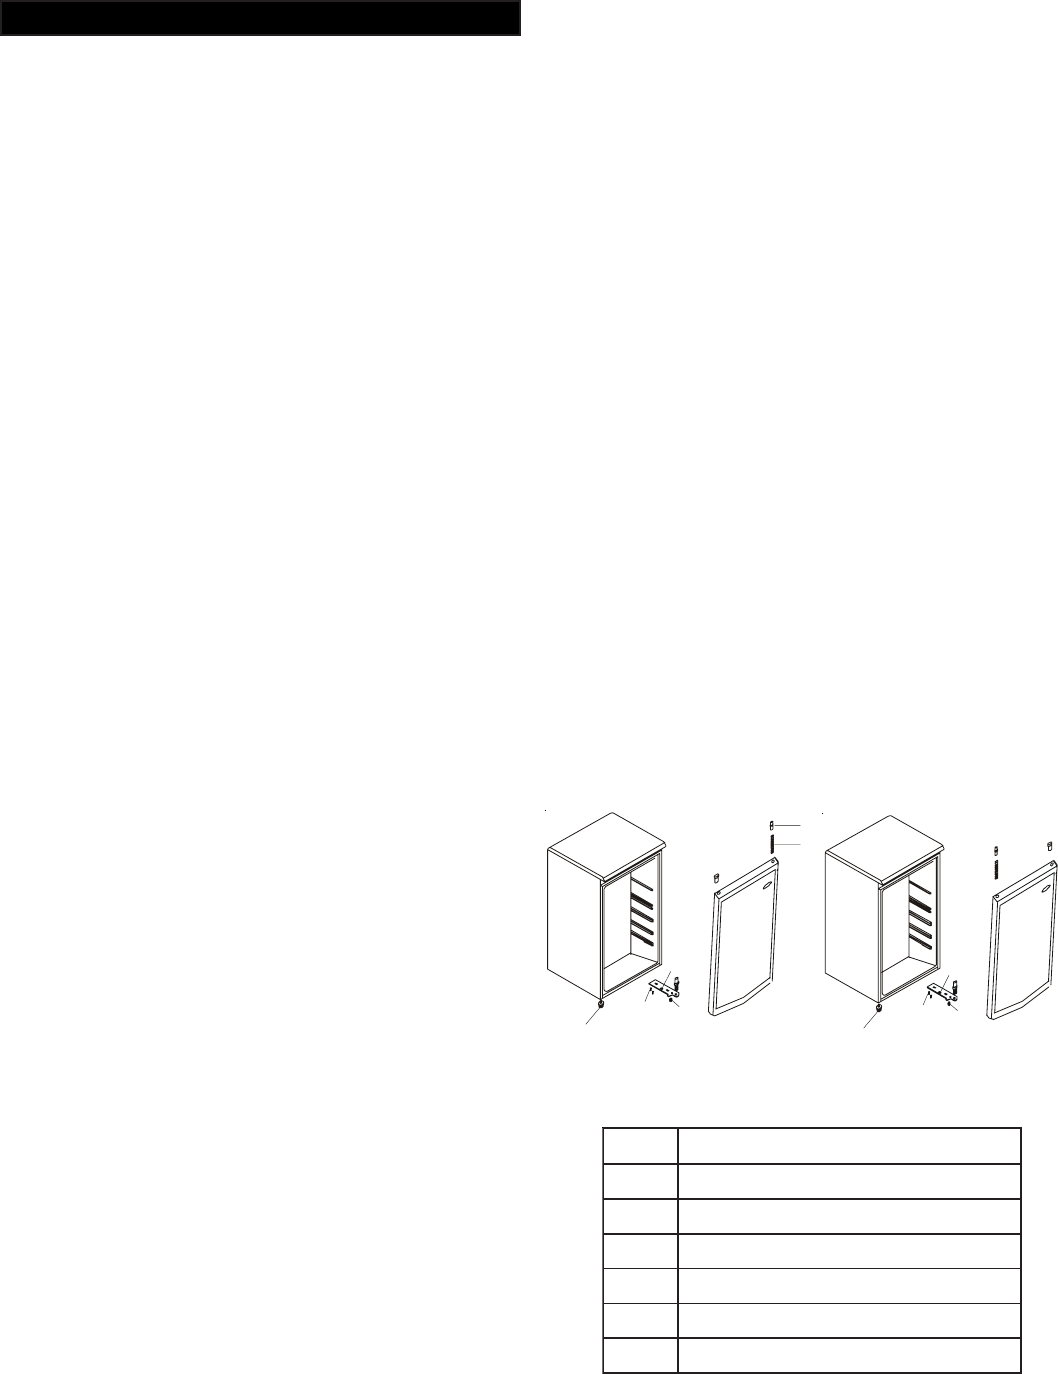
REVERSING THE DOOR SWING
The wine cooler glass door can be opened from left to right
and vice versa. Should you desire to change the opening
direction, please follow these instructions.
NOTE: All parts removed must be saved to do the
reinstallation of the door.
1. Remove the two screws (1) that hold the lower hinge
(2)(right side) to the frame. Also remove the screw-type
leveling front leg (3).
2. Remove the left front leg (4) and transfer it to the right
side.
3. Lift the door and place it on a padded surface to prevent
scratching it. Make sure to remove the spring (5) located
inside the upper right hole of the door, and the upper right
side pin (6).
4. Remove the plug button (7) from the upper left hole of
the door and transfer it to the uncovered hole on the right
side. Be sure to press the button firmly into the hole.
5. Insert the upper pin (6), previously removed from the
right side in step 3, and transfer it to the hole on the left
side of the top frame.
6. Insert the spring (5), previously removed from step
3,inside the upper left side hole of the door.
7. Set the door in its place making sure the pin (6) enters
the bushing at the lower upper frame section (hole).
8. While holding the door in the closed position, secure the
left hinge (2) previously removed in step 1.
9. Insert the 2 screws (1) previously removed in step 1 and
tighten them.
1
7
3
5
4
6
2
1
2
3
4
5
6
7
FIGURE 1
Position prior to door reversal
1swercSegniHrooD
2egniHrooDrewoL
3sgeLgnileveLtnorF
4geLtnorFtfeL
5gnirpSemarFrooD
6niPemarFrooD
7ediStfeL)emarFro
oD(gulPegniH
FIGURE 2
Position prior to door reversal
