14
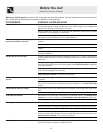
Before you call for service, review this list. It may save you time and expense. The list includes common occurrences that
are not the result of defective workmanship or materials in this appliance.
POSSIBLE CAUSE/SOLUTION
Poor installation. Place oven rack in center of oven. Place a level on the oven rack. Adjust
leveling legs at base of range until the rack is level. When range is level, cooktop may
appear out of alignment if countertop is not level.
Weak, unstable floor. Be sure floor is level and can adequately support range. Contact
a carpenter to correct sagging or sloping floor.
Kitchen cabinet misalignment may make range appear to be unlevel. Be sure cabinets
are square and have sufficient room for range clearance.
Cabinets not square or are built in too tight. Contact a cabinet maker to correct the
problem.
Contact builder or installer to make appliance accessible.
Carpeting interferes with range. Provide sufficient space so range can be lifted over
carpet.
Gas line is hard-plumbed. Have a flexible C.S.A. International approved metal appliance
connector installed.
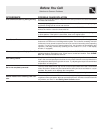
Surface Control knob has not been completely turned to LITE. Push in and turn the
Surface Control knob to LITE until burner ignites and then turn control knob to desired
flame size.
Burner ports are clogged. With the burner off, use a small-gauge wire or needle to clean
ports. See "Surface Burners" in the cleaning table under Care & Cleaning for additional
cleaning instructions.
Range power cord is disconnected from outlet (electric ignition models only). Be sure
cord is securely plugged into the outlet.
Electrical power outage (electric ignition models only). Burners can be lit manually. See
Setting Surface Controls in this Use & Care Manual.
Burner ports are clogged. With the burner off, clean ports by using a small-gauge wire
or needle.
Moisture is present after cleaning. Lightly fan the flame and allow burner to operate until
flame is full. Dry the burners thoroughly following instructions in the Care & Cleaning
section.
Dust particles in main line. Allow the burner to operate a few minutes until flame turns
blue.
In coastal areas, a slightly orange flame is unavoidable due to salt air.
Be sure the oven controls are set correctly for the desired function. See Setting Oven
Controls in this Owner's Manual or Entire Appliance Does Not Operate (see below).
Be sure regulator gas valve is "ON". See installation instructions.
The time of day must first be set in order to operate the oven.
Make sure electrical cord/plug is plugged tightly into outlet (electric ignition models only).
Service wiring not complete. Contact servicer or dealer.
Electrical power outage (electric ignition models only). Check house lights to be sure.
Call your local electric company for service. Surface burners can be lit manually. See
Setting Surface Controls in this Use & Care Manual.
Be sure gas supply is turned on.
Burned-out or loose bulb. See Changing the Oven Light (some models) section in this
Use & Care Manual to replace or tighten the bulb.
OCCURRENCE
Range is not level.
Cannot move appliance easily. Appliance
must be accessible for service.
Surface burners do not light.
Surface burner flame burns half way
around.
Surface burner flame is orange.
Oven does not operate.
Entire appliance does not operate.
Oven light (some models) does not work.
Before You Call
Solutions to Common Problems


