5
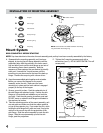
INSTALLATION OF MOUNTING ASSEMBLY
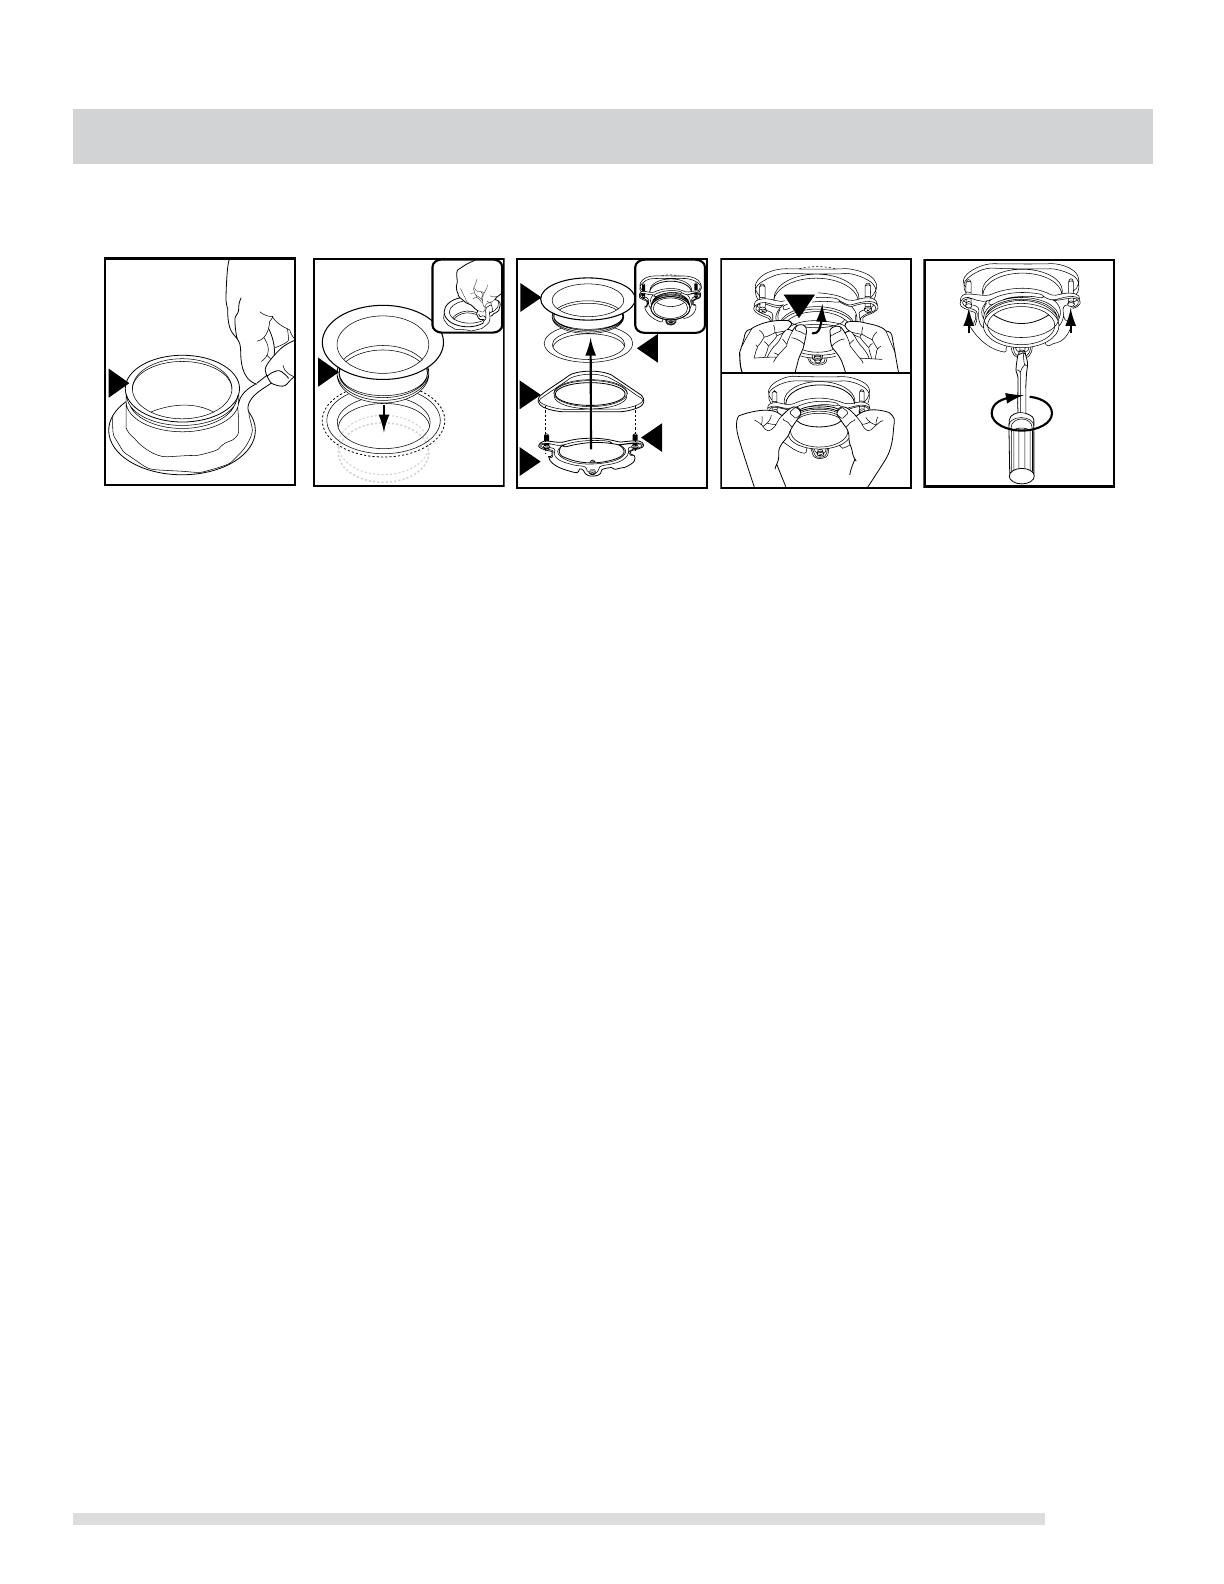
A. Evenly apply 1/2” thick rope of plumber’s putty around
flange (1).
B. Press Flange (1) firmly into sink drain. Remove excess
putty.
C. Insert fiber gasket (2), backup flange (3) and mounting
ring (5). Hold in place while inserting snap ring (6).
YOUR DISPOSER COMES WITH THE FOLLOWING MOUNT SYSTEM
Mount System
READ COMPLETELY BEFORE STARTING
NOTE: Pay close attention to the order of mount assembly parts, as they have been correctly assembled by the factory.
D. Place a weight such as a disposer on the sink flange to
hold it in place. Use a towel to prevent scratching sink.
Pull snap ring open adn press firmly unitl it snaps into
place.
E. Tighten the 1 2/3” screws (3) evenly and firmly against
backup flange. Use shorter screws if sink is more than
3/8” thick.
Grounding Instructions
FOR WASTE DISPOSERS EQUIPPED WITH A
GROUNDED PLUG-IN POWER CORD.
This appliance must be grounded. In the event of a
malfunction or breakdown, grounding provides a path of
least resistance for electric current to reduce the risk of
electric shock. This appliance is equipped with a cord
having an equipment-grounding conductor and a grounding
plug. The plug must be plugged into an appropriate outlet
that is properly installed and grounded in accordance with all
local codes and ordinances.
FOR WASTE DISPOSERS NOT EQUIPPED WITH A
GROUNDED PLUG-IN POWER CORD.
This appliance must be grounded. In the event of a
malfunction or breakdown, grounding provides a path of
least resistance for electric current to reduce the risk of
electric shock. The power cord (to be installed) must have
an equipment-grounding conductor and a grounding plug.
The plug must be plugged into an appropriate outlet that is
properly installed and grounded in accordance with all local
codes and ordiances. Disconnect electric power to
disposer circuit before installation. Turn the circuit
breaker to the OFF position or remove the fuse.
1
1
2
3
4
5
1
6
A D
E
B C


