9
GB
fig.fig.
fig.
Electrical connections
DANGER
Danger of electric shock! All fittings must be
installed by a competent person in accordance
with current wiring regulations and local
building regulations. If in doubt, consult a
qualified electrician.
IMPORTANT
Always switch off the electricity supply at
the mains during installation, cleaning and
maintenance. We recommend that the fuse is
withdrawn or circuit breaker switched off at the
distribution board while work is in progress.
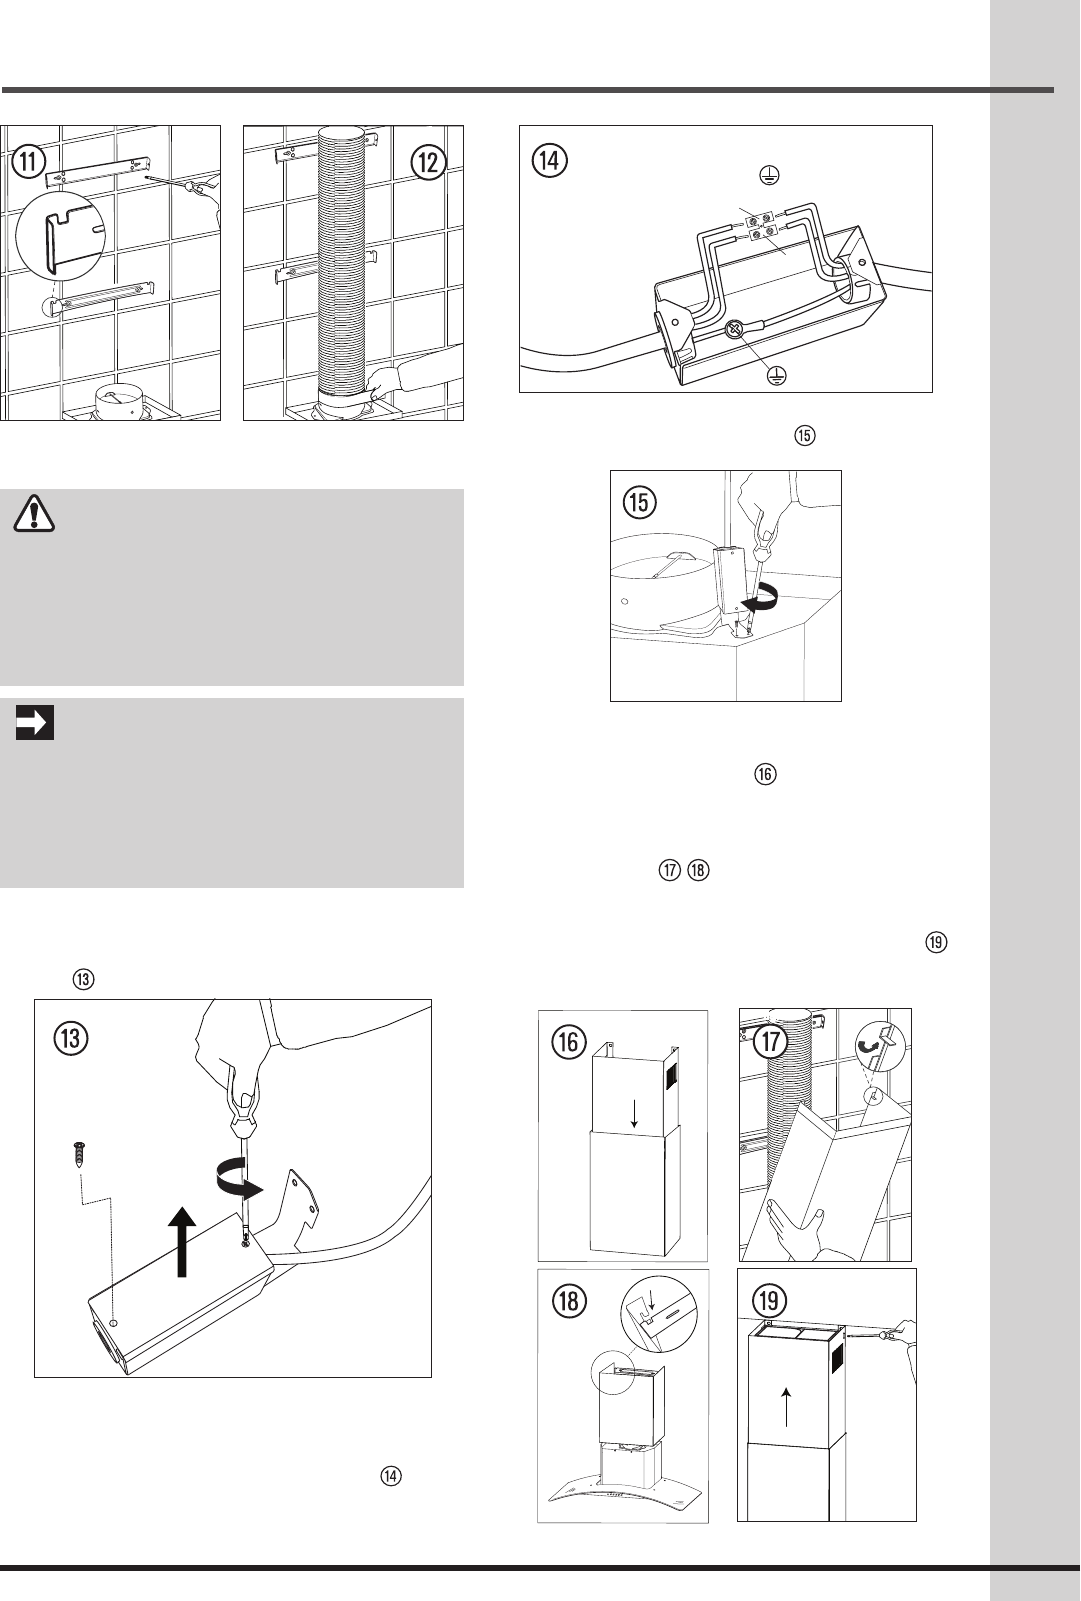
Step 5:
• Loosenthe2shortscrewsfromthejunctionbox
(g.
).
fig.fig.
• Connect the incoming positive, neutral and
ground cables to the respective terminals. The
ground cable is already pre-assembled onto the
junctionboxtoprovidegrounding(g. ).
fig.
(ground) = Green
N (neutral) = White
L
N
• Mount the junction box onto the range hood
using2shortscrews(15)(g.
).
fig.
Step 6:
• Inserttheupperchimney(3)intothelowerchimney
(3)fromtoptobottom(g. ).
• Mountupperandlowerchimney(3)ontherange
hood (1). Fit the tab, which is bend by 90 degrees,
into the lower bracket notch and mount to the lower
bracket(5)(g. / ).
• Pulltheupperchimney(3)totheupwardpositionto
match the screw hole of the upper bracket. Mount to
theupperbracket(4)with2sidescrews(12)(g. ).
fig.
fig.
fig.
fig.
fig.
fig.
• Insert2screws(10or14)inthetoplocation,but
donotfullyinsertthescrews(g. ). Mount the
range hood (1) to the wall and tighten the screws.
Insert and tighten the 2 remaining screws on the
bottomlocationoftherangehood(g. / ).
• Attachthecollar(6)totherangehood(1).Secure
with2shortscrews(12)(g. ).
Step 3:
• Mounttheglasscover(2)ontotherangehood
(1). Use the allen key (13) to secure with 4 sets of
bolts,rubberwashers,andwashers(9)(g.
).
Step 4:
• Mount upper and lower brackets (4, 5) on the
wall. Secure with the remaining 4 sets of long
screws (10). The notches of the lower bracket
shouldbefacinguptowardstheceiling(g.
)
.
• Attachtheexhaustduct(g.
)
.
Installing the hood
Installing the hood
00-Elux FHWC3060LSA-Range hood-Book-01.indd 9 12/8/10 12:43 PM


