6
F
E
G
Appliance Installation
(Note: two people may be required for proper installation).
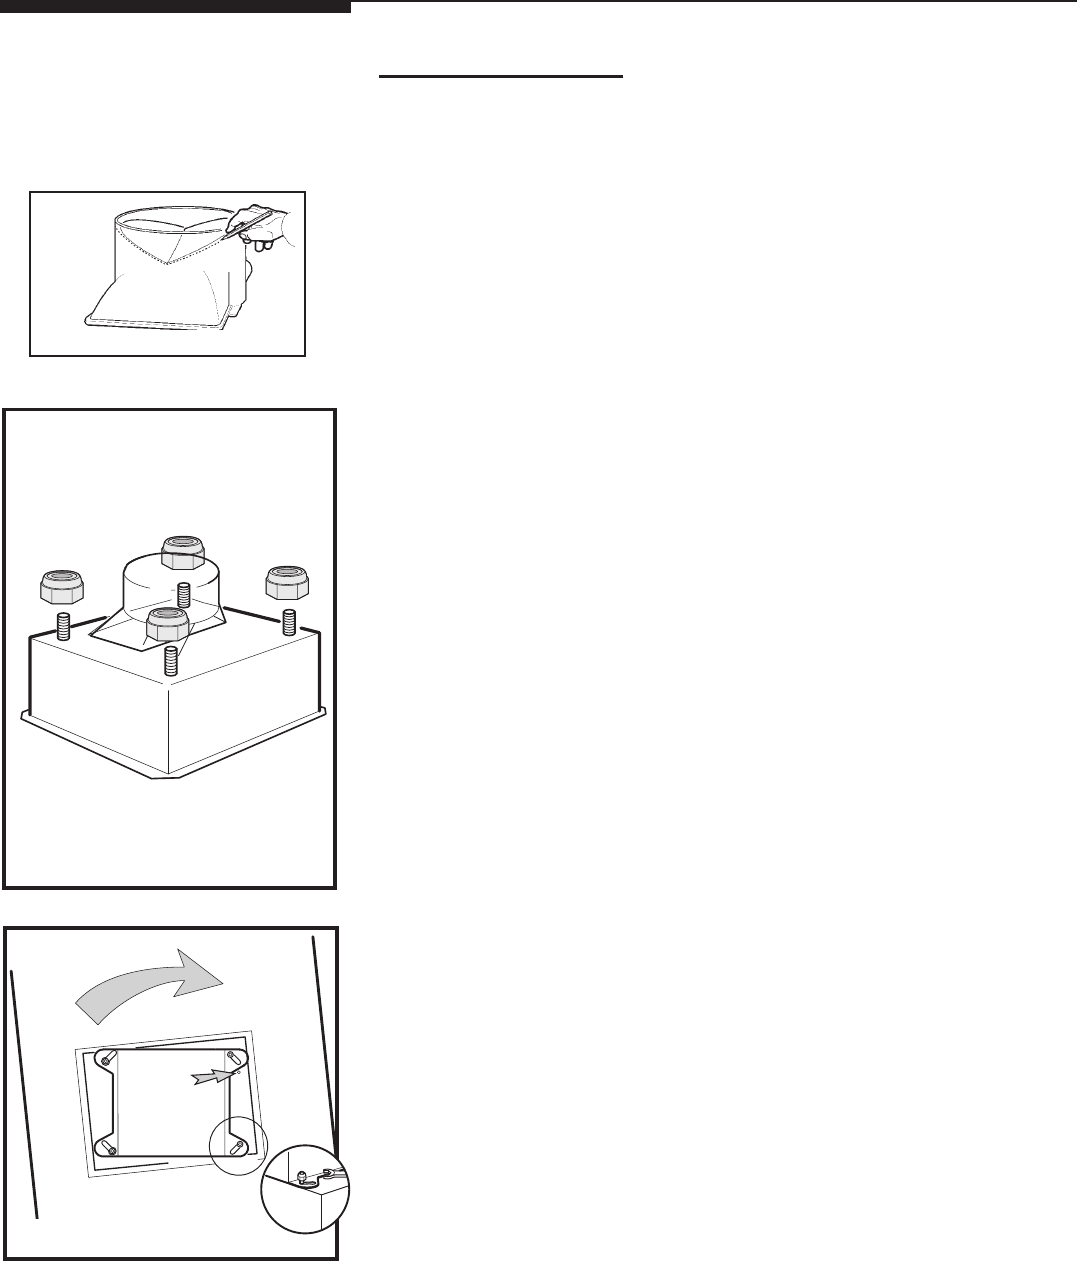
7.Install transition to top of hood (if removed for shipping). Snap damper into
transition, foam tape up , with firm pressure at either end. Mark onto exterior of
transition the 'V' location of the damper within. See Figure 6.
Note: Duct screws can ONLY go below this line.
8.Adjust chimney mounting structure to S dimension as determined in Step 1,
page 5. Use 2 screws per attachment leg. Do not fasten to ceiling now.
9.Set chimney mounting structure on top of hood canopy. Attach nuts loosely.
See Figure 7 and 8.
10.Fit duct piece on transition so that top end is 5-1/2" below top of chimney
structure, male end up.
11.Remove chimney structure from hood canopy.
12.Install Ducting. Fasten duct to transition with screws and tape per code.
Loosely fasten starter collar (included) flush to top of duct. Note: screws must
not hamper the damper (see 8. above for screw location).
Loosely fasten starter collar (included) flush to bottom of duct.
13.To install Chimney Structure to ceiling, use a 10mm or adjustable wrench or
flat head screwdriver. Drill pilot holes into ceiling. Attach mounting structure to
joists with the 4 lag screws provided. (Keep 1/2" conduit inside structure.) See
Figure 3.
14.To fasten the canopy use a 10mm or adjustable wrench. Affix nuts to top of
canopy.
Do not tighten. Raise canopy up to chimney structure and twist in place. See
Figure 8. Tighten nuts securely.
15.Ducting for all units: There should be no more than 1" gap between canopy
ducting and house ducting. Adjust starting collar over both ducts. Tighten collar.
Fasten duct with screws and tape per code. Make final angular adjustment to
unit at ceiling if necessary, then securely tighten 4 ceiling lag screws if not
already tightened.
Installation
Figure 6
Figure 7
Figure 8


