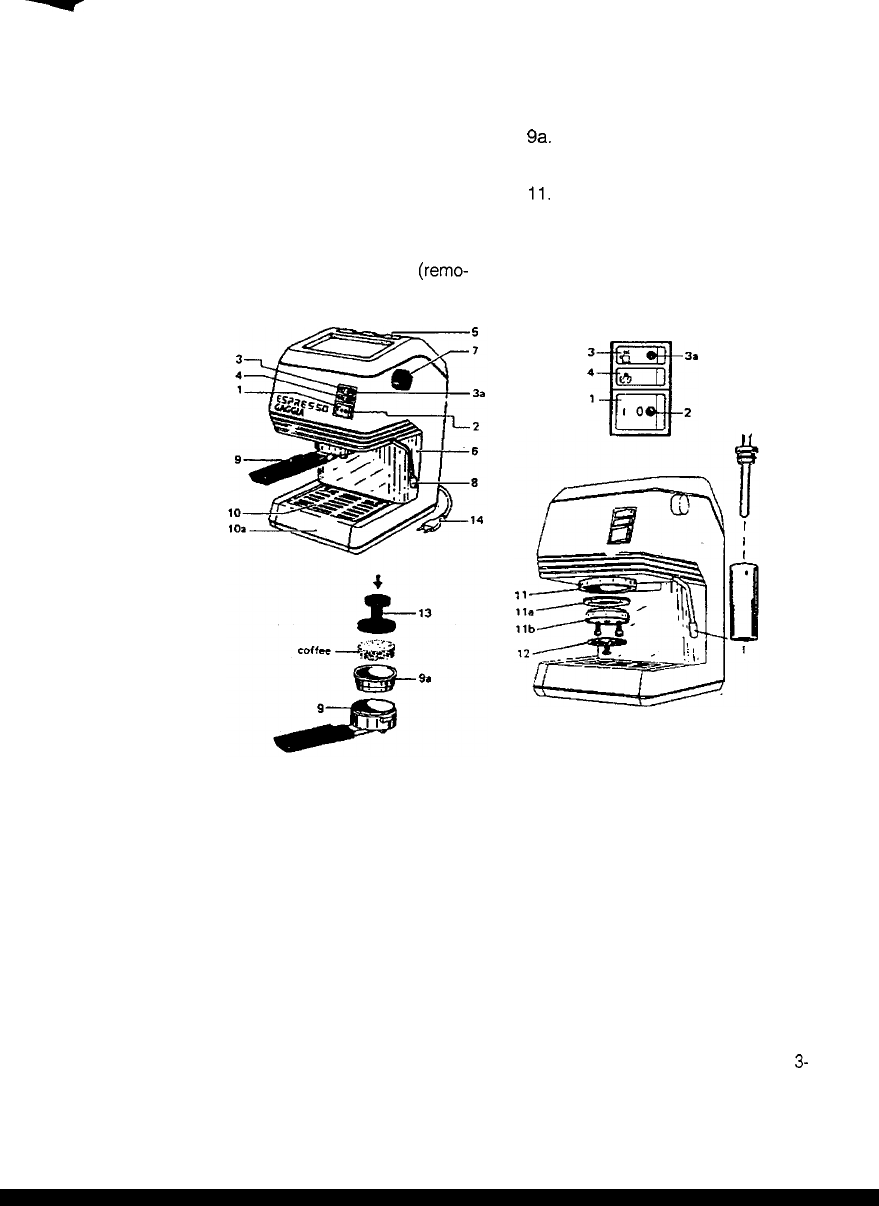
Description of Parts:
1.
2.
3.
3a
4.
5.
6.
7.
8.
On-Off switch
Power-on light
Hot water/brew switch (pump)
Temperature ready-light
Steam switch (temperature)
Reservoir cover
Removable water knob
Steam/hot water knob
Turbo frother steam nozzle
(remo-
veable)
9.
Filterholder
9a.
Filter basket 1
or
2
cups
10.
Drip plate
1 Oa. Drip tray
11.
Brew head
1 la. Filterholder seal
11 b.
Showerholder
12.
Shower head
13.
Tamper
14. Power cable and plug
INSTRUCTIONS FOR THE POWER SUPPLY CORD
Regarding Your Cord Set:
A. A short power-supply cord is provided to reduce risks resulting from becoming
entangled in or tripping over a longer cord.
ONLY FOR TWO WIRES POWER SUPPLY CORD:
This appliance has a polarized plug (one blade is wider than the other).
As a safety feature, this plug will fit in a polarized outlet only one way.
If fhe plug does not fit fully in the outlet, reverse the plug. If it still does not fit,
contact a qualified electrician. Do not attempt to defeat the safety feature.
B. Longer extension cords are available and may be used if care is exercised in
their use.
C. If a long extension cord is used, (1) the marked electrical rating of the extension
cord should be at least as great as the electrical rating of the appliance, (2) if the
appliance is of the grounded type, the extension cord should be a grounding type
3-
wire cord, and (3) the longer cord should be arranged so that it will not drape over the
counter top or table top where it can be pulled on by children or tripped over.
courtesy of
www.espressotec.com


