Part # 4520498 (01/08)Page 8
ADJUSTMENTS Continued
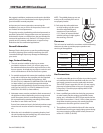
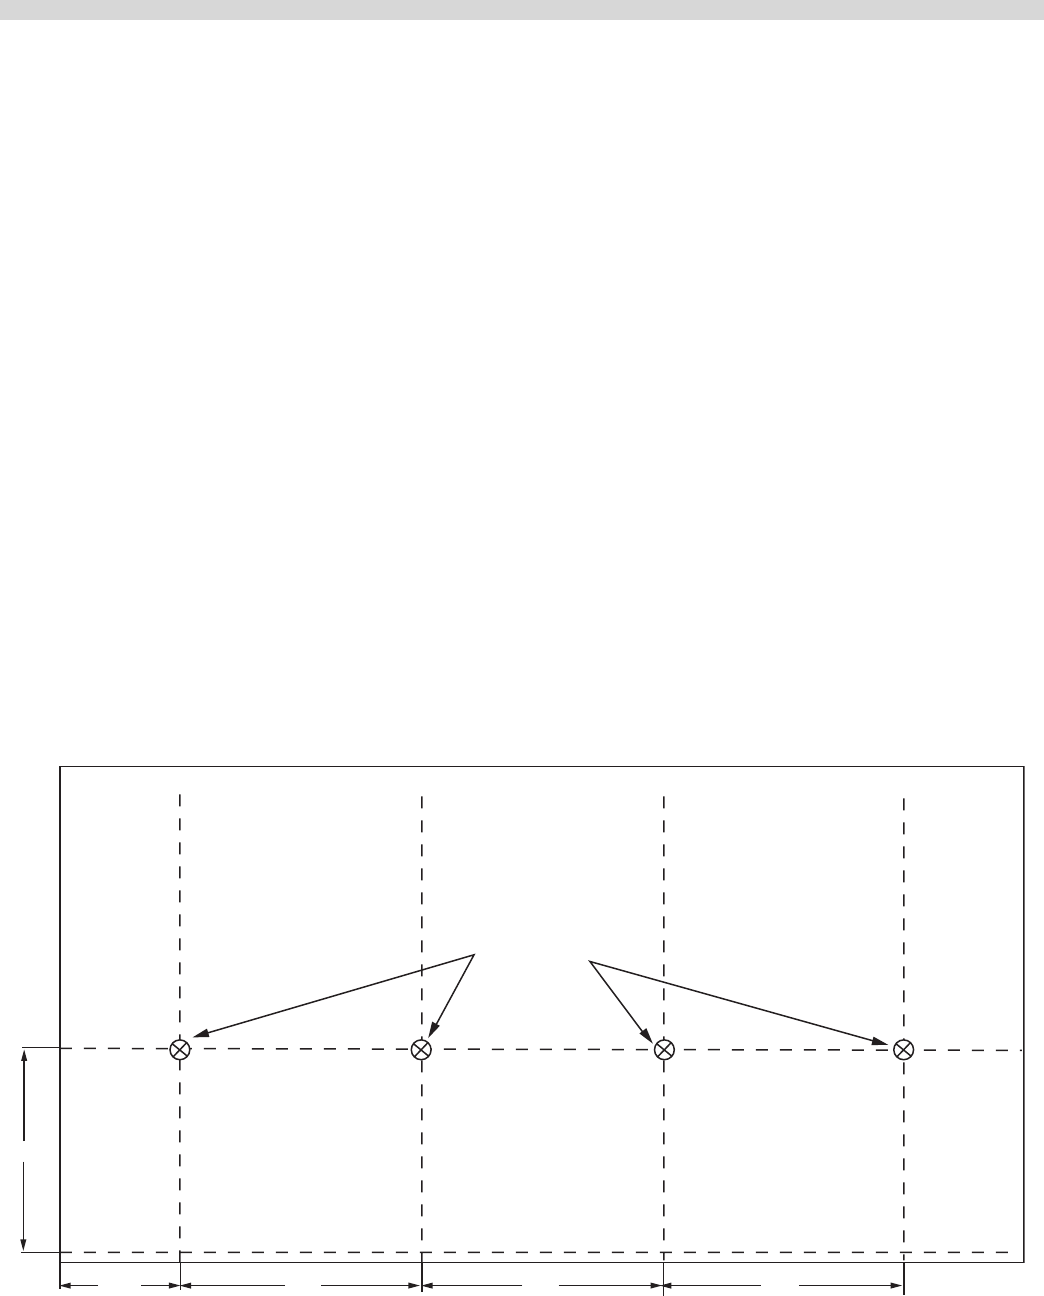
Drawing A
Place the probe
within a
1 1/2 " circle
for maximum
accuracy
5 7/8" 12" 12" 12"
10"
NOTE: Make certain no electrical connections have been
disturbed. Replace both panels and secure to body.
The griddle thermostat is a precision instrument. It is
carefully calibrated at the factory so that the dial setting
matches the actual griddle temperature.
Thermostat Temperature Verication
1. Set each thermostat dial to the same temperature.
Unless the grill temperature is being veried for a specic
function, use 360°F for the temperature setting.
Preheat the grill for 30 minutes before proceeding.
NOTE: Each minor line on the thermostat scale is 5 degrees F.
Use care when making temperature adjustments.
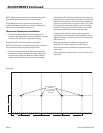
2. Place the surface temperature probe in the locations
indicated on Diagram A. Watch the amber indicator for
the zone being measured. When the amber indicator
is ON the burner for that zone is on. When the amber
indicator goes OFF note the temperature. The measured
temperature at the time the amber indicator switches o
should be no more than ± 5°F from the set temperature.
If the error is greater than ±5°F, but less than ± 10° F, then
rmly grasp the thermostat dial (be sure to not change
the 360° F setting) and loosen the dial set screw so that
the dial can rotate freely on the thermostat shaft.
Carefully rotate the dial to indicate the temperature
registered by your temperature indicating device and re-
tighten the set screw. Each minor line on the thermostat
dial’s scale is 5°F.
Reposition the dial to the calibration temperature
setting of 360° F. Allow sucient time for the grill
surface temperature to stabilize and repeat the above
instructions.
If the temperature is greater than ± 10°F, consult a service
technician.


