


Part # 4521635 (03/04/08) Page 15
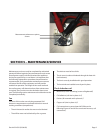
SECTION 7 – EXCHANGE OF SPARE PARTS
CAUTION
All spare parts and or accessories, may
only be replaced by authorized service
personnel.
CAUTION
In order to guarantee safety, use only
genuine OEM spare parts and accessories
purchased directly from a Garland
authorized part/service distributor. If other
components are used, no liability will be
accepted.
CAUTION
The electrical supply must be
disconnected.
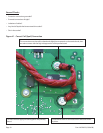
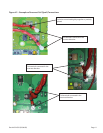
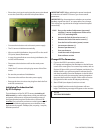
To Open The Induction Unit
(Counter Top Models)
• Turn the induction unit.
• Remove M4x8 screws.
• Turn induction unit back in normal position.
• Lift cover, turn away at the right side, put it at the side
panel.
• Remove coil carrier: remove 2 stop nuts at the left.
• Remove M4 screws.
• Remove screws A1 and A2.
• Turn away coil carrier at the left.
To Open The Induction Unit
(Built In Models)
• Remove M4 screws on the right side.
• Lift cover with the glass.
• Remove M4 screws, remove coil carrier.
• Remove PT-sensor and coil connections.
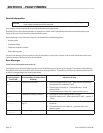
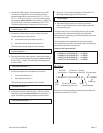
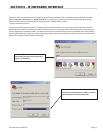
SECTION 8 – ADJUSTMENT OF PROCESS PARAMETERS
The induction unit (excluding all WOK-units) with new
Cu sensors can be adjusted. This can be done either by
means of the short circuit service plug (Poti-LED) part
number (94900096) or by PC/Laptop. In addition, the pan
detection and the power performance, can be adjusted by
the hyperterminal program of the PC/Laptop. Please refer
to Section 9 “IR Interface” for instructions on how to use the
hyperterminal program.
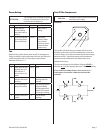
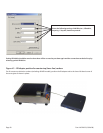
Initializing CU Sensors
By The Short Circuit Plug
If only the CU sensor is exchanged, the new CU sensor can be
initialized by means of the short circuit service plug (Poti-
LED). For this, you will not need the PC or Laptop. The pan
detection and the performance will not have to be changed.
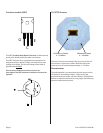
Procedure of Initialization:
• The cooking area must be clear of any items.
• Surrounding temperature 25°C (+/- 3°C) or 77°F
(+/- 37.4°F).
• Disconnect the induction unit from the main power
supply.