Consumer SupportTroubleshooting TipsOperating Instructions
Safety Instructions
Care and Cleaning
7
Care and cleaning of the compactor. GEAppliances.com
As is true of most appliances, proper care is needed to give you continued satisfaction. Before cleaning the compactor,
turn the knob to the OFF position and remove it. If you will be away for more than a couple of days, remove the
compactor bag. Lock the compactor by removing the knob and store it in a safe place.
Cleaning the Unit
To clean the outside:
Wipe with a clean damp cloth.
Painted panels:
Apply a coat of kitchen/appliance wax when
the compactor is new, and then several times
a year.
Stainless steel panels:
Stainless steel panels can be cleaned with
Cerama Bryte
®
or a similar product using a
clean, soft cloth.
Cerama Bryte is available from GE Parts by
calling 800.626.2002 (U.S.) or 800.661.1616
(Canada).
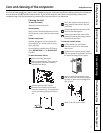
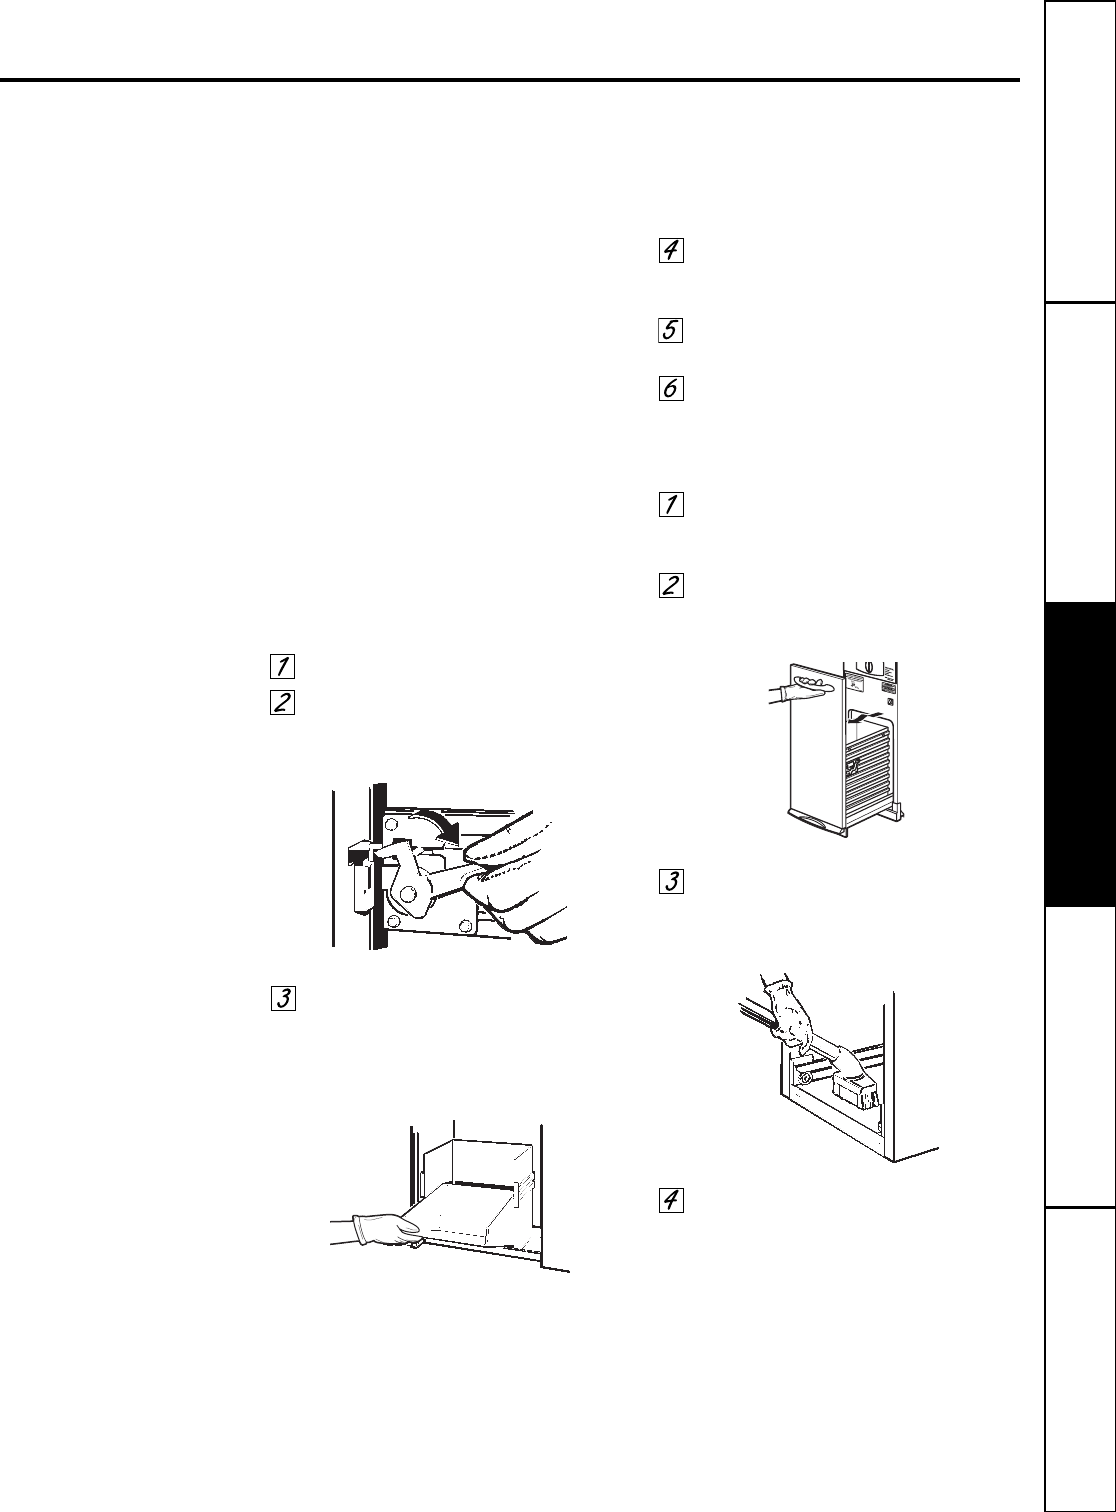
To clean the drawer interior:
Remove the bag. See page 6.
Wear protective gloves. There may be
bits of glass in the drawer. Press the
side door latch down.
Hold the side door latch and tilt
the side of the drawer until the latch
clears the drawer front. The drawer side
can be removed by tilting and sliding it
out.
Wash with a damp cloth using warm,
soapy water. Rinse and then dry with
a soft cloth.
If the drawer side was removed, slide it
back into the tilted position.
Press the side door latch down while
pressing the side to the upright position.
Lock the side door latch.
To clean the cabinet interior:
Pull the drawer out until it stops.
Note the tracks in which the drawer
rollers move.
Lift the front to clear the drawer stops.
Grab the drawer on both sides. Pull it out
the rest of the way and set it aside.
Vacuum inside of the cabinet. Liquid
spills or wet trash should be cleaned up
by hand, or use a vacuum designed to
pick up liquid.
Wash, rinse and dry the inside.


