


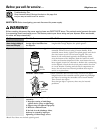
NOTE: Pay close attention to the order of the sink
flange parts, as they have been correctly assembled
by the factory.
A. Disassemble the sink flange assembly from the
disposer by turning the mount ring to the left
(clockwise) and removing it.
B. Raise the mount ring toward the top of the sink
flange. Remove the cushion mount and the mount
ring. You may want to practice installing the
cushion mount at this point before you are under
the sink.
C. Unscrew the support ring from the sink flange and
remove the fiber gasket. You are now left with the
sink flange and the rubber gasket.
D.The rubber gasket is used instead of plumbers
putty with stainless steel sinks.
E. If no putty is used, insert the sink flange through
the rubber gasket into the sink opening. Do not
turn the flange once it is seated.
F. If you use putty instead of the gasket, form a ring
around the underside of the sink flange. Insert the
flange into the sink opening, press down hard to
squeeze out excess putty. From under the sink,
trim off excess putty flush with the bottom edge
of the sink opening. Use putty sparingly on cast
iron sinks.
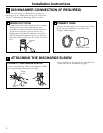
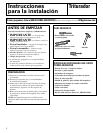
G.From underneath the sink,
slip the fiber gasket onto the
exposed sink flange. With
arrows pointing up, screw the
support ring onto the sink
flange and hand tighten until
the sink flange will not move. At
this point you may want to insert the stopper
in the sink and fill with water to check the sink
flange seal and insure there are no leaks.
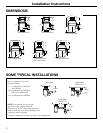
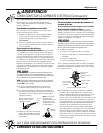
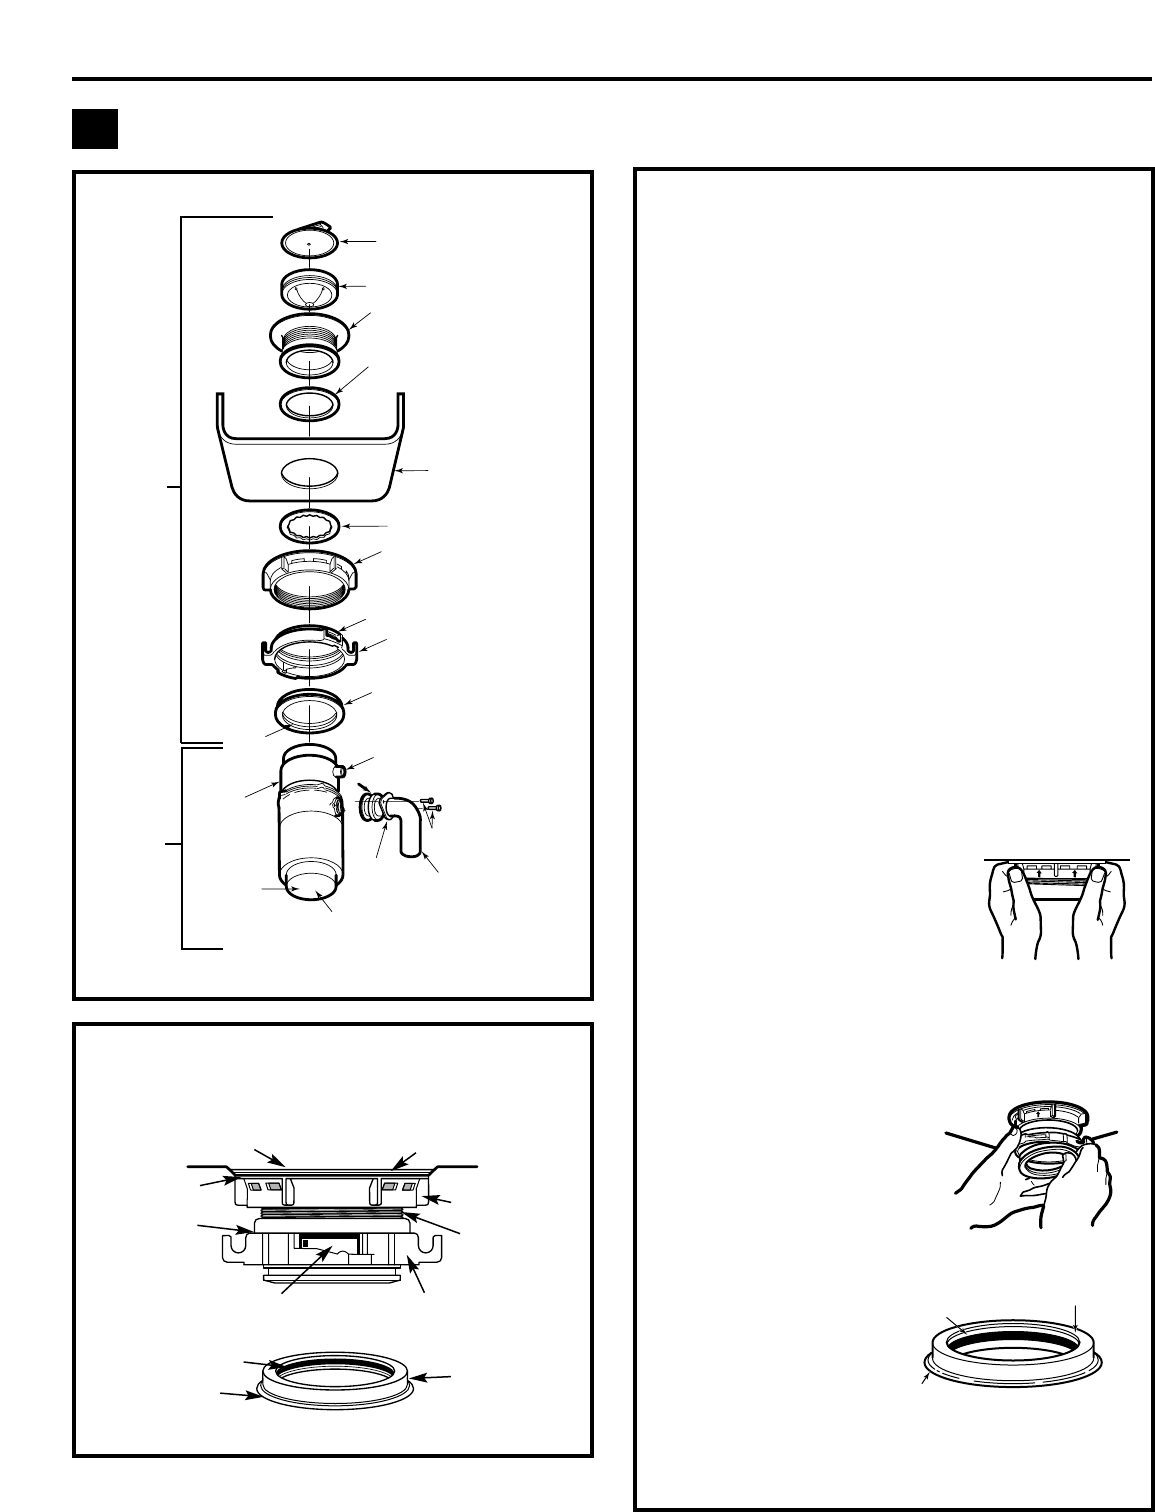
H.Place the mount ring over
the sink flange and hold in
place while installing the
cushion mount (large side
down). Make sure the
groove on the inside of the
cushion mount fits over the
lip on the sink flange,
similar to putting the lid
on a plastic container.
Run your fingers
around the entire
cushion mount with
slight pressure. Do not press too hard. When the
cushion mount is properly seated, the mount ring
can be pulled downward over the cushion mount
and will be free to turn.
5
Installation Instructions
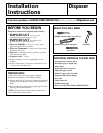
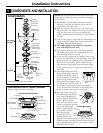
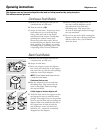
COMPONENTS AND INSTALLATION
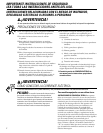
1
COMPONENTS
INSTALLATION OF SINK FLANGE
(Read completely before starting.)
Groove
Top
Bottom
Bead
Sink Flange
Rubber Gasket
Sink
Fiber Gasket
Support Ring
Open Area No Obstruction
Sink Flange
Mount Ring should be free
to move up and down
Cushion Mount Detail
*Stopper
*Removable
Splash Guard
Sink Flange
Rubber Sink
Flange Gasket
Groove
Dishwasher
Discharge Inlet
Elbow Gasket
Hopper
Sink
Fiber Gasket
Support Ring
(Note Arrows
Indicating Up)
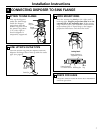
Screws
Discharge
Elbow
Elbow
Flange
Mount Ring
Rating Label
in This Area
Tightening Ears
End Bell
(Electrical
Connections)
Cushion Mount
*Not used with batch feed model
Sink Flange
Assembly
Disposer
Hand-tighten sink
flange
Correctly Installed Sink Flange
Bottom Bead of
Cushion Mount
Cushion Mount
Groove
Bottom Bead
(shown for proper orientation)