– 17 –
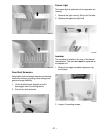
Door Gasket
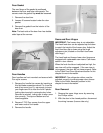
The rear flange of the gasket is positioned
between the inner and outer door panels. The
screws under the gasket flap must be loosened.
1. Remove the door bins.
2. Loosen 40 screws located under the door
gasket.
3. Remove the gasket from the interior of the
door liner.
Note: The back side of the door liner has double-
sided tape at the corners.
GEA00866
ScrewsScrews
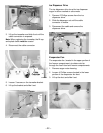
Door Handles
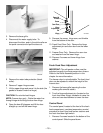
Door handles are front mounted and secured with
Torx-style screws.
1. Remove the handle trim covers by inserting a
thin flat-blade screwdriver about 2 in. from the
end of top cover trim. Pry up enough to insert
your fingers and lift to free trim from 2 plastic
locking tabs inserted in rectangle door holes.
Reverse to reinstall, taking care to align cover
trim correctly. The top and bottom are not
interchangeable.
2. Remove 2 T-20 Torx screws from the upper
and lower ends of the handle.
3. Remove the handle.
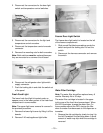
Doors and Door Hinges
IMPORTANT: The freezer door is not adjustable.
The fresh food door can be adjusted up and down
to match the height of the freezer door. Adjust the
fresh food door up or down using the hinge
adjustment pin (located on the fresh food lower
door hinge).
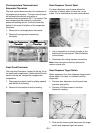
The fresh food and freezer lower door hinges are
equipped with replaceable cam risers. Cam risers
assist in door closure.
When the fresh food door is adjusted too high, the
cam riser will not be engaged. If the cam riser is
not engaged, the door will not close properly. Refer
to the Fresh Food Door Adjustment section in this
chapter for more information.
IMPORTANT: The refrigerator rollers must be
adjusted correctly to ensure proper door closure.
Refer to the Roller Assembly section in this
chapter for more information.
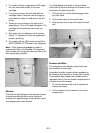
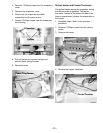
Door Removal
1. Remove the upper hinge cover by removing
the Phillips screw.
2. With the door in the closed position, disconnect
the wiring harness (freezer side only).


