


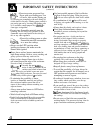

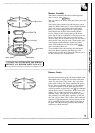
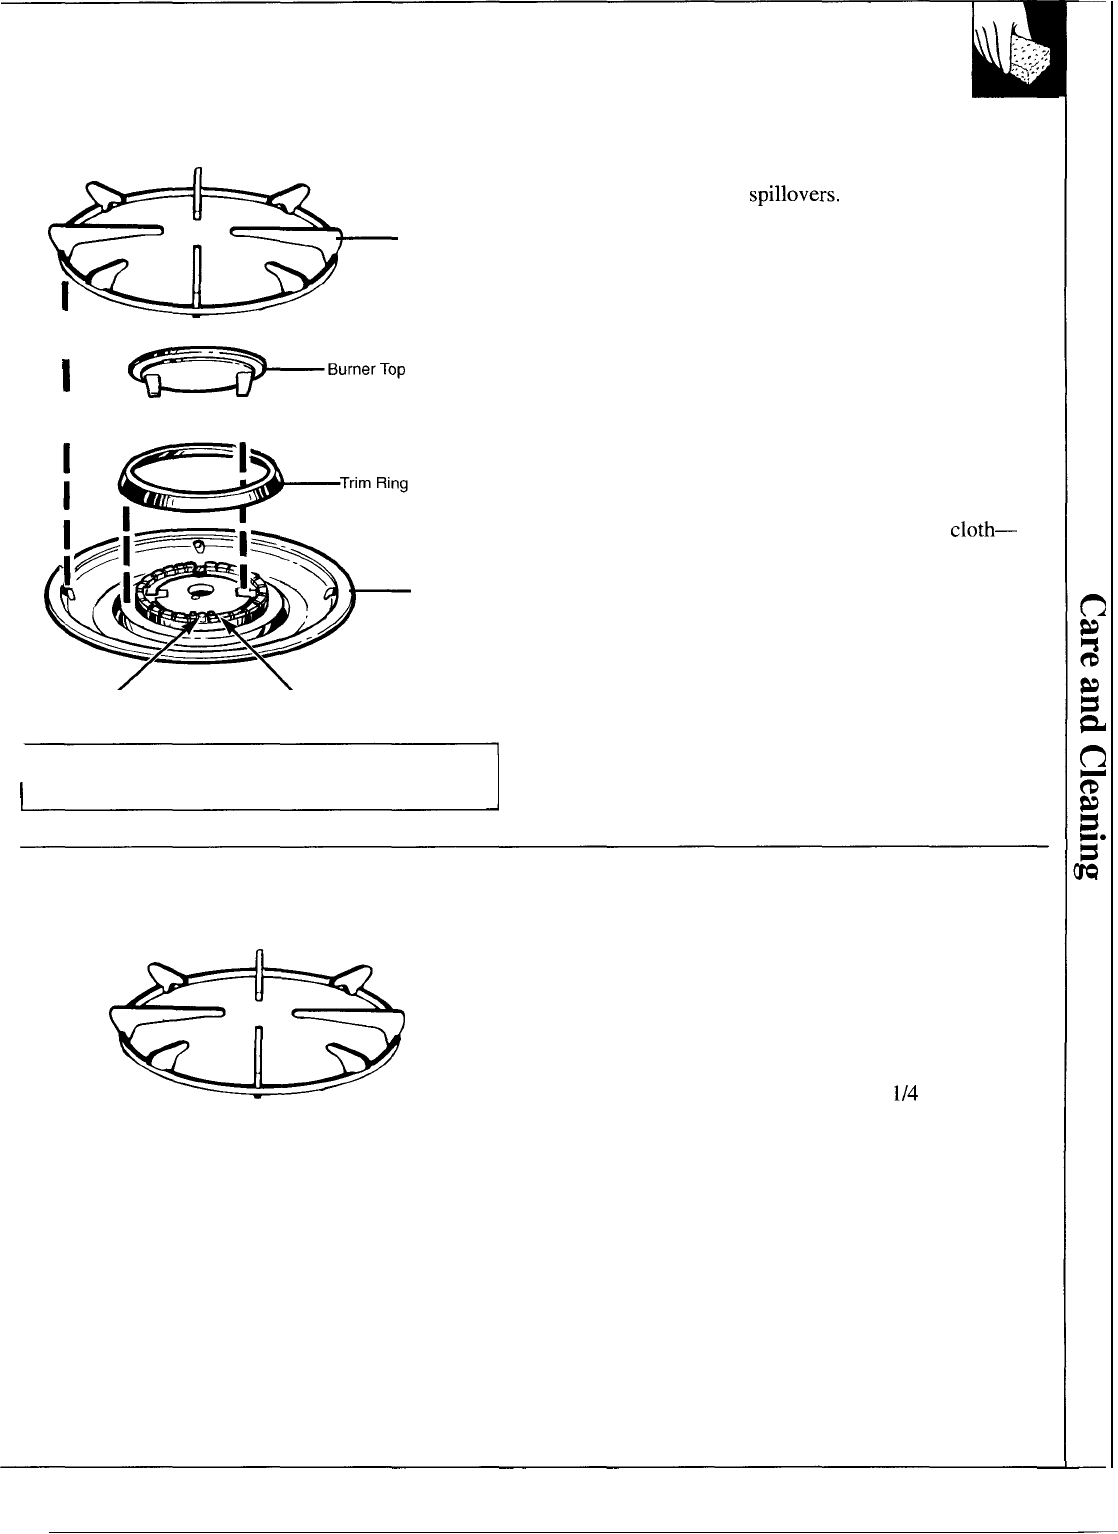
Burner Grate
I
I
%=P-B”rner’op
I
I
Burner Bowl
Spark lgniter
-
‘ Burner Body
CAUTION: DO NOT OPERATE THE BURNER
I
WITHOUT ALL BURNER PARTS IN PLACE.
Burner Assembly
The burner assemblies should be washed regularly
and, of course, after
spillovers.
Turn all controls off before removing burner parts and
drip pans.
The burner grates, burner tops and trim rings can be
lifted off, making them easy to clean. Removing them
gives you access to the burner bodies and burner
bowls. (To avoid snagging cloth on spark igniters,
leave burner tops in place when cleaning burner
bowls.) There are two locating pins on the burner
grates that fit into an indentation at the bottom of the
bowls. The pin allows the grate to sit level in one
direction only. Do not remove the pin. Do not remove
burner bowls from glass top units. Wash burner parts
with all-purpose non-abrasive cleaner and warm
water. Soak stubborn soil. Dry them with a
cloth—
don’t reassemble them wet.
To reassemble: Place the trim ring onto the burner
body first. Before replacing the burner top, first
examine the two tabs on its underside. The tabs are to
fit into receiving slots in burner head.
Burner Grates
Porcelain enamel burner grates should be washed often.
Wash them in hot, soapy water and rinse with clean
water. Dry the grates with a cloth—don’t put them
back on the cooktop wet. When replacing the grates,
be sure they’re positioned securely over the burners.
To get rid of burned-on food, place the grates in a
covered container or plastic bag. Add
1/4
cup ammonia
and let them soak for 30 minutes. Wash, rinse well,
and dry. Or you can use an abrasive cleaner for
stubborn stains. Although they’re durable, the grates
will gradually lose their shine, regardless of the best
care you can give them. This is due to their continual
exposure to high temperatures. Do not operate a burner
for an extended period of time without cookware on
the grate. The finish on the grate may chip without
cookware to absorb the heat.
9