


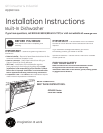
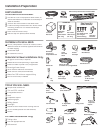
Installation Instructions
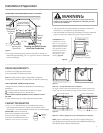
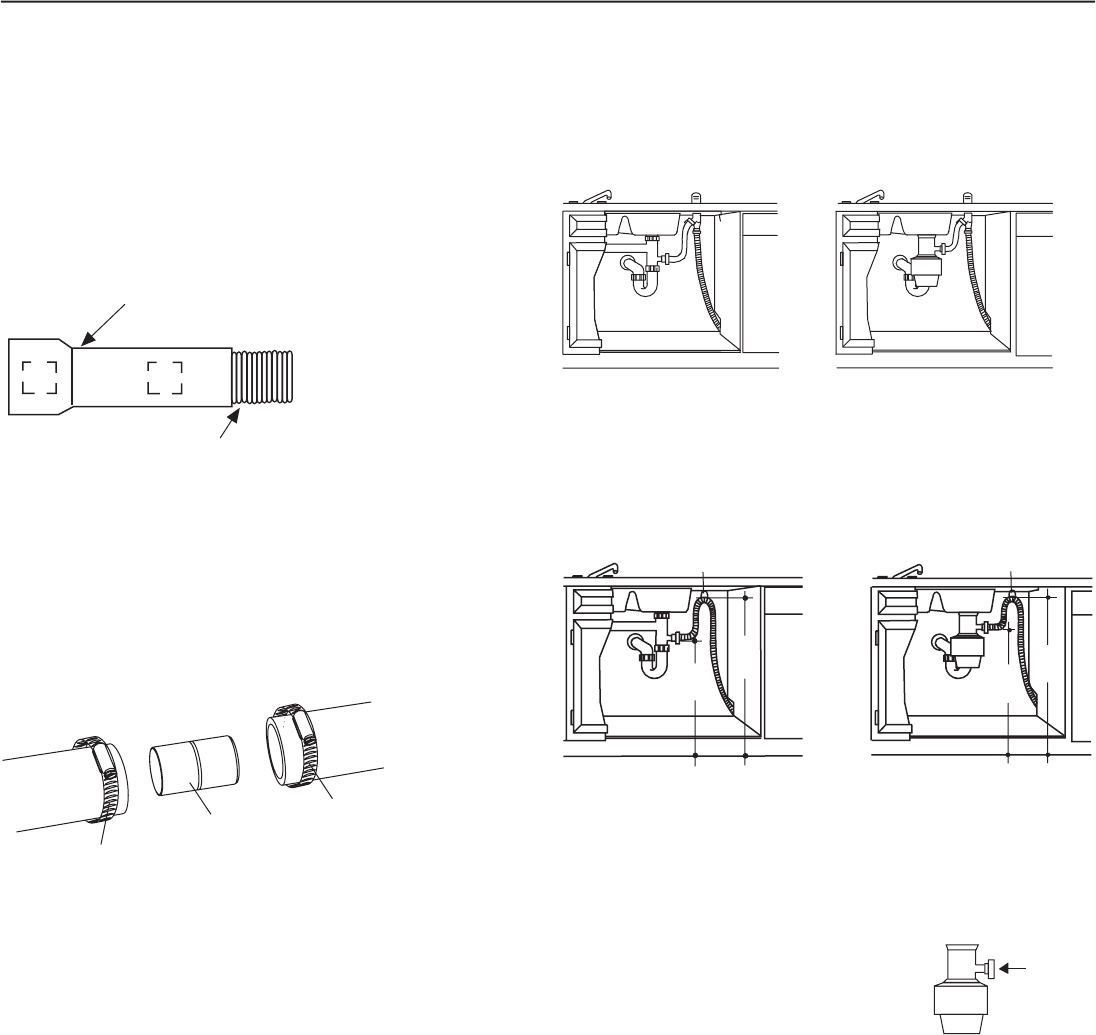
STEP 17–CONNECT DRAIN LINE
FOLLOW ALL LOCAL CODES AND ORDINANCES.
The molded end of the drain hose will fit 5/8" through 1"
diameter inlet ports on the air gap, waste tee or disposer.
• Determine size of inlet port
• Cut drain hose connector on the marked line, if required, to fi t
the inlet port.
DRAIN LINE INSTALLATION
• Connect drain line to air gap, waste tee or disposer using the
previously determined method.
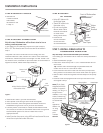
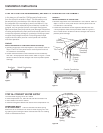
Method 1 – Air gap with waste tee or disposer
Figure Z
Figure AA
10
• If a longer drain hose is required and you did not purchase
drain hose GPF10L, add up to 42" length for a total of 120"
(10 feet) to the factory installed hose. Use 5/8" or 7/8" inside
diameter hose and a coupler to connect the two hose ends.
Secure the connection with hose clamps.
Figure X
Figure Y
• Secure the drain hose to the air gap, waste tee or disposer
with clamps.
Note:
TOTAL DRAIN HOSE LENGTH MUST NOT EXCEED 10 FEET
FOR PROPER DRAIN OPERATION.
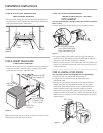
Method 2 – Built-in “High drain loop” with waste tee or
disposer
Tip:
Avoid unnecessary service call charges. Prior to
connecting drain hose be sure excess hose is not trapped,
kinked or crushed by the dishwasher. Pull excess hose through
the cabinet opening to prevent hose damage and pump out
issues.
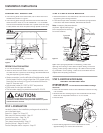
923-10A
Cutting Line
1"
5/8"
IMPORTANT: Do not cut corrugated portion of hose
Waste Tee Installation
Disposer Installation
Waste Tee Installation
Disposer Installation
Fasten to underside
of countertop
32"
Min.
18"
Min.
06C-1683C
18"
Min.
32"
Min.
06C-1683D
Fasten to underside
of countertop
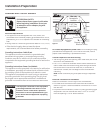
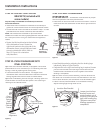
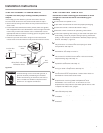
IMPORTANT
–
When connecting drain line to
disposer, check to be sure that the drain
plug has been removed. DISHWASHER WILL
NOT DRAIN IF PLUG IS LEFT
IN PLACE.
Remove
Drain
Plug
923-10N