


7
Care and Cleaning
Stainless Steel Hood
For your
safety
Pour votre
securité
Before servicing or cleaning unit, switch power
off at service panel and lock the service
disconnecting means to prevent power from
being switched on accidentally. When the
service disconnecting means cannot be locked,
securely fasten a prominent warning device,
such as a tag, to the service panel.
Avant de réparer ou de nettoyer votre appareil,
débranchez le courant au niveau du panneau
de service et verrouillez les mécanismes de
débranchement de service pour éviter tout
branchement accidentel au courant. Si vous ne
pouvez pas verrouiller les mécanismes de
débranchement de service, attachez
soigneusement un avertissement bien visible,
comme une étiquette, au panneau de service.
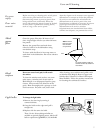
Light bulbs
To change the light bulbs:
1. Remove the trim ring by turning it
counterclockwise.
2. Grasp the bulb on the edges and pull it
straight out.
3. Replace with the same size bulb.
These 12 volt, 20 watt halogen bulbs are
available at specialty lighting stores. Ask for GE
bulb or equivalent: Q20MR16/C/CG40–BAB.
Metal
grease
filter
Clean the grease filter after 30 hours of “on”
time. A signal light will alert you when 30 hours
has passed.
Remove the grease filters and wash them
either by hand or in the dishwasher using
non-abrasive soap.
To clean, swish the filters in hot soapy water or
wash them in the dishwasher. Do not use abrasive
cleansers.
Hood
surfaces
Do not use a steel wool pad; it will scratch
the surface.
To clean the stainless steel surface, use warm
sudsy water, a stainless steel cleaner such as
Kleen King®, or an all-purpose liquid or spray
cleaner. Always scrub in the direction of the
grain. Rinse thoroughly with a sponge or cloth
and clean water. Dry with a soft, clean cloth.
After cleaning, use a stainless steel polish, such
as Stainless Steel Magic®, Revere Copper and
Stainless Steel Cleaner® or Wenol All Purpose
Metal Polish®. Follow the product instructions
for cleaning the stainless steel surface.
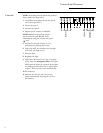
Note:
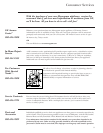
To remove
filters push them
back and down
using the knob.
Front
For proper operation, make sure
the filters are securely seated into
the channels.