


10
Installation
36" Stainless Steel Refrigerators, Freezers
• Side panels are required whenever the sides of the
product will be exposed and when installed between
frameless cabinets. See pages 3 and 4.
• Side panels are not required when installed into an
enclosure.
• Side panel installation will be determined by the
design of the side panel you have previously chosen.
• Side panels must be installed plumb.
Step 3
Install
Side Panels
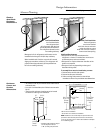
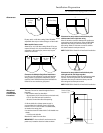
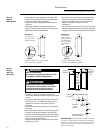
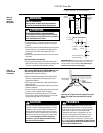
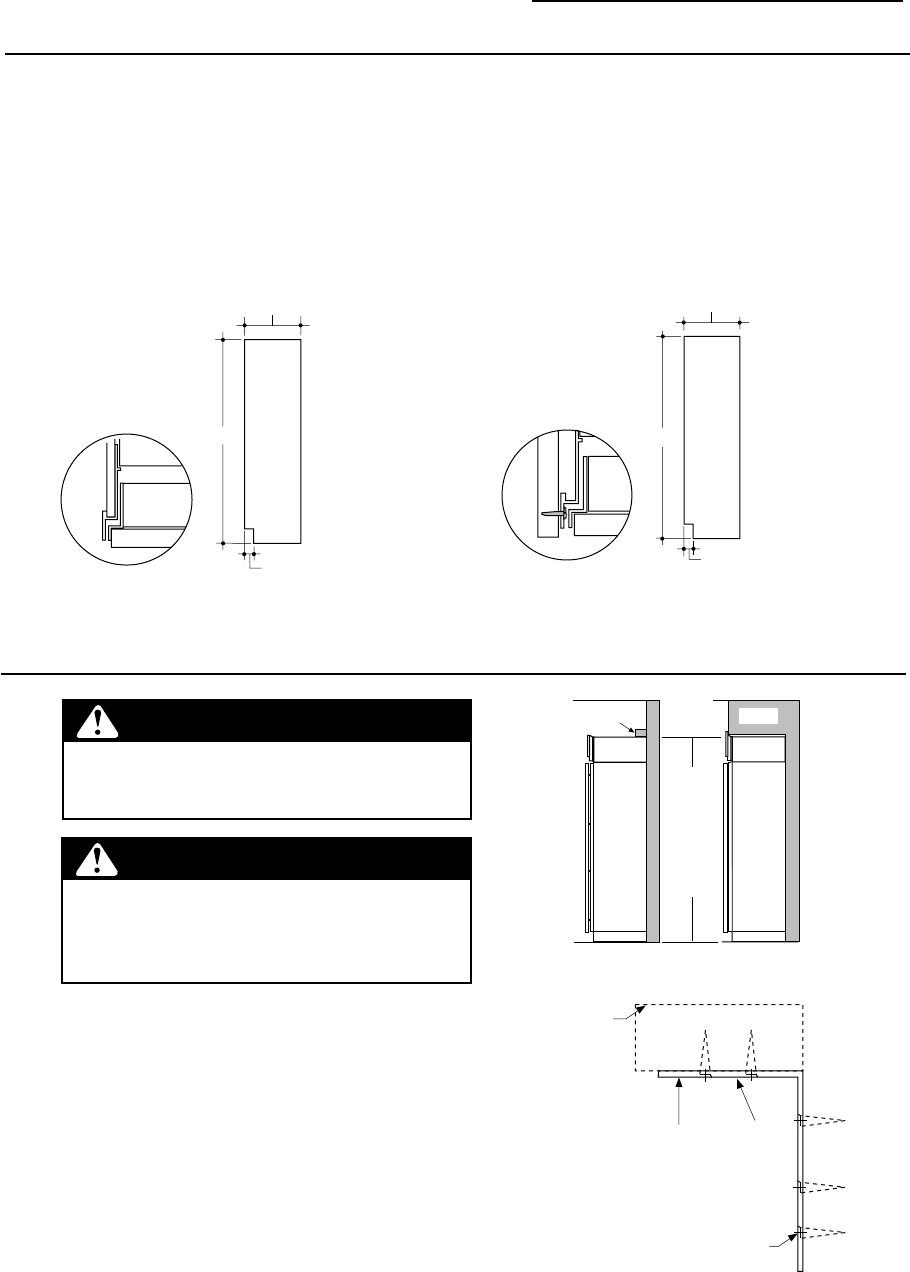
• If you choose to use 1/4" side panels, they should be
inserted into the case trim as illustrated. Fasten the
panels to the product with stick-on hook and loop
fastener strips before setting in place. See
illustration A.
• 1/2" to 3/4" side panels are normally set into place and
fastened to adjacent cabinetry or the back wall before
rolling the product into the opening. See illustration B.
Standard 4" high toekick or trim to fit. Height
may vary depending on application.
Illustration B
1/2" to 3/4" Side
Panels – Leading
edge of side panel is
flush with cabinet
front. Fasten to the
back wall using a
cleat.
Standard 4" high toekick or trim to fit.
Height may vary depending on application.
Illustration A
1/4" Side Panels –
Insert end of side
panel into case trim.
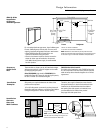
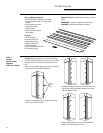
Trim
84"
23-9/16"
2-9/16"
84"
3-3/4"
24-3/4"
Top View
Top View
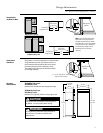
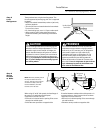
Step 4
Install
Anti-Tip
Brackets
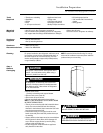
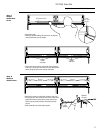
• Cut a 2" x 4" x 35" block and secure the block to
the mounting brackets provided using #12 or #14 wood
screws.
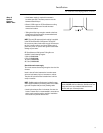
• Secure the bracket with wood block to the back wall
so that it is 84" (or your installation height) from the
finished floor. Use #12 or #14 wood screws. See
illustration.
• Screws must penetrate at least one inch into vertical
wall studs.
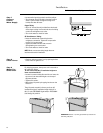
• Before pushing the refrigerator into the opening, plug
the power cord into the receptacle. Open the grille
panel and reach into the opening at the back to grasp
the power cord. Pull the power cord into the opening
as you push the refrigerator back.
• Gently push refrigerator into the opening with hands
against front corners.
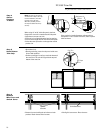
IMPORTANT NOTE: When the refrigerator is installed under a soffit
or if there is not enough height for this method of security, brackets
cannot be used. Proceed to step 5 to level the refrigerator and then
to step 6 to secure refrigerator to cabinets. The refrigerator must be
secured to prevent tipping.
PRECAUTIONS CONTRE LES BASCULEMENTS
Le réfrigérateur est beaucoup plus lourd en haut
et il faut le maintenir en place pour éviter la
possibilité de son basculement vers l’avant.
ATTENTION
Block
Soffit
Side View
Height
From
Floor
to
Bottom
of Wood
Block
Brackets
Required
Brackets
Not Required
Beneath a
Soffit
Mounting
Bracket
2 x 4 Cut
35" Length
Installation
Height
From Floor
Screws Mounted into
Vertical Wall Studs
WARNING
ANTI-TIP PRECAUTIONS
The refrigerator is top-heavy and must be secured
to prevent the possibility of tipping forward.