


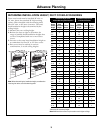

14
Installation Instructions
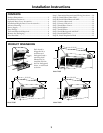
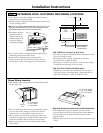
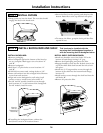
STEP 7 INSTALL FILTERS
• To remove the filters, grasp the latch, pull the filter
up and lift out.
• Drop grease tray into the hood. The rear tabs should
engage the slots in the hood track.
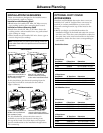
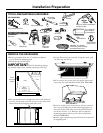
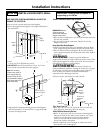
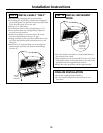
STEP 8 INSTALL BACKGUARD AND SHELF
This hood can be installed with the
warming shelf and backguard together or
with the warming shelf or backguard alone.
INSTALL BACKGUARD:
•Remove packaging.
•Place backguard against the bottom of the hood to
use as a template. Mark upper screw locations “A”
and “B”
•Remove backguard.
•Drill four 1/8" pilot holes at screw locations “A”
and “B”.
•If drill did not enter studs, enlarge holes to 3/8".
•Insert wall anchors into the enlarged holes. Remove
screws from wall anchors.
•Align and secure backguard to wall using 2 wall
anchor screws or wood screws in locations “A”.
•For 30" and 36" models, install 2 screws through
hole locations “C” at the bottom of the backguard.
For 48" models, install 4 screws.
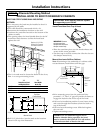
INSTALL SHELF OVER BACKGUARD:
•Install two shoulder screws into holes “D” in the
bottom of hood flange leaving 1/8" gap.
•Remove shelf packaging and protective film.
•Engage shoulder screws into the keyhole slots in the
top of the shelf. Slide shelf towards the left to lock
into place.
•Install two 3/4" long machine screws through the
bottom of the shelf into the bottom hood flange,
location “E”.
•Install anchor screws through the shelf and into the
wall holes “B”.
•Remove all protective film.
•If installing the backguard alone, without the
shelf, drive screws in all locations shown.
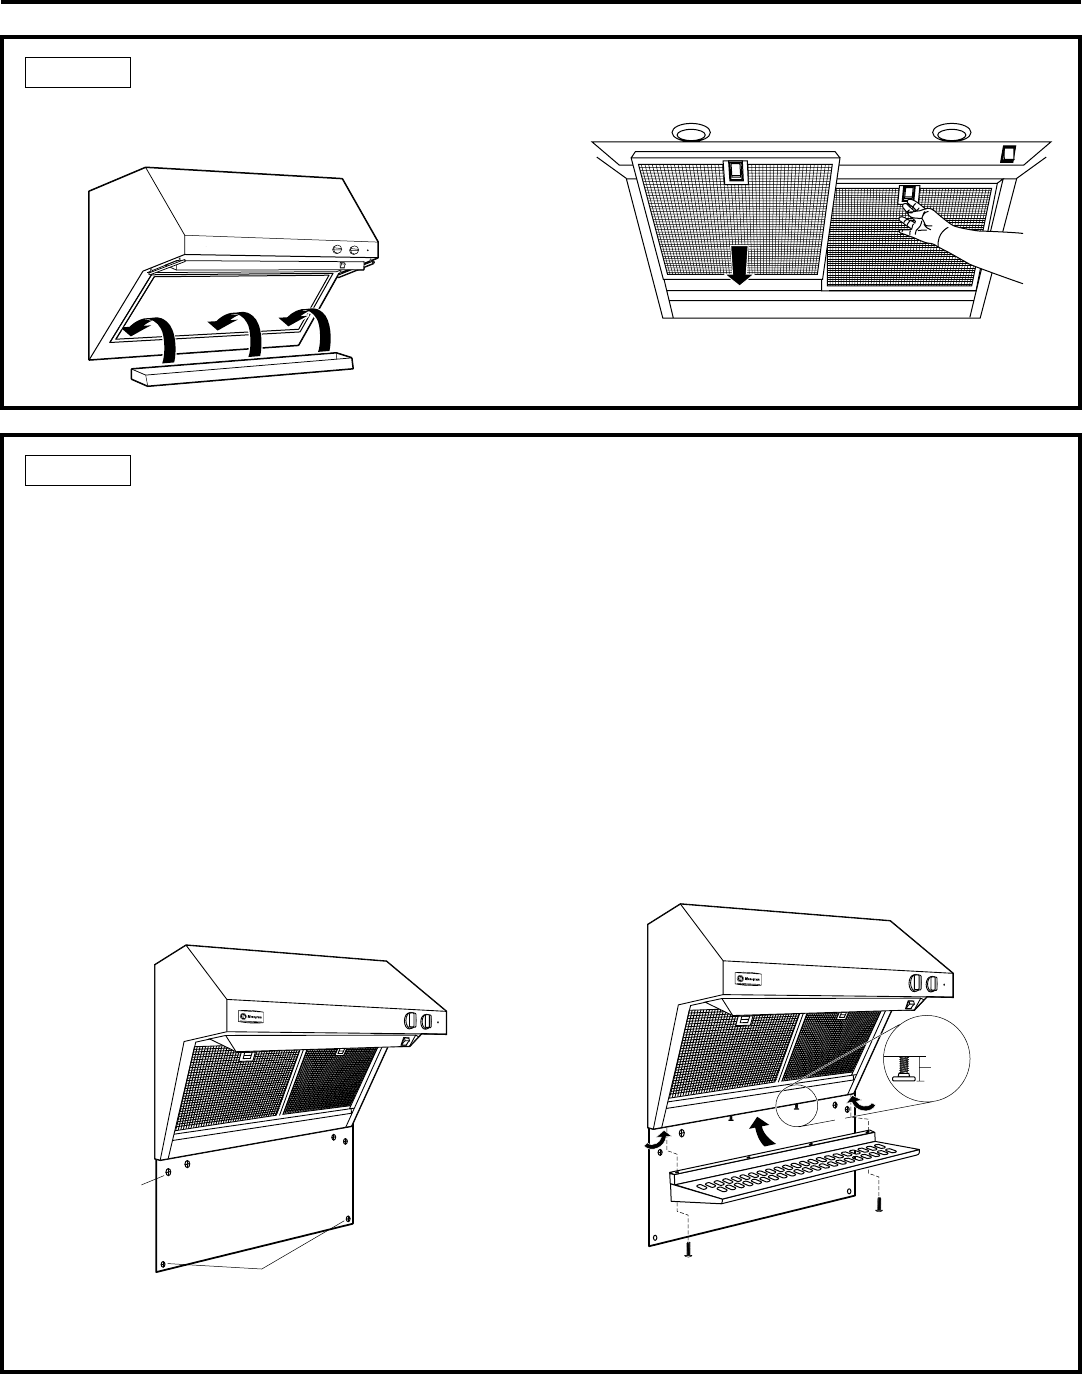
1/8"
Gap
D
B
E
D
E
B
Mounting
Holes for
Backguard (A, C)
and Shelf (B)
C
B
A
C
K
G
U
A
R
D
A
A
B
B
• Insert the filter into the opening and drop into the
bottom. Raise filter to the top and lock into place.