


Installation Instructions
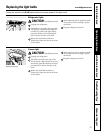
REMOVE THE FRESH FOOD
DOOR HANDLE
(For placement in the installation
location or reversal of the handles –
on some models)
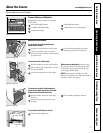
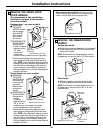
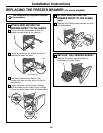
Stainless steel (on some models):
REMOVING
THE DOOR
HANDLE: Loosen
the set screws
with the 3/32″
Allen wrench
and remove
the handle.
REVERSING THE
DOOR HANDLE:
•Remove the
handle mounting
fasteners with a
1/4″ Allen
wrench and
transfer the
handle mounting fasteners to the right side.
• Remove and transfer the plug button and
logo badge to the left side of the fresh food
door. NOTE: Use a flat plastic edge to prevent
damaging the door. Remove any adhesive on
the door with a mild detergent. Remove the
paper covering on the adhesive backing on
the logo badge prior to carefully attaching the
badge to the door.
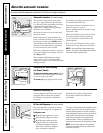
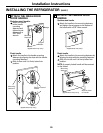
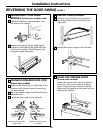
Plastic handle (on some models):
REMOVING
THE DOOR
HANDLE: Slide
the handle up
on the handle
mounting
fasteners and
remove the
handle.
REVERSING THE
DOOR HANDLE:
•Remove the
handle
mounting
fasteners with a
3/8″ or 10 mm
socket wrench and transfer the handle
mounting fasteners to the right side.
•Remove and transfer the plug button and
logo badge to the left side of the fresh food
door. NOTE: Use a flat plastic edge to prevent
damaging the door. Remove any adhesive on
the door with a mild detergent. Remove the
paper covering on the adhesive backing on
the logo badge prior to carefully attaching the
badge to the door.
A
A
5
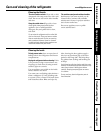
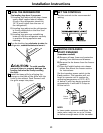
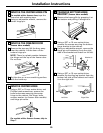
After removing the handle: Move the small plug
button from the top right side of the door top and
insert it into the hole on the opposite side.
Small
Plug
Button
A
B
A
B
Mounting
Fasteners
Mounting Fasteners
Plug
Button
Plug
Button
(appearance may vary)
Badge
Badge
(appearance may vary)
(appearance may vary)
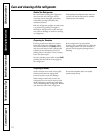
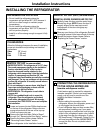
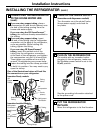
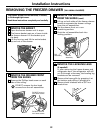
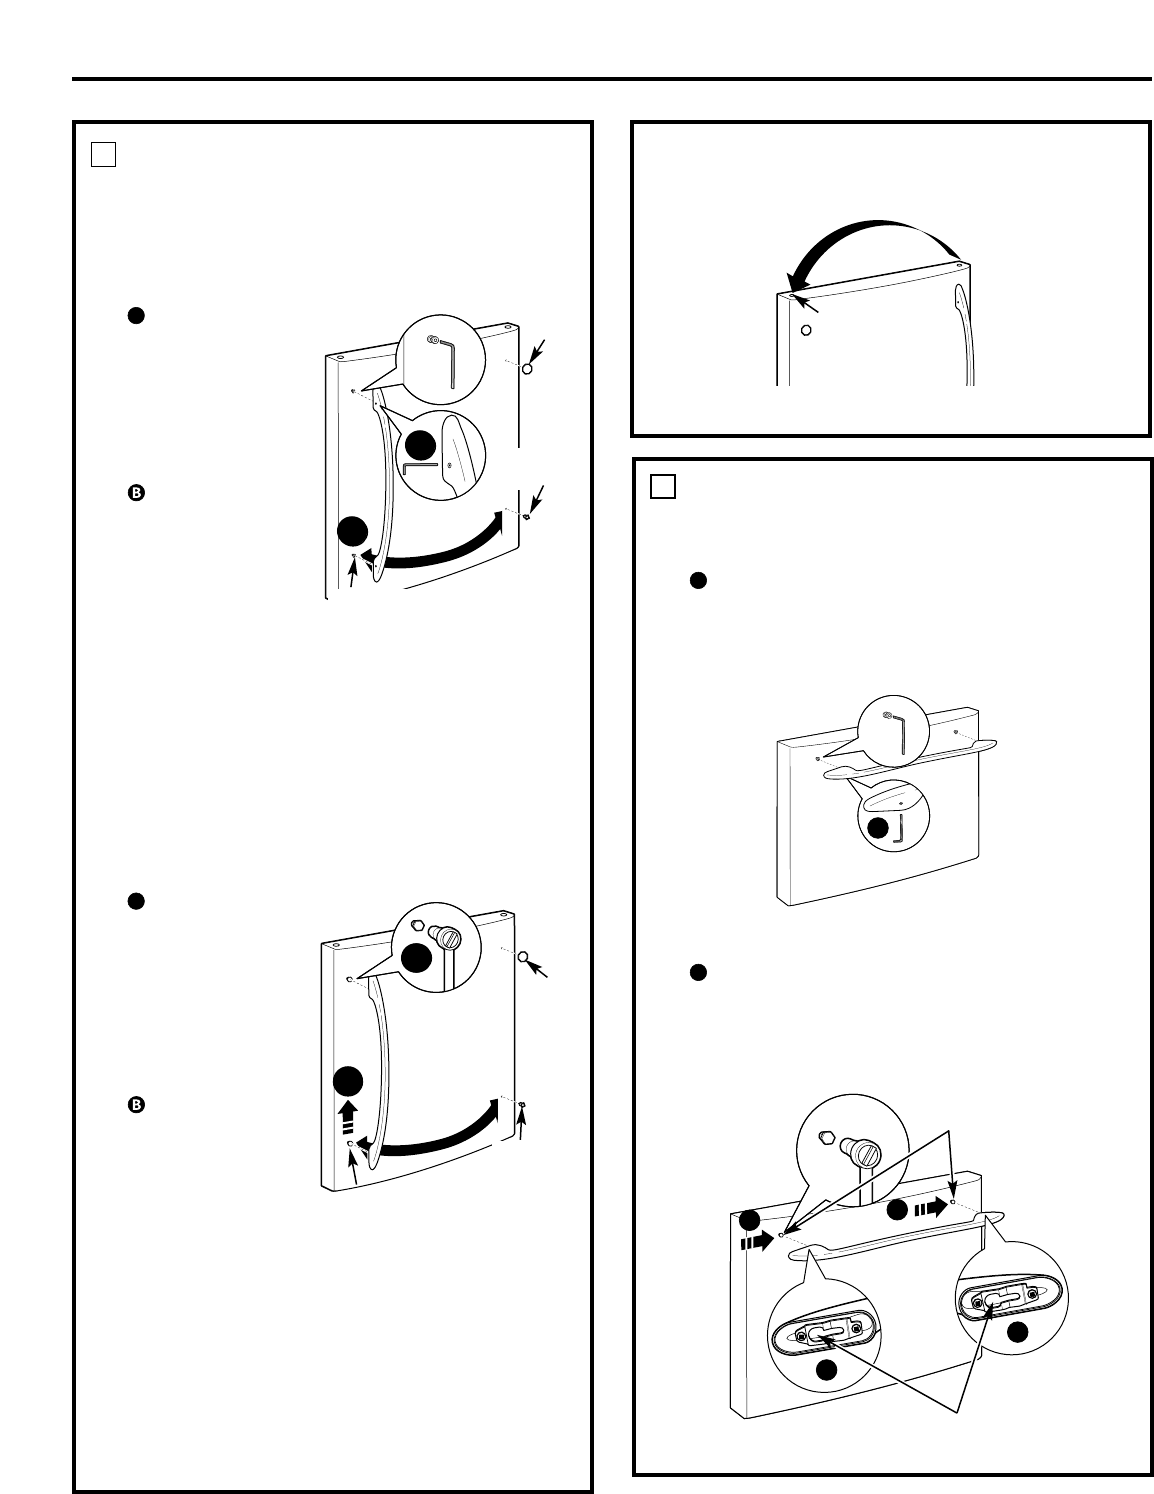
REMOVE THE FREEZER DOOR
HANDLE
Stainless steel handle:
Loosen the set screws located on the underside
of the handle with the 3/32″ Allen wrench and
remove the handle.
NOTE: If the handle mounting fasteners need to
be tightened or removed use a 1/4″ Allen wrench.
Plastic handle:
Slide the handle to the right on the handle
mounting fasteners and remove the handle.
NOTE: If the handle mounting fasteners need to
be tightened or removed use a 3/8″ or 10 mm
socket wrench.
A
A
6
A
A
A
A
Mounting
fasteners
Slots on back
of handle
(appearance may vary)
A
19