


Installation Preparation
5
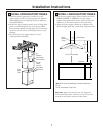
REMOVE THE PACKAGING
The vent hood is packed separate from the required
accessory: ZXR858, ZXR859 or ZXR8510.
• Remove the frame, cover, parts box, side bars and
packaging.
• Remove junction box cover.
• Install strain relief onto junction box cover.
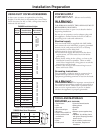
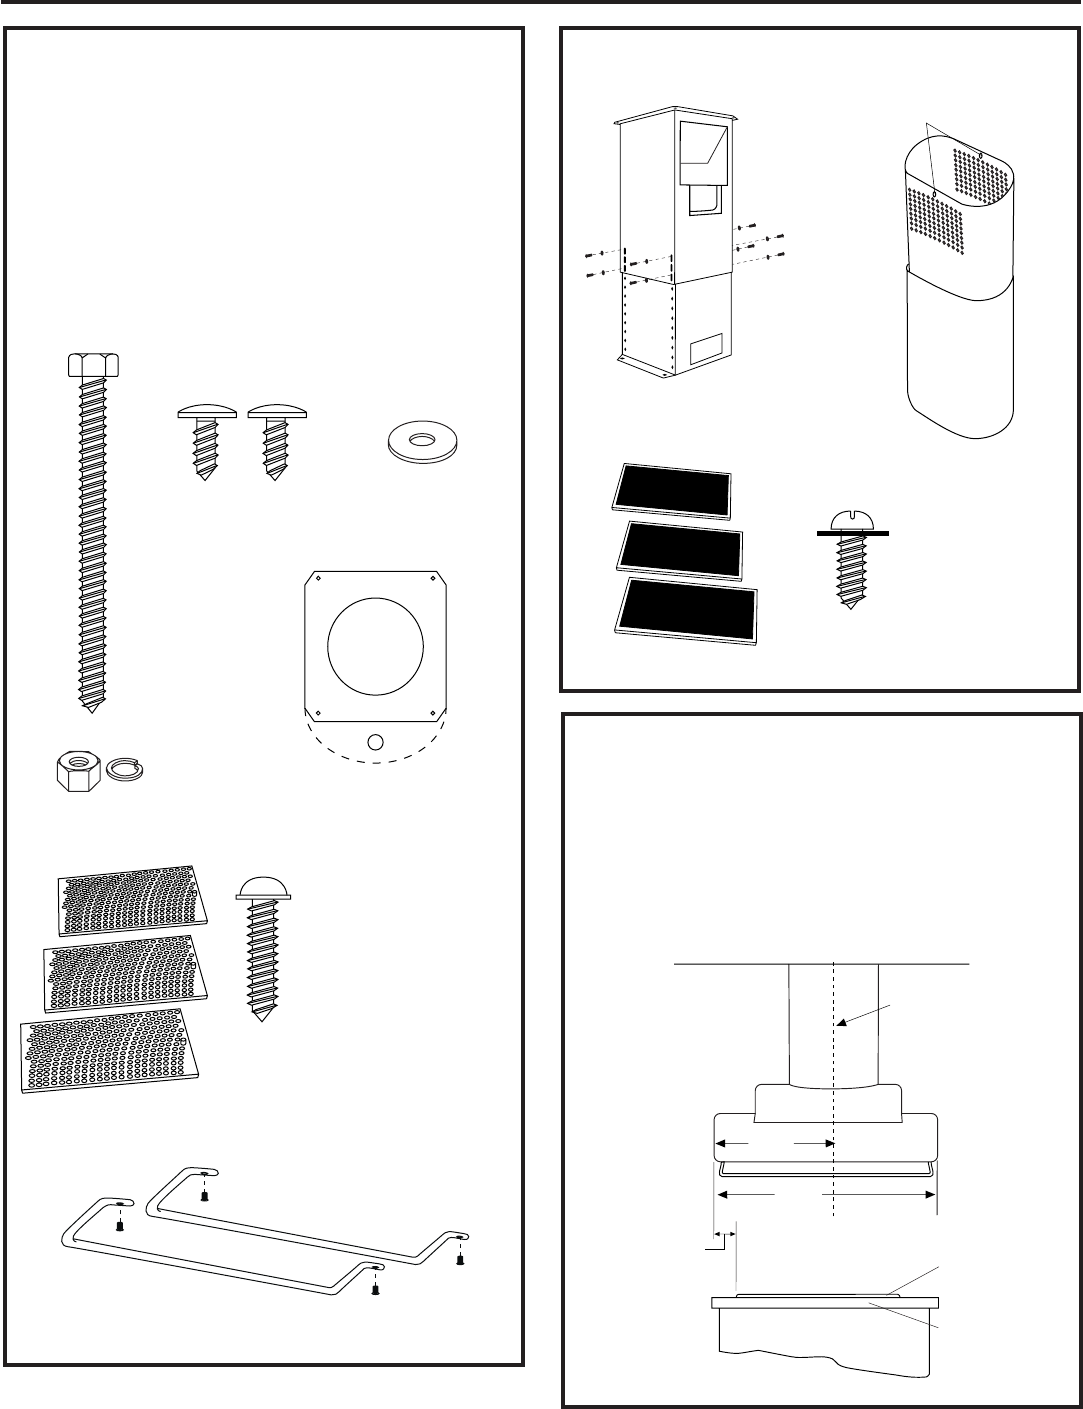
Check Installation Hardware
Locate the hardware accessory box packed with the
hood and check contents.
Mounting Screw Holes
Front of Hood
4 Flat Washers
4 (10mm) Nuts
and Lock Washers
8 Frame Attachment
Screws with Washers
(attached to
accessory
support frames)
2 Phillips Head
Decorative Screws
2 side bars with 4 Machine screws
4 Hex head
wood lag screws
(6mm x 2-1/2”
or
1/4 x 2-1/2")
Template
Check service manual
envelope taped to the front
on the hood to be sure it
contains one stop screw.
Leave this screw in the
envelope.
Check contents of the required accessory,
ZXR858, ZXR859 or ZXR8510.
Decorative Duct Covers
Support Frames
With 8 Screws
And 8 Washers
3 Stainless Steel
Grease Filters
3 Charcoal Filters
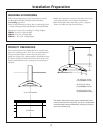
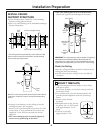
PLAN THE LOCATION
Determine the exact location of the vent hood.
• Use a plumb to check location to be sure countertop/
cooktop location below the hood will align exactly.
• The hood should project forward 1-1/2
″
beyond the front
edge of the cooking appliance. See illustration.
• Observe the recommended space between the cooking
surface and bottom of hood.
Ceiling
Hood
Ducting
Centerline
Side View
Approx. 1-1/2"
Beyond Cooking
Surface
Cooktop
Countertop
27-1/2"
Hood
Front
13-3/4"