76
How To Use George Foreman’s
Lean Mean Fat Reducing Griddle
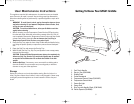
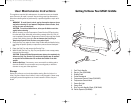
1. Before using this appliance for the first time, clean the Griddle as out-
lined in the User Maintenance Instructions.
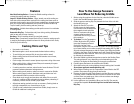
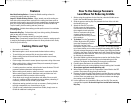
2. Slide the grease catching Drip Tray beneath the front of the unit with
the Handle facing out.
3. Attach the Service Tray to the
Griddle. Insert the front supports
into the holes in the Griddle frame
then rotate the back end of the
Service Tray down until the rear
supports snap into place. To
remove the Service Tray, reverse
this procedure.
4. To preheat: Turn the Temperature
Control Knob to the OFF position.
Insert the Temperature Control
Probe fully into the Probe
Receptacle. Plug the cord into a 120V AC outlet. The variable tempera-
ture control allows you to cook at a specific heat setting; 250˚ F to 450˚ F.
Align the selected temperature with the Power Light. When the Griddle
is heating, the Power Light illuminates and it will remain ON until the set
temperature has been reached. Then it will cycle on and off, as needed,
to maintain the set temperature.
5. Allow the Griddle to preheat except where noted on the Cooking Chart.
The preheat time will vary, depending on the heat setting you have
selected. The higher the heat setting, the longer the preheat time.
6. Carefully place the items to be cooked on the Griddle.
7. Allow the food to cook, turning halfway through cooking time if needed.
Do not leave appliance unattended during use!
8. When finished cooking, turn the Temperature Control Knob to the OFF
position. Disconnect the plug from the wall outlet.
9. Remove the food using the Plastic Spatula provided. Be sure to always
use either plastic or wooden utensils so as not to scratch the non-stick
surface. Never use metal tongs, forks or knives as these can damage
the coating on the Griddle Plate.
10. Let the appliance cool completely. When cool, the Drip Tray may be
removed and emptied. Be sure the liquid has cooled before removing
Drip Tray.
Features
Non-Stick Cooking Surface - Covers the Griddle cooking surface for
reduced fat cooking and easy cleaning.
Large 21" Griddle Cooking Surface - Large, smooth, non-stick cooking sur-
face with uniform temperature conduction for cooking food items such as
pancakes, hash browns, eggs, grilled cheese sandwiches, chopped vegeta-
bles, etc. Unique design allows fats to drip from the Griddle into the Drip
Tray for healthy, fat free cooking and easy clean-up.
Heat settings - Variable heat settings provide perfect control in a multitude
of cooking tasks.
Removable Drip Tray - Collects fats and juices during cooking. Dishwasher
safe (on top rack) for easy cleaning.
Backstop - Built in backstop allows for easy food removal.
Service Tray - Conveniently located Service Tray is ideal for resting utensils
or stacking and keeping cooked food warm for short periods of time. Easily
lifts off for quick clean-up.
Cooking Hints and Tips
• Use tender cuts of meat.
• Marinate tougher cuts of meat to tenderize them before cooking.
•To avoid drying out meat and fish, do not pierce with a utensil.
• Better cooking results will be achieved with boneless cuts of meat,
chicken and fish.
• Cut the edge of the meat in several places to prevent curling of the meat
• When cooking fish or chicken breast fillets, tuck extremely thin parts
under to prevent overcooking.
• If cooking more than one item, select foods of even thickness. This will
promote consistent doneness and appearance.
• When cooking small portions, make sure meat is centered on Griddle.
When cooking larger portions, distribute evenly and allow one inch
space between foods to promote uniform cooking.
• Some foods such as eggs and pancakes cook better if the non-stick
surface is conditioned with vegetable shortening before preheating. If
necessary, remove excess oil with a paper towel.
• Adjust heat setting gradually and only as necessary. Cooking foods at
too high a temperature can cause them to dry out.
• If food is under-cooked when removed from Griddle, simply return to
Griddle for additional cooking time.
Service Tray
Griddle Frame
Rear
Supports
GFG21_IB_4-11-03 11/5/03 3:44 PM Page 11


