6
5
How to use:
This product is for household use only.
GETTING STARTED
• Remove all packing material and any stickers.
• Remove and save literature.
• Please go to www.prodprotect.com/applica and
register your warranty.
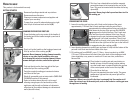
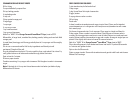
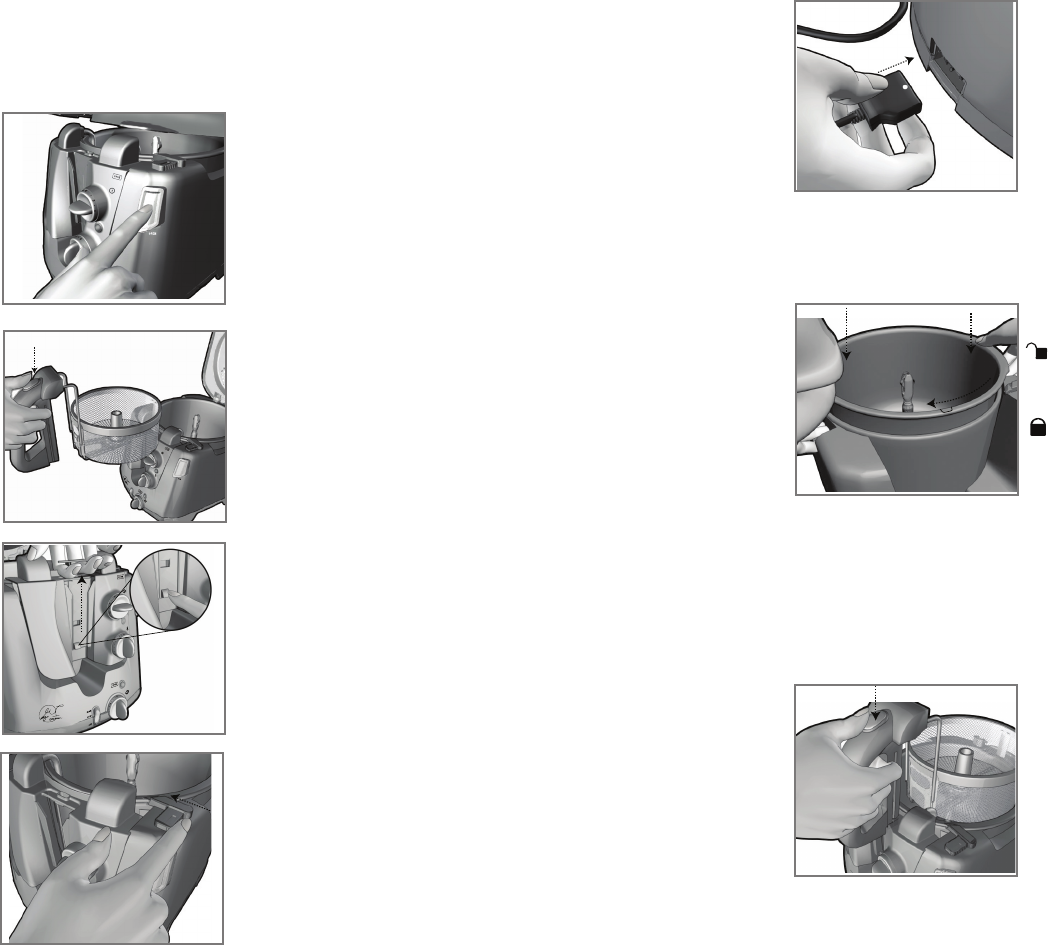
• To open fryer, press lid release button on top right
side of fryer to release latch on the lid (B).
CLEANING FRYER BEFORE FIRST USE
1. Press the button on the top center of the handle of
the basket and lift the basket straight up and out of
the fryer (C).
2. Firmly pull up the handle on the heating element and
lift it up and out of the cooking pot (D).
Important: Do not immerse heating element assembly
in water or any other liquid. In addition, take care
not to damage thin wires on heating element; if these
become damaged or broken, unit must be replaced.
3. Push out the tab on the front top right of the fryer
under the lip of the cooking pot (E).
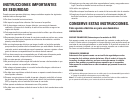
4. Twist the nonstick cooking pot counterclockwise
and lift out of the fryer.
5. Wash all removable parts as instructed in CARE AND
CLEANING section of this manual.
6. Select a location where this unit is to be used
allowing enough space for back and top of the
appliance and the wall and bottom of cabinets to
allow heat to flow without damage to cabinets and
walls (about 6 inches).
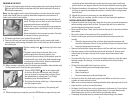
7. This fryer has a detachable cord with a magnetic
power attachment to be inserted to the rear of the
fryer. This must be inserted with the white dot facing
upward (F).
Important: Never plug in the fryer unless there is oil in
the cooking pot.
PREHEATING THE FRYER
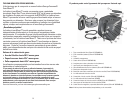
1. Lower the cooking pot into fryer with L hook on the bottom of the pot at
approximately 11 o’clock (the oil level markings inside the pot will be in
approximately the same position facing you) with the
small detent on the top of the pot over the UNLOCK
signage on the front of the fryer. The L hook must
drop into the slot on the bottom of the fryer. Once it
is engaged turn the pot clockwise toward the LOCK
signage until it is locked in position. (The oil level
markings will be directly in the center back of the fryer.)
Push the tab at the right front of the fryer to the left until
it is engaged under the cooking pot (G).
2. Insert heating element into cooking pot and lower it firmly into the bottom of the
pot until it sits flush into the front insert of the fryer.
3. Fill cooking pot from MIN (8²/
³
cups / 2.1 liters – do not use less) up to MAX
(11¾ cups / 2.8 liters do not use more) line at the back of the cooking pot with
clean vegetable, corn, peanut or canola oil. Do not use olive, sunflower or
flavored oils.
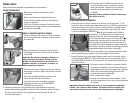
4. Place basket in cooking pot and press button on
handle to lower it into its resting position making
sure the handle area is centered within the grooves
of the control panel on the front of the fryer (H).
5. Close the lid on the fryer.
6. Plug unit into standard electrical outlet. The green
temperature light and the red power light will be
illuminated.
Important: When in use, the oil in the fryer is extremely hot. Use caution at all
times. Do not touch any of the metal parts, such as the basket or cooking pot once
the appliance is heating.
B
C
D
E
F
G
H


