


9
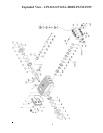
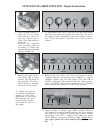
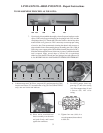
7. If previously disassembled thoroughly clean all exposed surfaces on the
spacer (29E) and all exposed threads on the plunger bolt (29C) and the
steel plunger base (25). Threads MUST be free of old loc-tite and any other
material such as oil, grease, etc. This is necessary to ensure proper curing
of new loc-tite. Giant recommends cleaning the threads with acetone or
other suitable cleaner. Reassemble plunger assembly parts (29A, 29B, &
29E) using a new copper gasket (29D) and the cleaned plunger bolt (29C).
Slide the bolt through the center of the four (4) pieces so that the threaded
end is exposed. Apply several drops of loc-tite 243 (or equivalent)
adhesive to the threads. Thread into steel plunger base and tighten to 26
ft.-lbs. BE CERTAIN ALL PARTS ARE CENTERED WITH THE BOLT!
TO REASSEMBLE PROCEED AS FOLLOWS:
29E 29A 29B 29D 29C
LP122A/LP122A-4000/LP123/LP255 - Repair Instructions
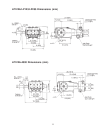
8. Lubricate weep seal (36). Place, weep seal (36), and pressure ring (36A)
into the seal sleeve (35). Assemble the o-ring (35A and 35B for LP255
only) onto seal sleeve and lubricate.
9. For LP255 pumps, insert sup-
port ring (37) into valve casing
(43). Place support ring (41) and
v-sleeves (40) into valve
casing.
36A 36 35 35A 35B (LP255 only) 39
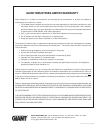
10. Place entire manifold/seal
sleeve assembly over the studs
and push firmly until seated
against the crankcase.
11. Tighten hex nuts (49A) in a
crosswise pattern (shown above)
to 60 ft.-lbs.
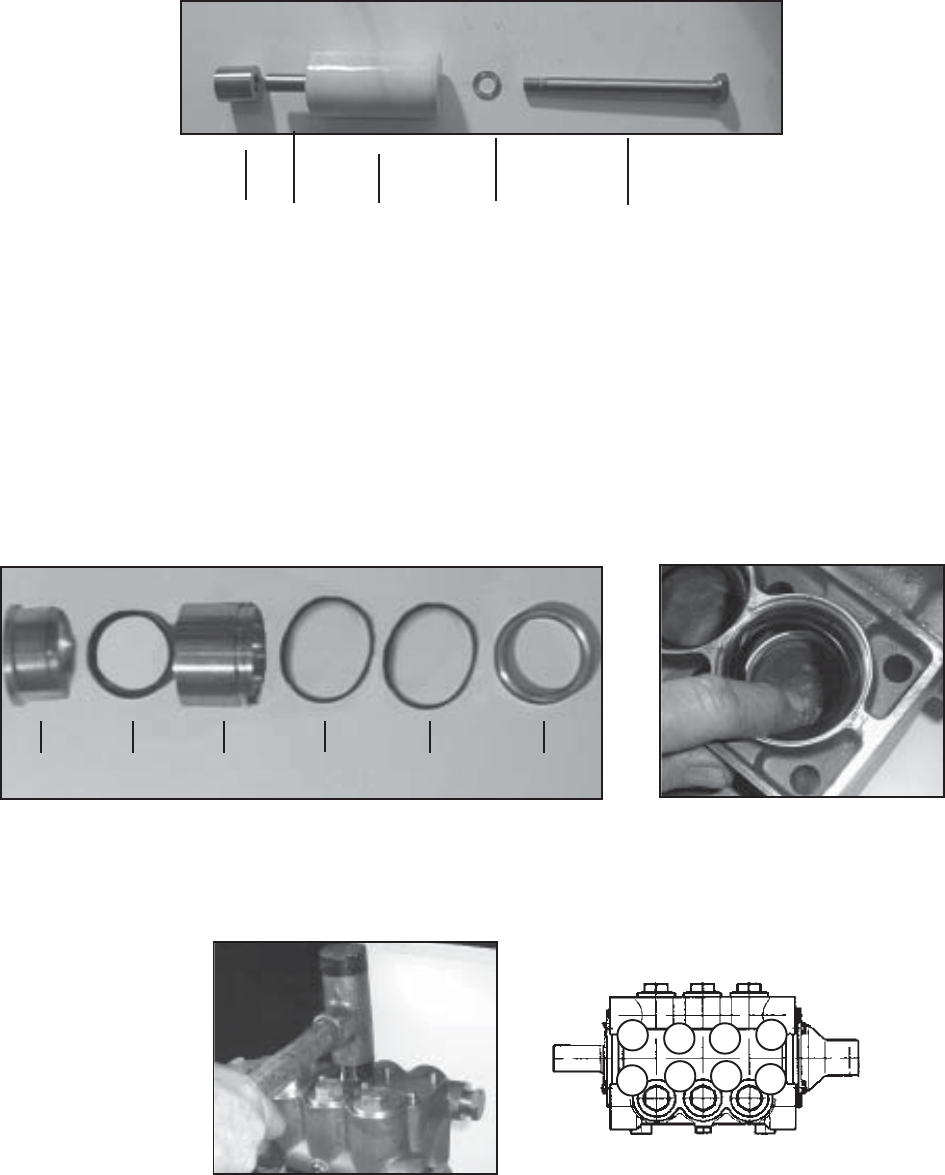
6
4 2
7
8
1
3
5