


Page 10 G & MG Series Granita Machine
Cleaning and Sanitizing Procedures (con’t)
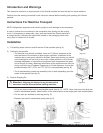
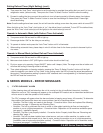
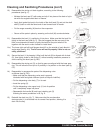
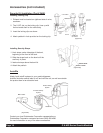
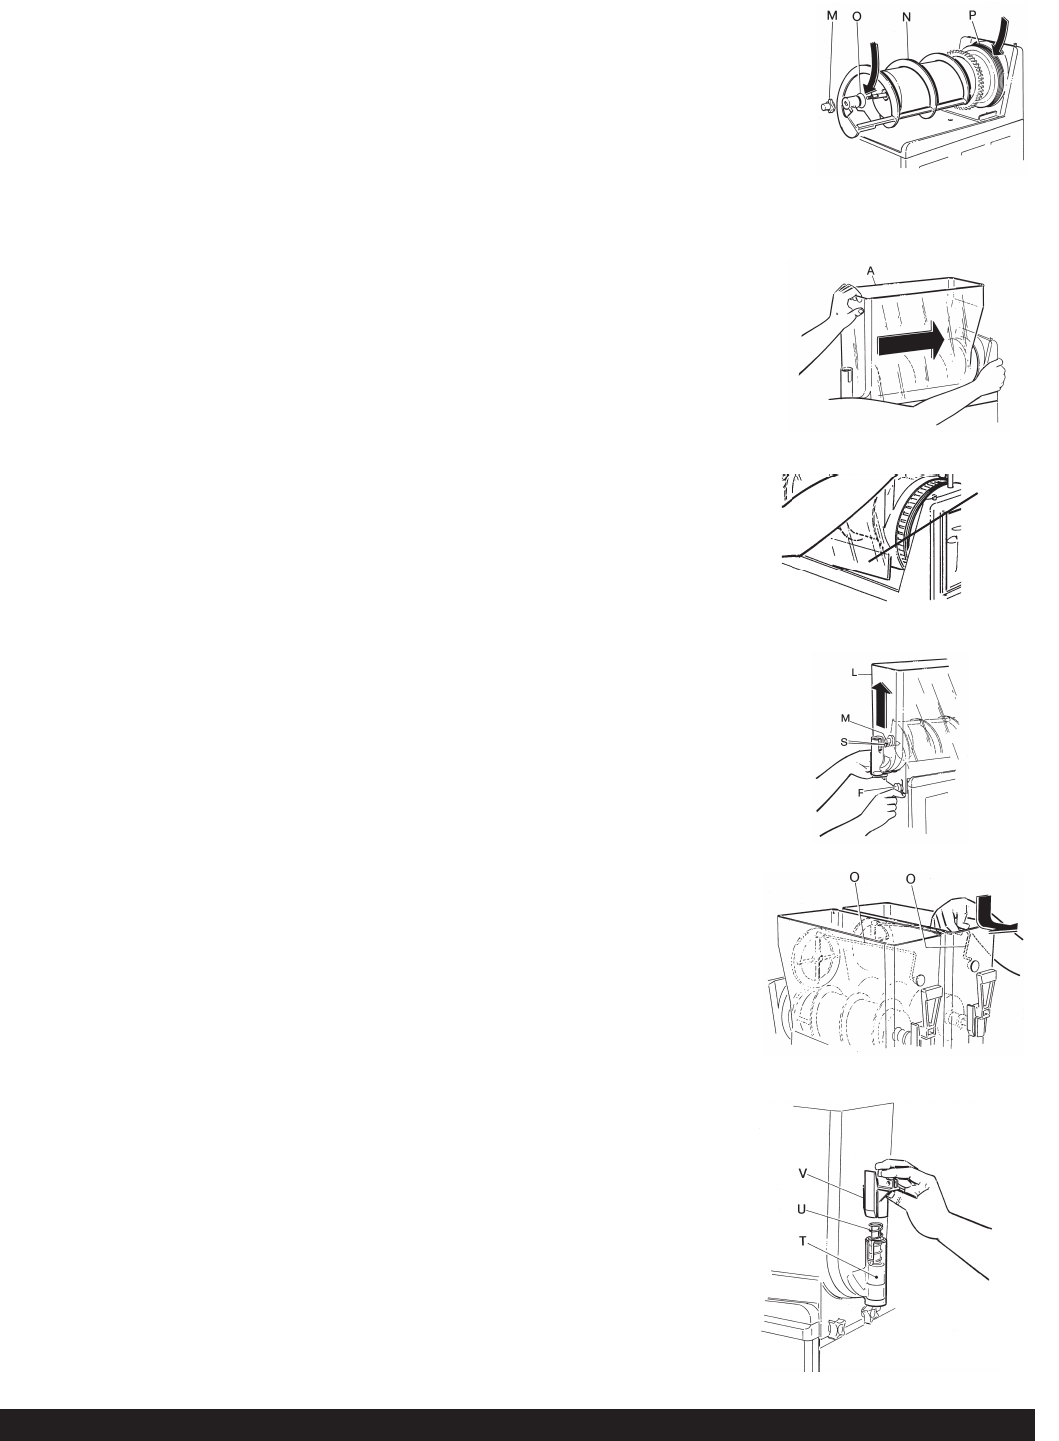
10.) Reassemble the mixing unit back together, according to the following
procedures (see fig. Y):
• Moisten the bowl seal (P) with water and slip it into place at the back of cylin-
der with ribs angled toward back of freezer.
• Apply food grade lubricant to the inside of the shaft seal (O) and put the shaft
seal (O) back on with the flared end of seal toward back of freezer.
• Put the auger assembly (N) back on the evaporator.
• Secure all the parts in place by screwing on the bolt (M) counterclockwise.
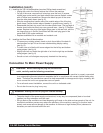
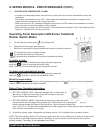
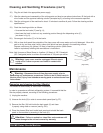
11.) Reassemble the bowl (L), positioning it into place. Make sure that the bowl fits
tightly to the bowl seal (see fig. Z). We also suggest that the rear part of the
bowl be moistened with water or lightly lubricated at the point where it fits
together with the seal to make it easier to install bowl.
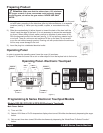
11a.) The lower right and left bowl flanges should fit on the outside of each black tri-
angle edge (see fig. AA). The lid cover will not fit properly if this is not cor-
rectly positioned.
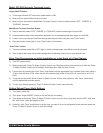
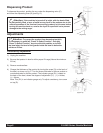
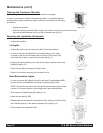
12.) Secure the bowl (L) by keeping it lifted until the bolt (M) is aligned with its hole
(S), then tightly screw on the knobs (F) without exerting excessive pressure to
avoid cracking the bowl (see fig. BB).
13.) Reassemble the mixing rod (O) so that its gears are aligned with the lower gear
ring. This will allow the front pin to fit perfectly in its position on the bowl (see fig.
CC).
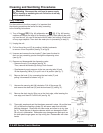
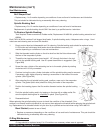
14.) Reassemble in sequence the parts of the dispensing valve
as follows (see fig. DD).
• Make sure that the dispensing valve seat is properly
lubricated with food-grade lubricant (such as Haynes Lubrifilm).
• Put the dispensing valve body (T) in its seat.
• Insert the spring (U).
• Put the dispensing valve upper body (V) into its position
until it completely snaps into place.
• Reassemble the handle (B) and insert retaining pin (G)
following the same procedures in #5, fig. S.
15.) Reinstall the drain tray (fig. T). Make sure that the condensation
drainage tube (J) is reinserted into its correct fixed position, allowing it to
drain into the tray.
(Figure BB)
(Figure CC)
(Figure AA)
(Figure DD)
(Figure Z)
Bowl outside
corner must be
over the white
plastic edge.
(Figure Y)