6
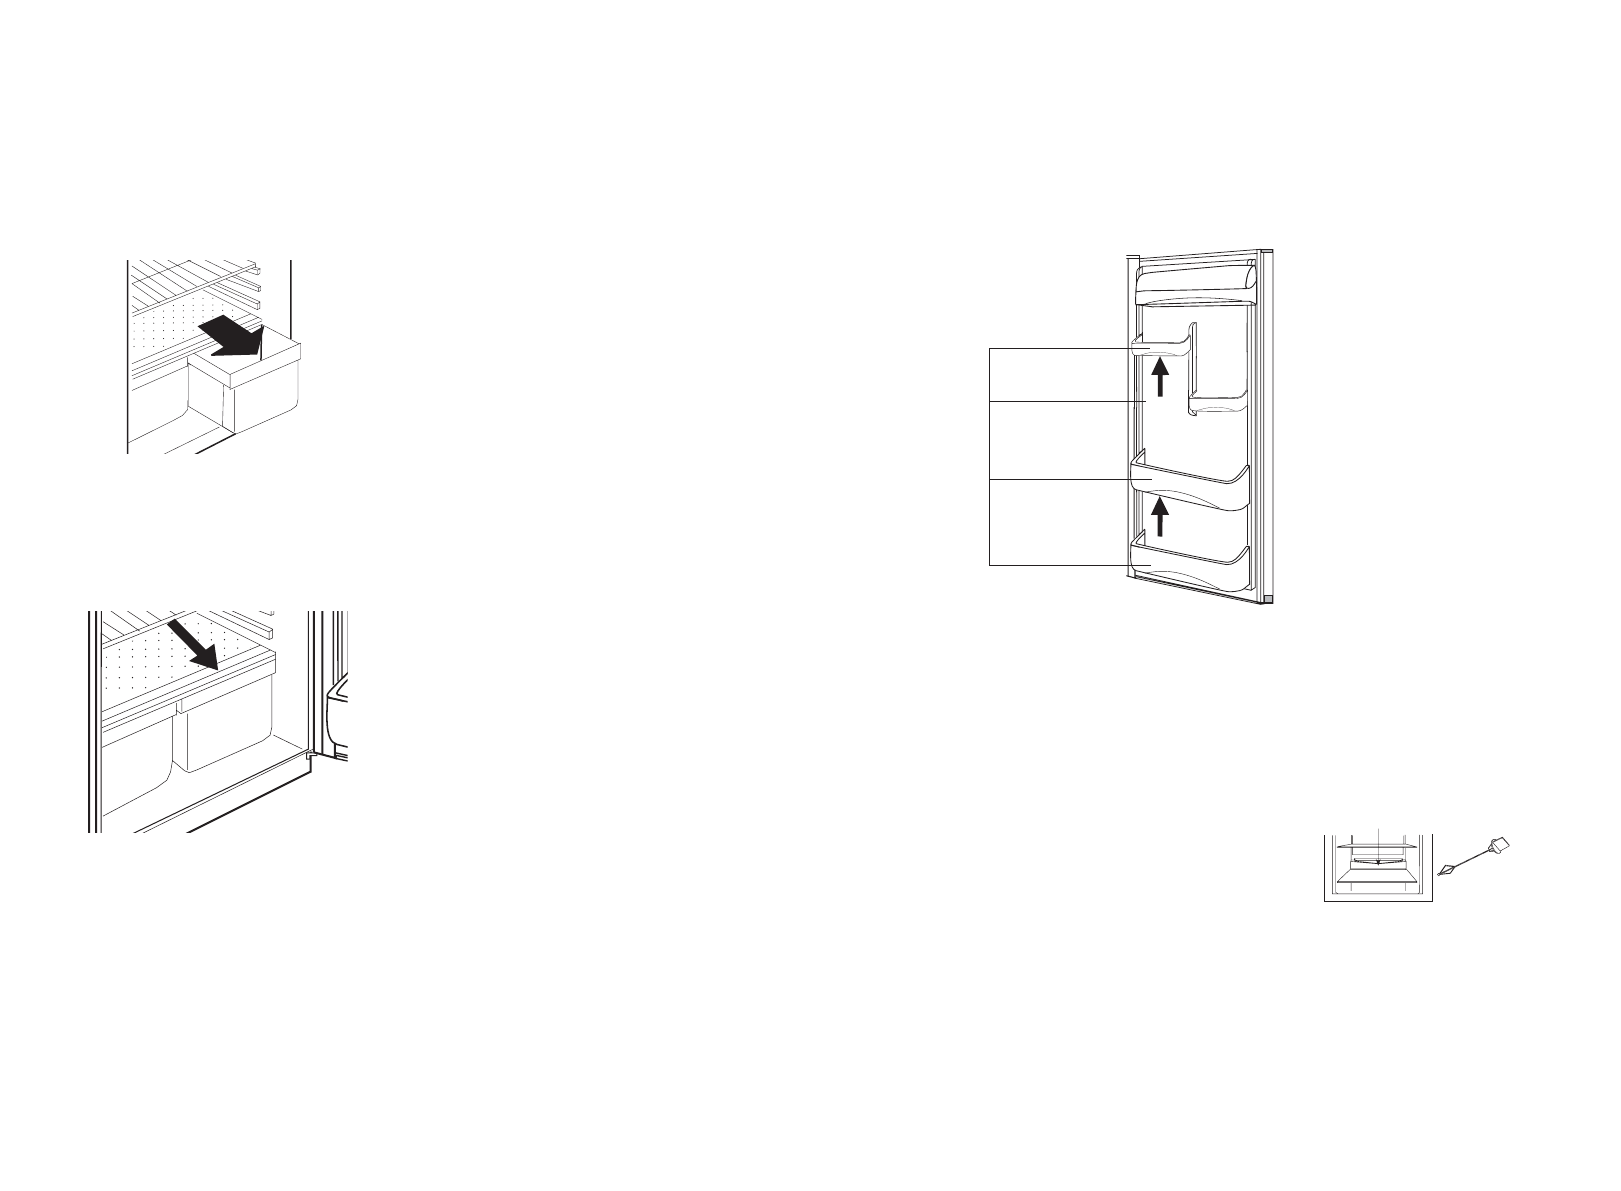
To remove and install the crisper: (see fig. # 2)
1. Grip the crisper firmly and slide out completely.
2. Replace the crisper by placing the crisper properly
and gently sliding it back into place.
To remove the crisper cover: (see fig. # 3)
1. First remove both crispers
2. Carefully grasp the crisper cover and slide out to remove.
To replace the crisper cover:
1. Insert the rear of the crisper cover into the support bracket on the side
walls of the refrigerator.
2. Slide the crisper cover into place.
3. Replace the crispers as previously instructed.
Crisper and Crisper Cover
fig. # 2
fig. # 3
.6.
To remove refrigerator door shelves: (see fig. # 5)
1. Remove all items stored on the shelf.
2. Gently push up each side until the shelf is clear of the door shelf
brackets and then remove.
To replace refrigerator door shelves: (see fig. # 4)
1. Align the ends of the shelves with the door shelf brackets.
2. Carefully push down on each end of the door shelf until it is locked in
place in the refrigerator door brackets.
Refrigerator Door Shelves
door shelves
fig. # 4
Defrosting the cold storage com-
partment
The cold storage compartment is designed
for automatic defrosting. Frost formed on the
back wall will melt and flow via the drain-
pipe to the evaporating container over the
compressor on the back of the refrigerator,
where the heat generated by the compressor
will evaporate the water.(see fig. #5)
Caution: Always keep the drain over the vegetable and fruit tray clear to
ensure the normal flow of defrosted water. Use the rod provided to clear
any blockages.
fig. # 5
cleaning rod
Water outlet
.7.
