5
How to Assemble and Use
IMPORTANT: Your blender jar and cutting blades are
subject to wear during normal use. Always inspect jar for
nicks, chips or cracks. Always inspect cutting blades for
broken, cracked or loose blades. If jar or cutting blades
are damaged, do not use. Contact our toll-free customer
service number for replacement parts.
1. Make sure blender is unplugged. Place blender base on
clean, dry surface to keep foreign particles from being
pulled up into motor during operation.
2. Set jar into place on blender base, making sure it is
securely seated by rotating jar counterclockwise into
locked position.
3. Put ingredients in jar, place processing lid on jar.
4. Plug cord into outlet.
5. Process food or beverages. Place hand on processing
lid when blending liquids. Press Pulse Switch as needed
to process foods. Hold the Pulse Switch for blender to
operate continuously.
6. ALWAYS turn blender off and wait until blades have
stopped rotating before removing jar.
7. To remove jar after blending is complete, turn jar
clockwise and lift the jar straight up.
8. ALWAYS remove jar from base before drinking from jar.
Replace processing lid with drinking lid before drinking
from jar.
9. NEVER replace jar onto unit while motor is running.
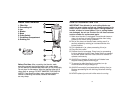
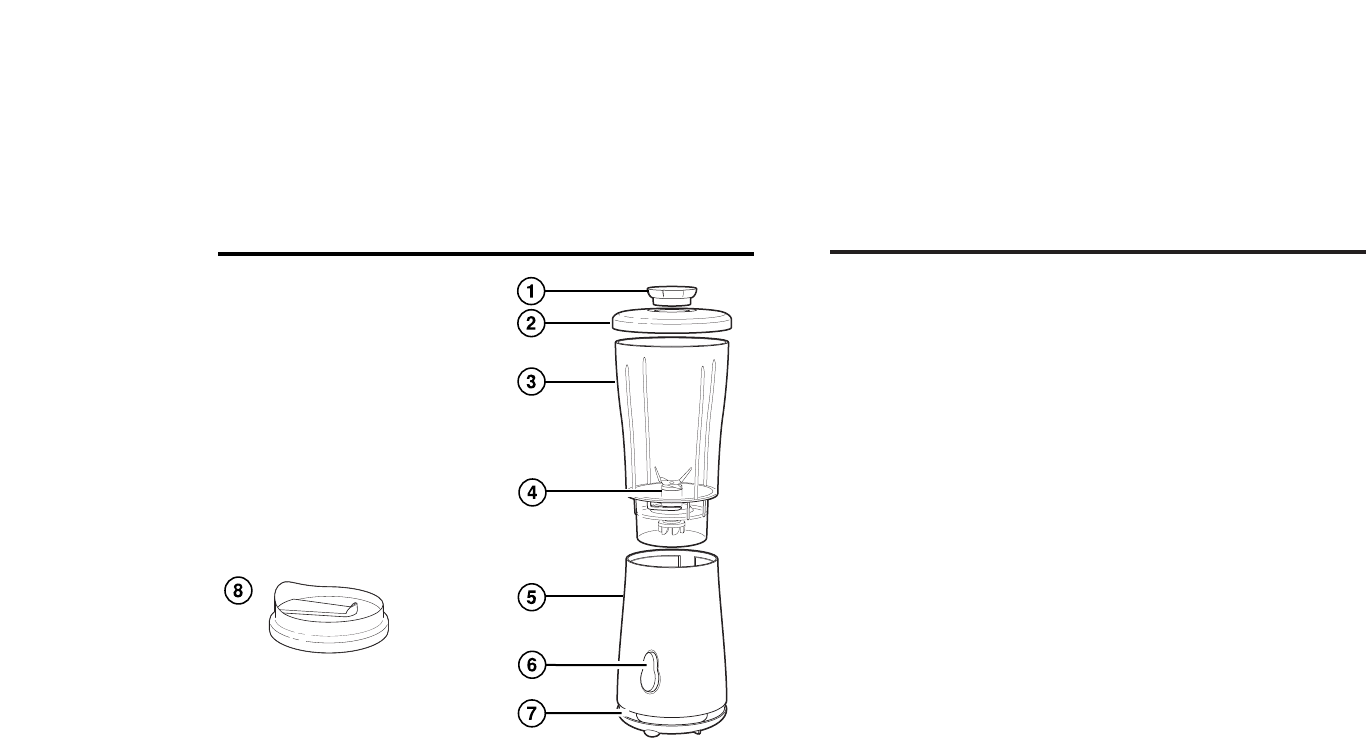
Know Your Blender
1. Filler-Cap
2. Processing Lid
3. Jar
4. Blades
5. Base
6. Pulse Switch
7. Cord Wrap Compartment
8. Drinking Lid
Before First Use: After unpacking the blender, wash
everything except the blender base in hot, soapy water.
Do not attempt to disassemble blade from jar. Dry thoroughly.
Do not place in dishwasher. Wipe the blender base with a
damp cloth or sponge. DO NOT IMMERSE THE BASE IN
WATER. Care should be taken when cleaning inside the
blender or handling the blades, because the blades
are very sharp.
4


