


5
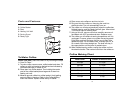
Parts and Features
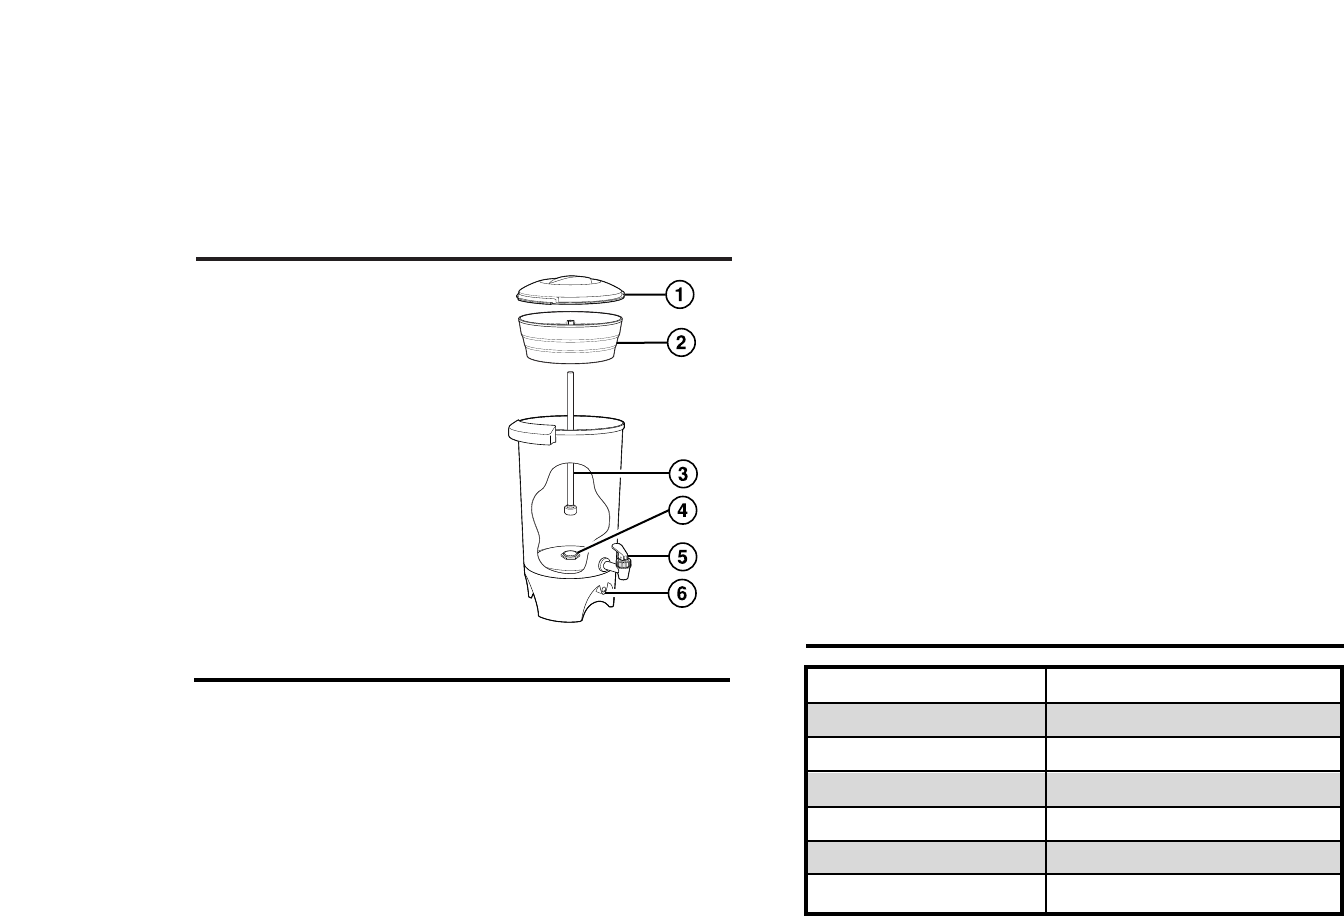
1. Cover
2. Coffee Basket
3. Stem
4. Heating Unit Well
5. Serving Spout
6. Ready Light
4
4. Place cover onto coffee urn and turn to lock.
5. Plug cord into the coffee urn then plug the cord into
electrical outlet. The unit automatically turns on.
6. The coffee urn will stop automatically when the coffee has
finished brewing, and the Ready light will glow. Allow about
1 minute per cup for brewing time.
7. Using a hot mitt, remove cover then carefully remove cof-
fee basket with HOT grounds and stem. Replace cover.
8. The coffee urn will remain at serving temperature until it is
unplugged. To serve, place a cup under the serving spout.
Push down and hold the lever until the cup is filled, then
release the lever. For a constant flow, to empty the urn, or
fill a carafe, lift the lever straight up. The lever will stay in
the open position until the lever is pushed down.
9. When finished serving coffee, unplug the coffee urn from
the electrical outlet. Then remove cord from the coffee urn.
Before First Use: Clean the coffee urn by following the steps
in “How To Clean.”
1. To make coffee, remove cover, coffee basket and stem. Fill
coffee urn with cold water to desired level as indicated by
numbered servings on inside of urn.
2. Place stem into coffee basket. Then holding the center
post of the coffee basket place large end of stem into
heating unit well.
3. Measure ground coffee into coffee basket. Avoid getting
ground coffee in the stem. Refer to the Coffee Making
Chart that follows. Spread coffee evenly in basket.
Coffee Making Chart
To Make Coffee
Water Level
42 cups
36 cups
30 cups
24 cups
18 cups
12 cups
Amount of Ground Coffee
2
1
⁄2 cups
2
1
⁄4 cups
1
3
⁄
4 cups
1
1
⁄
2 cups
1 cup
3
⁄4 cup