


– 16 –
STARTUP WITH ELECTRONIC IGNITION (HGFD & HGFC(F) SERIES)
CAUTION: Before turning the burners on, the fry tank must be filled with liquid or melted
shortening.
1. Plug the power cord into an appropriate grounded receptacle and
turn the main gas valve on.
2. Fill the fry tank with shortening. If using solid shortening, the fryer
must be equipped with a melt cycle.
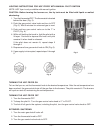
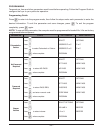
3. Open fryer cabinet door; turn the gas valve extension arm located
inside the cabinet door to OFF (Fig. 8). Wait 5 minutes for unburned
gas to vent.
4. Turn the gas valve extension arm to ON.
5. Press the power switch on.
6. If pilot fails to light within 90 seconds, the display will show IGNITION LOCKOUT. The key pad
becomes disabled and the alarm sounds. To restart, turn the fryer power switch OFF. Wait 5
minutes, then repeat steps 3 through 5 until the pilot lights. If the pilot fails to light after several
repeated attempts, contact your local Hobart Service office.
7. Thirty seconds after the pilot ignites, the fryer begins heating as programmed.
8. When the set temperature is reached, the burners shut off and the set temperature is displayed
in the window. The fryer then cycles on and off to maintain the set temperature.
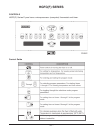
LIGHTING INSTRUCTIONS FOR MANUAL PILOT IGNITION (HGFD & HGFC(F) SERIES)
CAUTION: Before turning the burners on, the fry tank must be filled with liquid or melted
shortening.
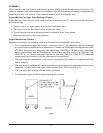
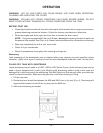
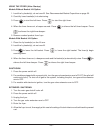
1. Turn the thermostat knob (located behind the door panel) to OFF
(Fig. 7).
2. Push the gas valve extension arm in and turn arm to OFF. Wait 5
minutes for unburned gas to vent.
3. Push gas valve extension arm in and turn to PILOT.
4. While still depressing the arm, light the pilot with a lit taper. Continue
with steps 2 through 4 until pilot remains lit when the extension arm
is released.
5. Push in and turn gas valve extension arm to ON.
6. Repeat steps 1 through 5 if gas supply is interrupted.
Fig. 7
Fig. 8