


– 7 –
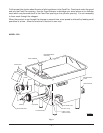
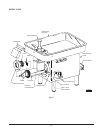
CLEANING (Fig. 3 or Fig. 4)
WARNING: DISCONNECT ELECTRICAL POWER SUPPLY AND PLACE A TAG AT THE DISCONNECT
SWITCH INDICATING THE CIRCUIT IS BEING WORKED ON BEFORE CLEANING, SERVICING OR
REMOVING PARTS.
The chopper should be thoroughly cleaned at the end of each day or any time it is not to be used for
an extended period of time.
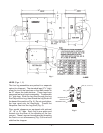
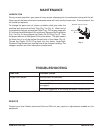
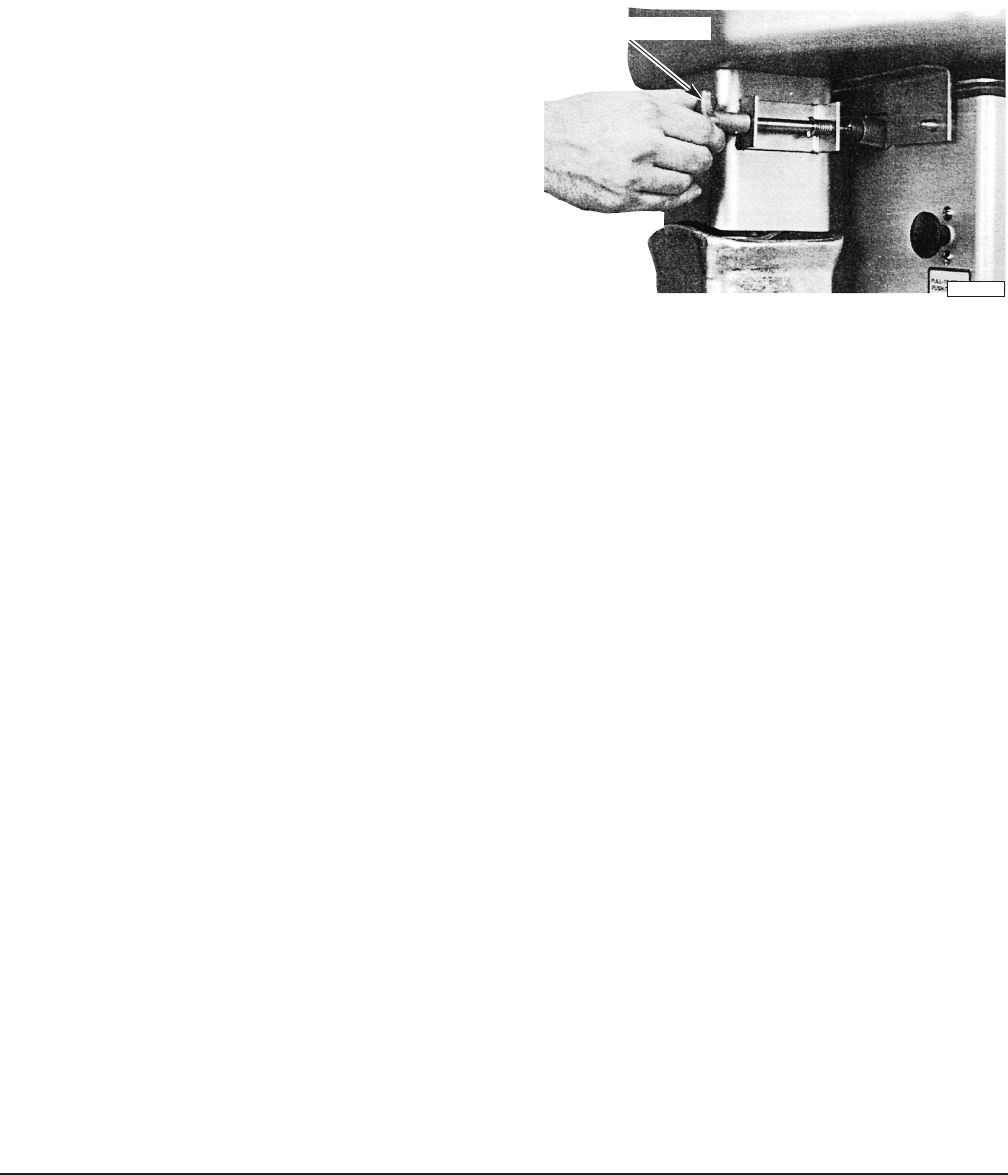
On model 4732A only, rotate the Feed Pan Lock
Knob counterclockwise to unlock the pan (Fig. 5).
Slide the Feed Pan toward the chopping attachment
until the pan is free of the alignment brackets. Lift
off the Feed Pan and take it to a sink for cleaning.
On model 4732, the Feed Pan is permanently
attached and must be cleaned in place.
Pull the Deflector straight up to remove it. Using the
spanner wrench, loosen the Adjusting Ring.
Unscrew and remove the Adjusting Ring with both
hands. Hook the spanner wrench around the Worm
stud and pull the Worm end out of the Cylinder.
Remove the Knife and Plate and then the Worm.
Place the removed parts in a sink for cleaning.
Using the spanner wrench, loosen but do not remove the cylinder nuts. With one hand on bottom of
Cylinder for support (it is heavy), turn the Cylinder clockwise and remove to a sink.
Thoroughly clean all removed parts in a sink using hot soapy water and sanitize them. Wipe machine
housing with a damp cloth.
Prior to reassembly, apply a light coating of tasteless mineral oil to the inside of the Cylinder, the threads
on the Cylinder and the Adjusting Ring, the Worm edges, the Knife and Plate and any other exposed
(non-plated) metal surfaces.
To reassemble the machine, first install the Cylinder by rotating it counterclockwise until the ears are
under the cylinder nuts. Tighten the cylinder nuts finger-tight.
Slide the Worm into the Cylinder and rotate it to engage the square shank with the attachment drive.
With the spanner wrench, tighten the cylinder nuts.
CAUTION: Do not over-tighten the cylinder nuts.
Install the Knife (cutting edges out) and the Plate. Screw the Adjusting Ring on hand-tight.
To install the Feed Pan (model 4732A only), slide the alignment bracket (on the bottom of the pan) onto
the alignment foot on the chopper housing. Make a visual check to make sure the Feed Pan is squarely
on top of the machine. Push the Feed Pan Locking Knob in and rotate it 90
o
clockwise.
Store the Feed Stomper as shown in Fig. 3 or Fig. 4.
PL-41632-1
FEED PAN LOCK KNOB
Fig. 5