


6
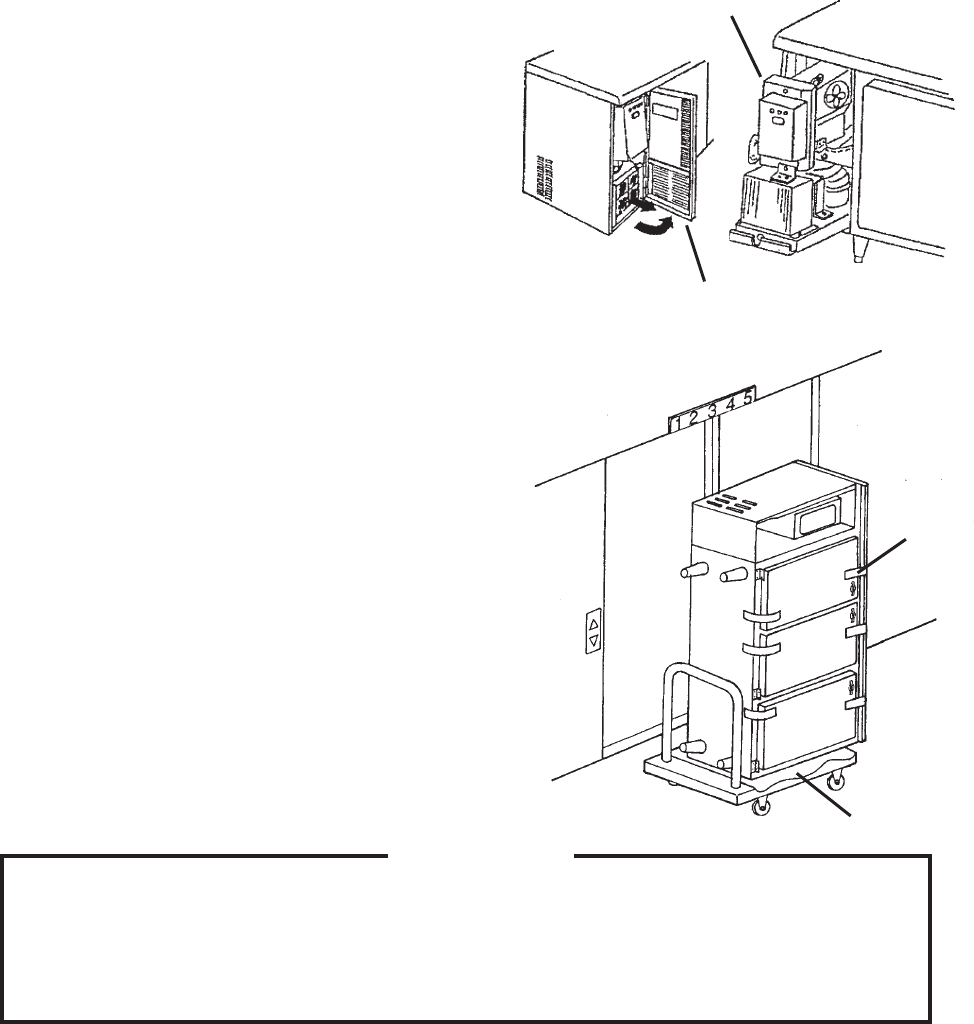
B. Opening and Removing the Front Panel
1) Grip outer edge of the front panel near the bottom and top and pull open approximately
1/2 inch (13 mm) until it is disengaged.
2) Swing the panel open completely and lift up approximately 1/2 inch (13 mm) to remove
completely.
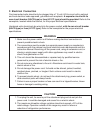
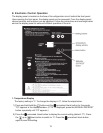
C. Moving the Unit in a Narrow Elevator or Hallway
Hoshizaki undercounter and worktop models have a cartridge type (removable) refrigeration
unit. When the space in an elevator or hallway is limited, the unit can be carried as follows:
1) Turn off the power supply, and unplug the unit.
2) Remove the front panel, then remove the
wire guard located below the display
panel.
3) Unhook the wiring connectors at the control
box, then remove the two hex-head M6
attachment nuts and the M5 bolt.
4) Very carefully slide out the refrigeration
unit. Support the evaporator as it clears the
evaporator case. Be careful not to damage
the refrigeration circuit tubing.
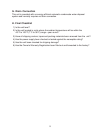
5) After taking out the refrigeration unit, secure the doors/drawers with tape.
Note: Remove all accessories from inside the cabinet.
6) Place the unit upright on a cart, and roll it
into the elevator.
7) Carry the unit to the installation site. Refit
the removed parts in the reverse order of
which they were removed.
Note:
• Before placing the unit upright on a
cart, lay a cloth on the cart to protect
the unit from damage.
• When standing or carrying the unit, be
sure to work in pairs.
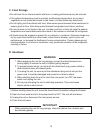
WARNING
The installation must be carried out by qualified personnel in accordance with
this Instruction Manual. Improper installation may cause water leak, electric
shock or fire. After the installation, make a trial run to check for proper operation
and instruct the user on how to use and maintain the unit according to the
Instruction Manual.
Cloth
Tape
Front Panel
Refrigeration Unit