


75
18) Check for water leaks.
19) Replace the panels in their correct positions.
0) Turn on the power supply.
J. Adjustment of Water Regulating Valve (water-cooled model)
The water regulating valve (also called "water regulator") is factory set, and generally no
adjustment is required. However, when necessary, adjust the water regulator using the
following procedures.
1) Prepare a thermometer to check the condenser drain temperature. Attach a pressure
gauge to the high-side line of the system.
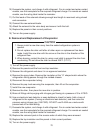
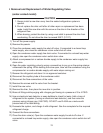
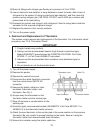
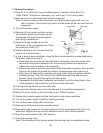
) Five minutes after a freeze cycle starts,
conrm that the thermometer reads 104°F
to 115°F (40°C to 46°C). If it does not,
rotate the adjustment screw by using a at
blade screwdriver until the temperature
is in the proper range. See Fig. . Next,
check that the reference pressure is in the
range indicated in the Head Pressure table
in the Performance Data section. If it is not
in the proper range, verify the refrigerant
charge.
3) Check that the condenser drain temperature is stable.
K. Removal and Replacement of Headmaster (Condensing Pressure
Regulator - C.P.R.) (remote air-cooled model)
CAUTION
1. Always install a new drier every time the sealed refrigeration system is
opened.
. Do not replace the drier until after all other repair or replacement has been
made. Install the new drier with the arrow on the drier in the direction of the
refrigerant ow.
3. When brazing, protect the headmaster and drier by using wet cloths to
prevent the headmaster and drier from overheating. Do not allow the
headmaster or drier to exceed 50°F (11°C).
1) Turn off the power supply.
) Remove the panels from the remote condenser unit.
3) Recover the refrigerant and store it in an approved container.
4) Before heating, break off the stub on the dome to release the dome charge.
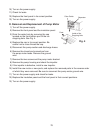
5) Disconnect the headmaster.
6) Place the new headmaster in position.
7) Remove the drier, then place the new drier in position.
Fig. 2
Adjustment Screw
CW – Higher
CCW – Lower
Top View