


17
If a Hoshizaki B-1300, B-1500, B-1650, or non-Hoshizaki storage bin is used:
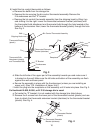
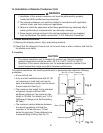
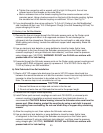
g. Remove the 2 screws securing the thermostat bulb attachment (plastic) to the
thermostatextensionbracket(stainless).Usethe2screwstoattachthe"Z"bracket
(plastic) to the thermostat extension bracket (stainless).
h. Use the two 4×10 stainless steel screws in the accessory bag to attach the
thermostatbulbattachment(withattachedthermostatbulb)tothe"Z"bracket.
i. Remove the 2 screws from the lower part of the thermostat bracket (plastic) and use
them to attach the thermostat extension bracket (stainless) to the thermostat bracket
(plastic). See Fig. 5.
7) Replace the panels and baffle in their correct positions (unless you are installing an
upperunit).(See"E.InstallationofUpperUnit").
Note: The bin control thermostat must be checked for proper operation at startup.
E. Installation of Upper Unit
1)See"II.D.Setup"forthelowerunitinstallation.
2) Remove the top panel and the top
insulation of the lower unit. These pieces
must be removed when installing an upper
unit.
3) Unpack the upper unit, and remove
the shipping carton, tape, and packing
material.
4) Remove the panels of the upper unit.
5) Stack the upper unit on top of the lower
unit.
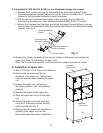
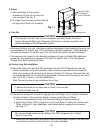
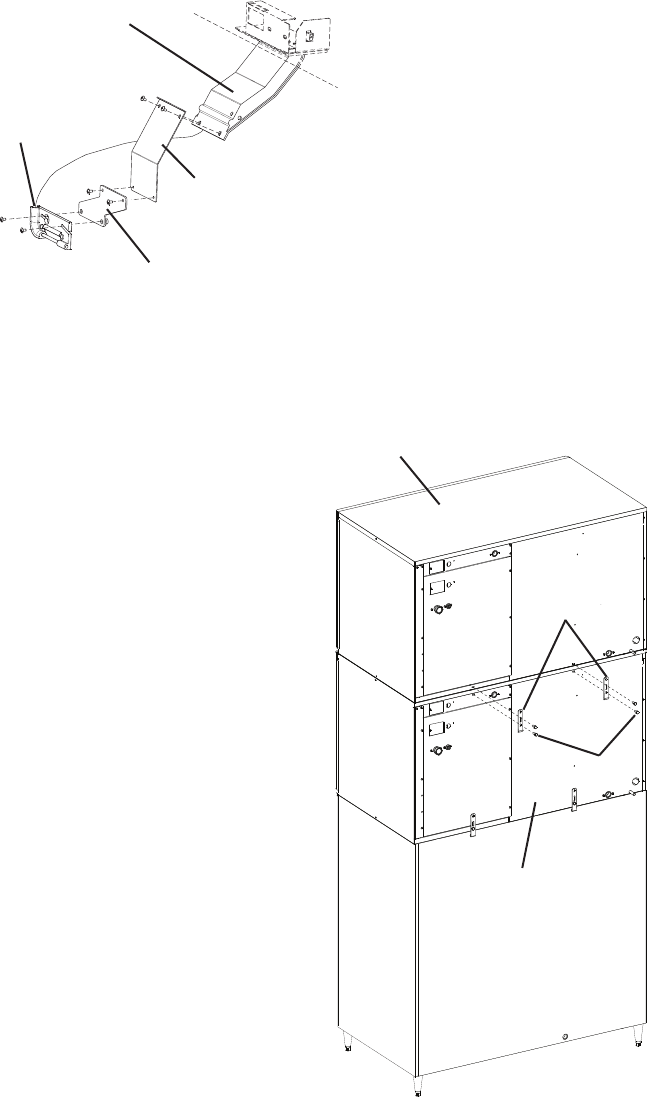
6) Secure the upper unit to the lower unit
using the 2 mounting brackets and the
bolts provided. See Fig. 6.
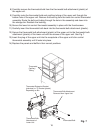
7) Remove the thermostat bulb attachment
(plastic) of the upper unit from the
thermostat extension bracket (stainless).
Thermostat Bracket
(plastic)
Thermostat Bulb
Attachment (plastic)
"Z"Bracket(plastic)
Thermostat Extension
Bracket (stainless)
Fig. 5
Fig. 6
Icemaker
(Upper Unit)
Mounting
Brackets
Bin
Icemaker
(Lower Unit)
Bolts