


45
7) Remove the screws and the valve from the bracket.
8) Install the new valve.
9) Remove the drier, then place the new drier in position.
10) Braze all fittings while purging with nitrogen gas flowing at a pressure of 3 to 4 PSIG.
11) Check for leaks using nitrogen gas (140 PSIG) and soap bubbles.
12) Evacuate the system, and charge it with refrigerant. See the nameplate for the required
refrigerant charge.
13) Connect the flare-connections.
14) Open the water supply line shut-off valve.
15) Check for water leaks.
16) Replace the panels in their correct positions.
17) Turn on the power supply.
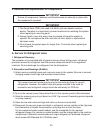
I. Adjustment of Water Regulating Valve - Water-Cooled Model Only
The water regulating valve (also called "water regulator") is factory-adjusted. No adjustment
is required under normal use. Adjust the water regulator, if necessary, using the following
procedures.
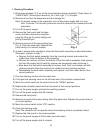
1) Prepare a thermometer to check the condenser drain temperature. Attach a pressure
gauge to the high-side line of the system.
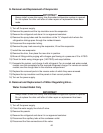
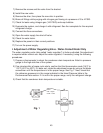
2) Five minutes after a freeze cycle starts, confirm that the thermometer reads 104°F to
115°F (40°C to 46°C). If it does not, rotate the adjustment screw by using a flat blade
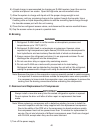
screwdriver until the temperature is in the proper range. See Fig. 1. Next, check that
the reference pressure is in the range indicated in the Head Pressure table in the
Performance Data section. If it is not in the proper range, verify the refrigerant charge.
3) Check that the condenser drain temperature is stable.
Fig. 1
Adjustment
Screw
CW – Higher
CCW – Lower
Top View