


3
GB
Electrical connection
THE APPLIANCE MUST BE EARTHED
Install a standardised plug corresponding to the load indicated
on the appliance data plate (see Technical data table).
The appliance must be directly connected to the mains using
an omnipolar switch with a minimum contact opening of 3
mm installed between the appliance and the mains. The
switch must be suitable for the charge indicated and must
comply with current electrical regulations (the earthing wire
must not be interrupted by the switch). The supply cable
must be positioned so that it does not come into contact
with temperatures higher than 50°C at any point.
Before connecting the appliance to the power supply, make
sure that:
• The appliance is earthed and the plug is compliant with the law.
• The socket can withstand the maximum power of the
appliance, which is indicated by the data plate.
• The voltage is in the range between the values indicated
on the data plate.
• The socket is compatible with the plug of the appliance.
If the socket is incompatible with the plug, ask an
authorised technician to replace it. Do not use extension
cords or multiple sockets.
! Once the appliance has been installed, the power supply
cable and the electrical socket must be easily accessible.
! The cable must not be bent or compressed.
! The cable must be checked regularly and replaced by
authorised technicians only.
! The manufacturer declines any liability should these
safety measures not be observed.
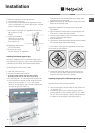
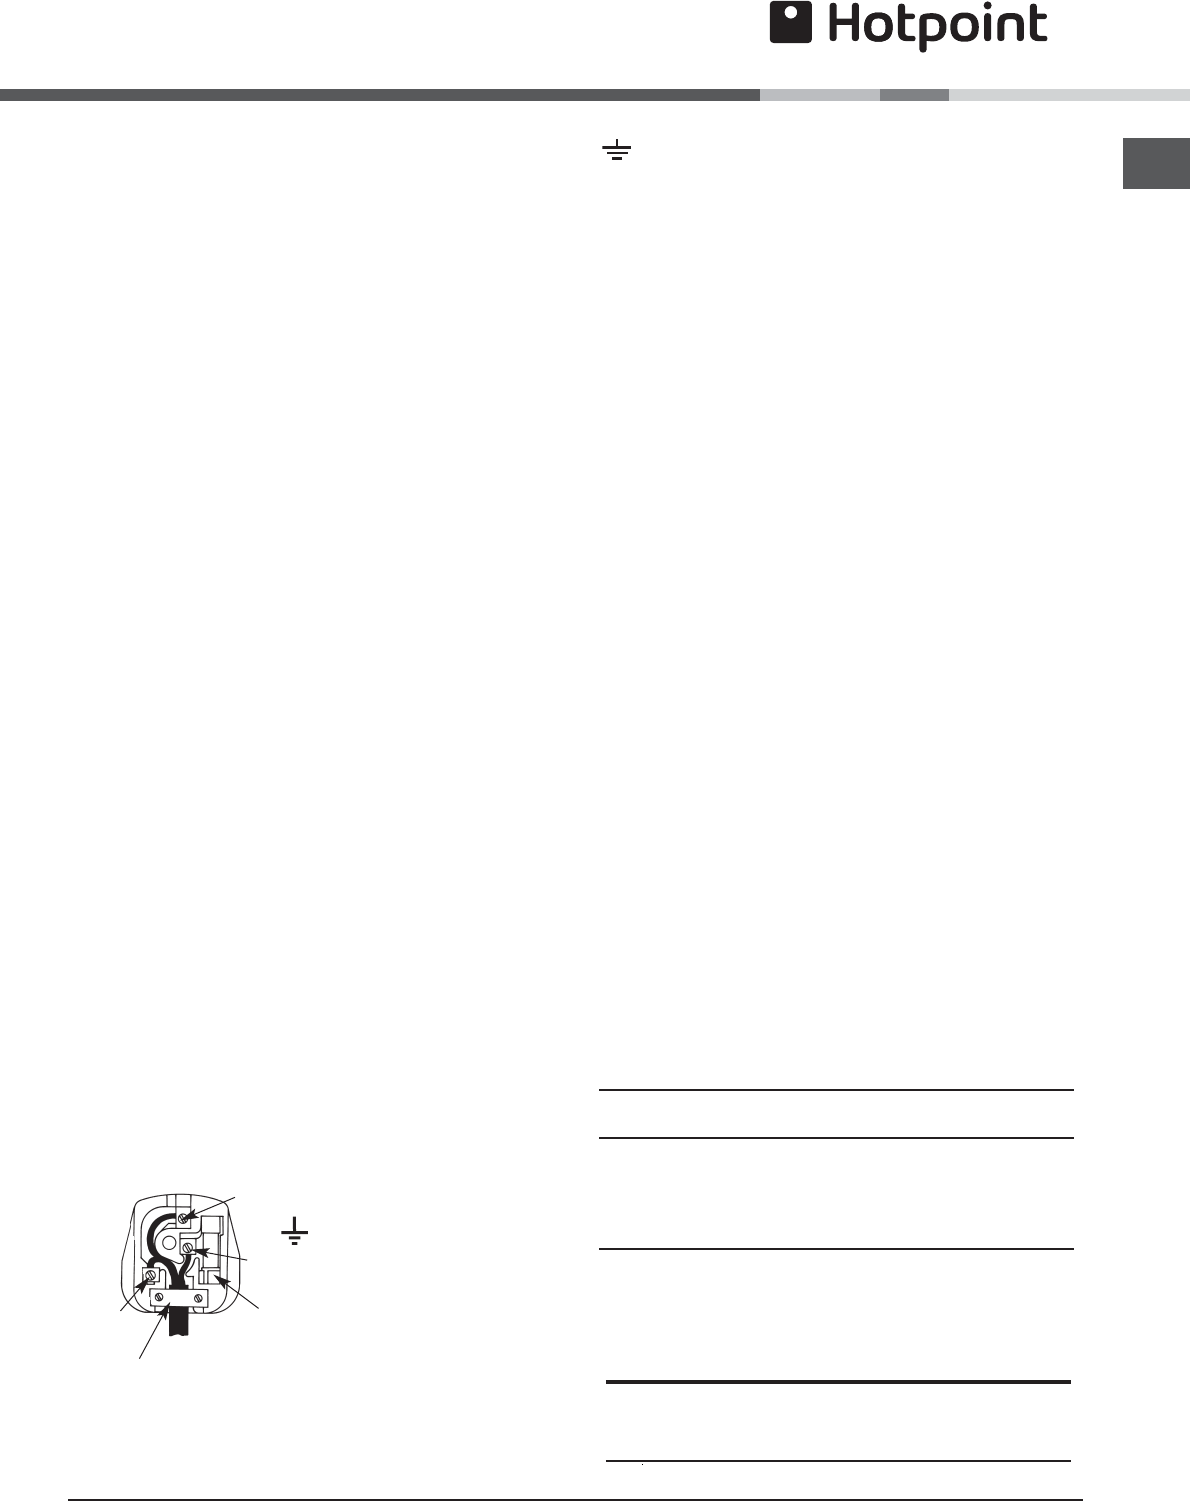
IF THE FITTED PLUG IS REMOVED
The exible mains lead must be correctly connected as
below to a three pin plug of not less than 13 amp capacity.
If a B.S. 1363 fused plug is used, it must be tted with a
fuse which is approved to B.S. 1362.
Important: the wires in the mains lead are coloured in
accordance with the following code:
Green & Yellow - Earth
Blue - Neutral
Brown - Live
The power supply cable must be type H05VV-F
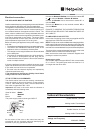
Green &
Yellow to
Earth
Brown
to Live
Blue to
Neutral
Cord
Clamp
3 Amp
Fuse
As the colours of the wires in the mains lead may not
correspond with the coloured markings identifying the
terminals in your plug, proceed as follows:
Connect the Green & Yellow wire to terminal marked “E”
or
or coloured Green or Green & Yellow.
Connect the Brown wire to the terminal marked “L” or
coloured Red.
Connect the Blue wire to the terminal marked “N” or
coloured Black.
FAILURE TO OBSERVE THE ACCIDENT-PREVENTION
REGULATIONS RELIEVES THE MANUFACTURER OF
ALL LIABILITY.
IF A MOULDED PLUG IS FITTED
In the event of replacing a fuse in the plug supplied an ASTA
approved fuse to BS1362 must be tted.
NOTE: The fuse cover must be retted when changing the fuse.
In the event of losing the fuse cover the plug must not be used
until a replacement fuse cover has been obtained and tted. A
new fuse cover can be obtained from your local Electricity Board.
The colour of the correct replacement fuse cover is that of the
coloured marks or inserts in the base of the plug.
Make sure that the cable does not become trapped when
pushing the cooker into position.
Replacing the cable
Use a rubber cable of the type H05VV-F with a cross section
of 3 x 1.5 mm². The yellow-green earth wire must be 2 ÷ 3
cm longer than the other wires.
Voltage and Frequency
220-240V~ 50 Hz
Technical Characteristics
Grill
heating mode: Conventional
Main Oven
Usable Volume: 41 Litres
heating mode: Conventional
Usable Volume: 19 Litres
/60