


11
GB
Maintenance and care
Switching the appliance off
Disconnect your appliance from the electricity supply
before carrying out any work on it.
Cleaning the appliance
The stainless-steel or enamel-coated external parts
as well as the rubber seals may be cleaned using a
sponge that has been soaked in lukewarm water
and neutral soap. If these stains are difficult to
remove, use only specialised products. After
cleaning, rinse and dry thoroughly. Do not use
abrasive powders or corrosive substances.
Ideally, the inside of the oven should be cleaned
after each use, when it is still lukewarm. Use hot
water and detergent, rinse and dry with a soft cloth.
Do not use abrasive products.
All accessories - with the exception of the sliding
racks - can be washed like everyday crockery, and
are even dishwasher safe.
Never use steam cleaners or pressure cleaners on
the appliance.
Cleaning the oven door
Clean the glass part of the oven door using a sponge
and a non-abrasive cleaning product, then dry
thoroughly with a soft cloth. Do not use rough abrasive
material or sharp metal scrapers as these could
scratch the surface and cause the glass to crack.
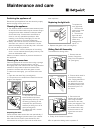
To clean more thoroughly, you can remove the oven
door.
1. Open the oven door fully (see diagram).
2. Lift up and turn the small levers located on the two
hinges (see diagram).
3. Grip the door on the two
external sides and close it
approximately half way. Unlock
the door by pressing on the
clamps F, then pull the door
towards you lifting it out of its
seat (see diagram).
To replace the door, reverse
this sequence.
Inspecting the seals
Check the door seals around the oven periodically. If
the seals are damaged, please contact your nearest
After-sales Service Centre (see Assistance). We
recommend not using the oven until the seals have
been replaced.
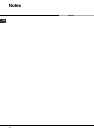
Replacing the light bulb
To replace the
oven light bulb:
1. Remove the
glass cover of the
lamp-holder.
2. Remove the
light bulb and
replace it with a
similar one:
Wattage 25 W,
cap E 14.
3. Replace the glass cover (see diagram).
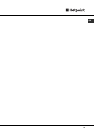
Sliding Rack Kit Assembly
To assemble the sliding racks:
1. Remove the two
frames, lifting them
away from the spacers
A (see figure).
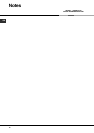
2. Choose which shelf to
use with the sliding
rack. Paying attention to
the direction in which
the sliding rack is to be
extracted, position joint
B and then joint C on
the frame.
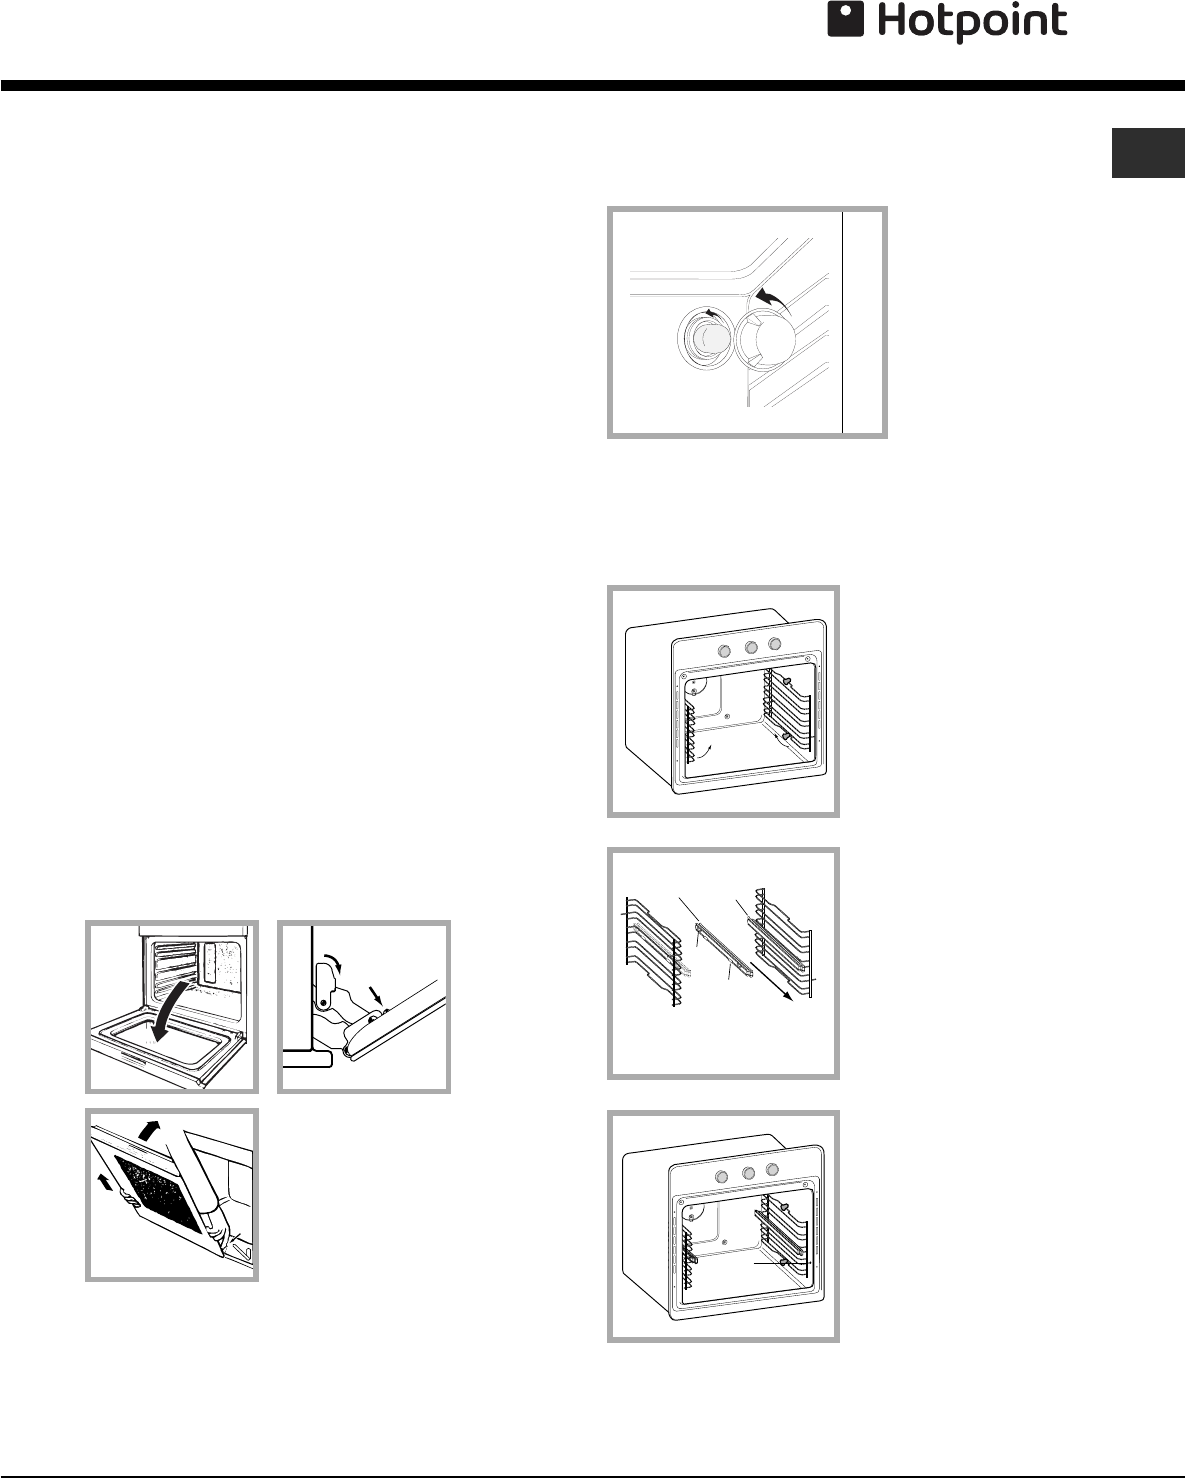
3. Secure the two
frames with the guide
rails using the holes
provided on the oven
walls (see diagram). The
holes for the left frame
are situated at the top,
while the holes for the
right frame are at the
bottom.
4. Finally, fit the frames on spacer A.
Do not place the sliding racks in position 5.
F
F
A
D
B
C
Left
guide rail
Right guide
rail
Direction
of extraction