


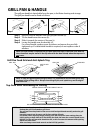
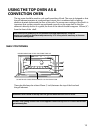
The grill pan handle is detachable from the pan, to facilitate cleaning and storage.
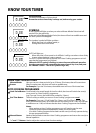
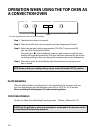
The grill pan handle can be fixed as follows:
Step 1 Remove screw & washers from the grill pan bracket (a).
Step 2 Tilt the handle over the recess (b).
Step 3 Slide it towards the centre of the pan (c).
Step 4 Locate the handle over the bracket (d).
For a fixed handle, replace screw & washers and ensure they are fully
tightened up. If a detachable handle is required, do not replace screw &
washers.
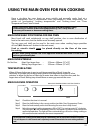
Grill Pan Food Grid and Anti-Splash Tray
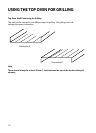
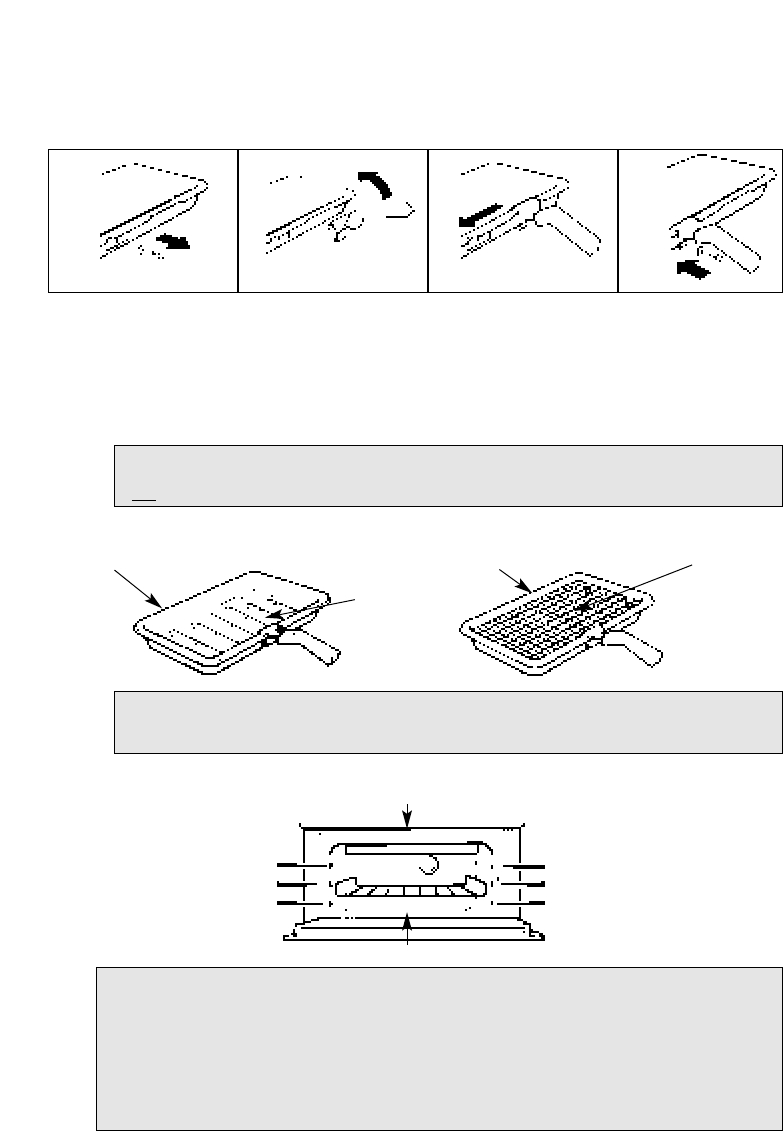
Top Oven Shelf Positioning for Grilling
GRILL PAN & HANDLE
15
Note: If a fixed handle is required, the grill pan cannot be kept in the main oven with the
door closed but may be stored in the top oven with the door closed, when the top oven is
not in use.
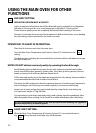
Note: To stop fat splashing onto the grill mesh, it is important to use the anti-splash tray
as shown in the grilling chart. Always clean the grill pan, anti-splash tray and food grid
after each use.
Step 1 Step 2 Step 3 Step 4
GRILL PANGRILL PAN
FOOD GRID
ANTI-SPLASH
TRAY
(a)
(b)
(c)
(d)
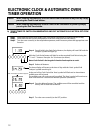
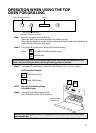
NOTE: Ensure oven timer is set to Manual.
Preheat the grill if indicated on grill chart.
The grill pan must be placed on the correct shelf and positioned centrally under the grill
element.
Leave the control at 6 for toast, and for fast cooking of foods.
For thicker foods requiring longer cooking, turn the switch to a lower setting after the
initial sealing on both sides at 6. The thicker the food, the lower the control should be set.
DO NOT line the grill pan with aluminium foil, as this increases the amount of fat spitting
which can cause a fire.
After use always return both controls to their OFF (0) position.
ENSURE SHELVES ARE FITTED CORRECT WAY UP.
DO NOT PLACE FOOD/UTENSILS DIRECTLY ON THE OVEN FLOOR
3
2
1
3
2
1