


8
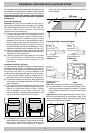
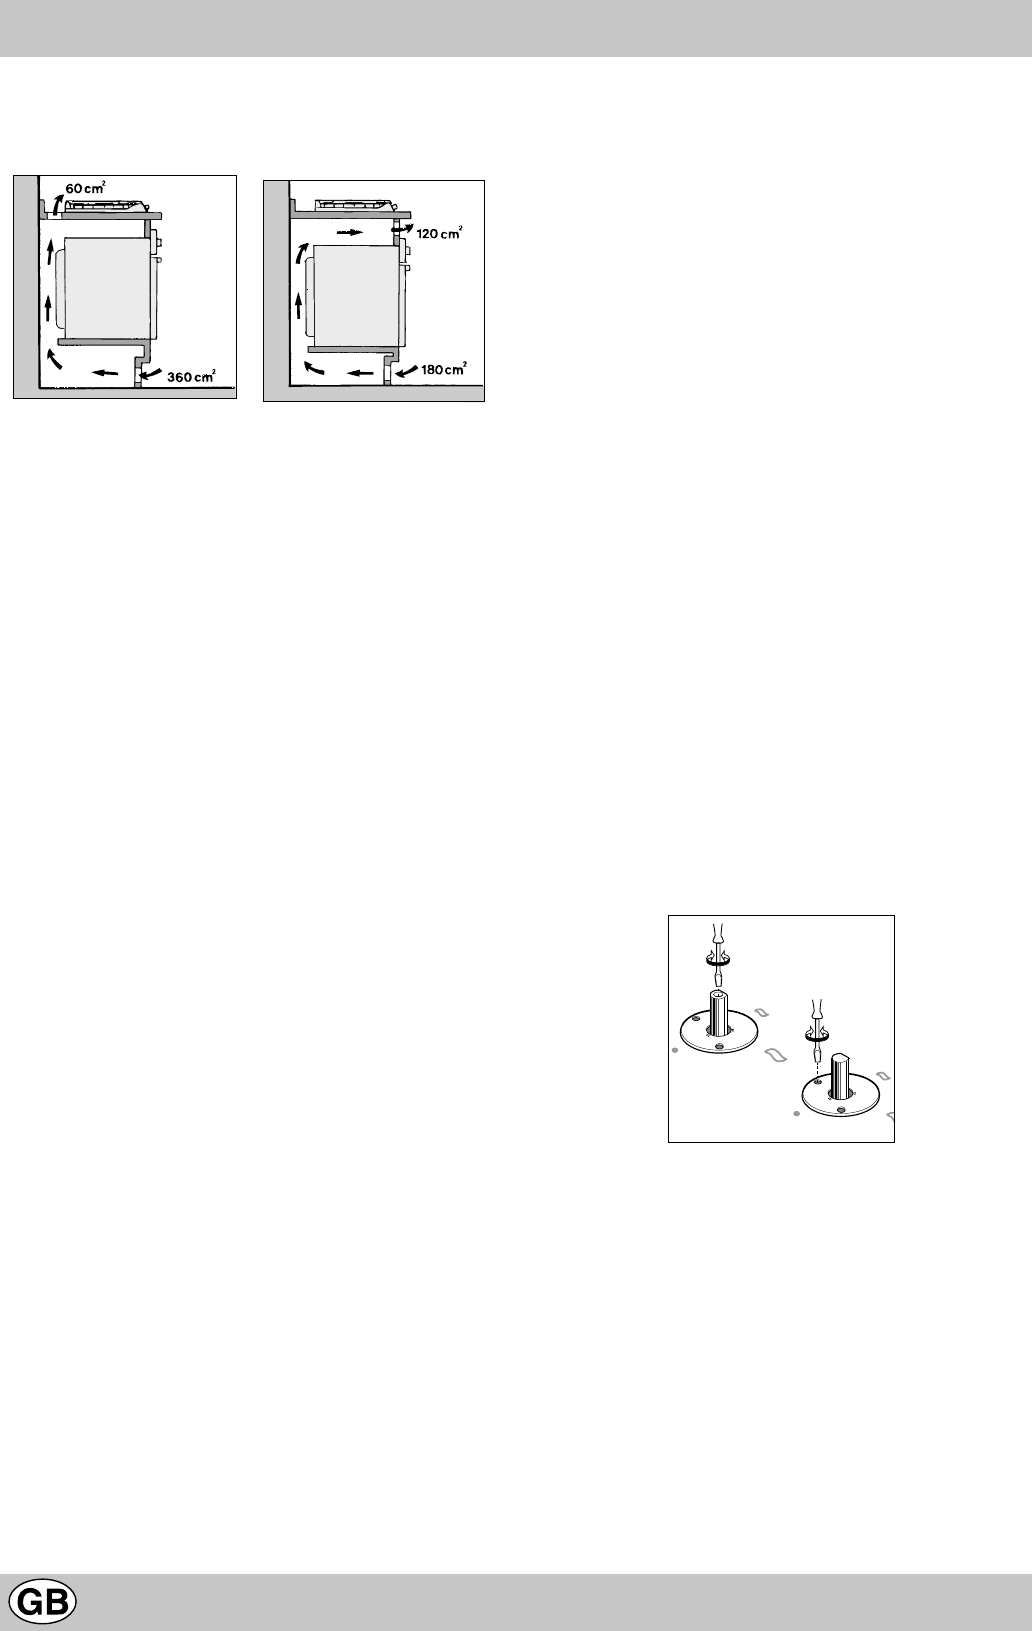
When installing the hob above a built-in oven without forced
ventilation, ensure that there are air inlets and outlets for
ventilating the interior of the cabinet adequately.
Gas Connection for Cooktop
The hob should be connected to the gas supply by an
authorized installer. During installation of this product it is
essential to fit an approved gas tap to isolate the supply
from the appliance for the convenience of any subsequent
removal or servicing. Connection of the appliance to the
gas mains or liquid gas tanks must be carried out
according to the safety standards currently in force, and
only after it is ascertained that it is suitable for the type of
gas to be used. If not, follow the instructions indicated in
the section entitled, “Adapting the hob for Different Types of
Gas”. If the hob is to be connected to tanks containing liquid
gas, use pressure regulators that comply with current safety
standards.
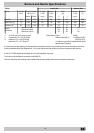
Important: To insure that the appliance operates safety,
the gas is regulated correctly and your appliance lasts
over time, make sure that gas pressure levels comply with
the indications given in Table 1, “Nozzle and Burner
Specifications”.
Gas Connection to Non-flexible Pipe
(copper or steel)
Connection to the gas source must be done in such a way
as to not create any stress points at any part of the
appliance.
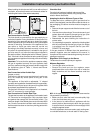
The appliance is fitted with an adjustable, "L" shaped
connector and a gasket for the attachment to the gas supply.
Should this connector have to be turned, the gasket must
be replaced (supplied with the appliance).
The gas feed connector to the appliance is a threaded,
male 1/2" connector for round gas pipe.
Gas Connection to Flexible Steel Pipe
The gas feed connector to the appliance is a threaded, male
1/2" connector for round gas pipe. Only use pipes, tubes
and gaskets that comply with current safety codes. The
maximum length of the flexible pipes must not exceed 2000
mm. Once the connection has been made, ensure that the
flexible metal tube does not touch any moving parts and is
not crushed.
Check the Seal
Once the hob has been installed, make sure all the
connections are properly sealed, using a soapy water
solution. Never use a flame.
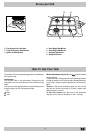
Adapting the Hob for Different Types of Gas
To adapt the hob to a different type of gas than that for
which it was designed, (see the sticker under the hob or on
the packaging), the burner nozzles must be changed, as
follows:
• Remove the pan supports and slide the burners out of
the hob.
• Unscrew the nozzles using a 7mm socket wrench and
replace them with those for the new type of gas. (See
Table 1, “Burner and Nozzle Specifications”).
• Reassemble the parts following the instructions in
reverse order.
• On completing the operation, replace the old rating label
with the one showing the new type of gas; the sticker
is available from our Hotpoint Service (see KEY
CONATCTS, back page).
If the gas pressure is different than that prescribed, a
pressure regulator must be installed at the source, in
compliance with national standards governing the use of
piped gas regulators.
Regulation of Air Supply to the Burner
The burners do not need a primary air regulator.
Minimum Regulation
• Turn the gas valve to minimum.
• Remove the knob and turn the regulator screw
(positioned either on the side of the top or inside the
shaft) clockwise until the flame becomes small but
regular.
N.B.: In the case of liquid gas, the regulation screw must be
fully screwed in (clockwise).
• Make sure that, when the knob is turned rapidly high
to low, the flame does not go out.
• In the event of a malfunction on appliances with the
security device (thermocouple) when the gas supply
is set at minimum, increase the minimum supply levels
using the regulator screw.
Once the adjustment has been made, apply sealing wax,
or a suitable substitute, to the old seals on the by-pass.
Installation Instructions for your built-in Hob