GB
5
PLEASE PHONE US TO REGISTER YOUR APPLIANCE AND ACTIVATE YOUR 5 YEAR PARTS GUARANTEE ON 08448 24 24 24
PLEASE PHONE US TO REGISTER YOUR APPLIANCE AND ACTIVATE YOUR 5 YEAR PARTS GUARANTEE ON 08448 24 24 24
Start-up and use
Starting the appliance
! Before starting the appliance, follow the installation
instructions (see Installation).
! Before connecting the appliance, clean the
compartments and accessories well with lukewarm water
and bicarbonate.
! The appliance comes with a motor protection control
system which makes the compressor start approximately
8 minutes after being switched on. The compressor also
starts each time the power supply is cut off whether
voluntarily or involuntarily (blackout).
1. Insert the plug into the socket and make sure that
the green POWER indicator light illuminates (the
TEMPERATURE ADJUSTMENT knob must be in the
OFF position).
2. Turn the TEMPERATURE ADJUSTMENT knob to an
average value and press the SUPER FREEZE button
(rapid freezing): the SUPER FREEZE indicator light
will illuminate. It will switch off once the freezer has
reached its optimal temperature. At this point food
may be placed inside the appliance.
Using the freezer to its full potential
• Use the TEMPERATURE CONTROL knob to adjust the
temperature.
MIN = warmest MAX = coldest
is the optimal temperature for energy saving levels.
We recommend, however, a medium position.
• Do not re-freeze food that is defrosting or that has
already been defrosted. These foods must be cooked
and eaten (within 24 hours).
• Fresh food that needs to be frozen must not come into
contact with food that has already been defrosted.
Fresh food must be stored in the FREEZER and
STORAGE compartment.
• Do not place glass bottles which contain liquids, and
which are corked or hermetically sealed in the freezer
because they could break.
• The maximum quantity of food that may be frozen daily is
indicated on the plate containing the technical properties
located within the freezer (for example: Kg/24h: 4).
• To freeze (if the freezer is already operating):
- for small quantities which are less than those
indicated on the data plate, press the rapid freezing
SUPER FREEZE button (corresponding indicator light
illuminates), insert the food and close the door.
The function is disabled automatically after 24 hours
or when optimal temperatures have been reached
(indicator light goes out);
- for large quantities which are greater than the
maximum load indicated on the data plate, hold down
the rapid freezing SUPER FREEZE button until the
corresponding indicator light begins to flash. After 24
hours the indicator light stops flashing and remains on
constantly. Place the food inside the freezer and close
the door. After another 24 hours, the function will be
disabled automatically (indicator light goes out).
• In order to obtain a greater amount of space in
the freezer compartment, you may remove the
bins (except the lowest bin and the special COOL
CARE ZONE bin (if exists), which has an adjustable
temperature) and place the food directly onto the
supplied rack.
! Do not open the door during freezing.
! If there is a power cut or malfunction, do not open the
freezer door. This will help maintain the temperature
inside the freezer, ensuring that foods are conserved
for at least 9 -14 hours.
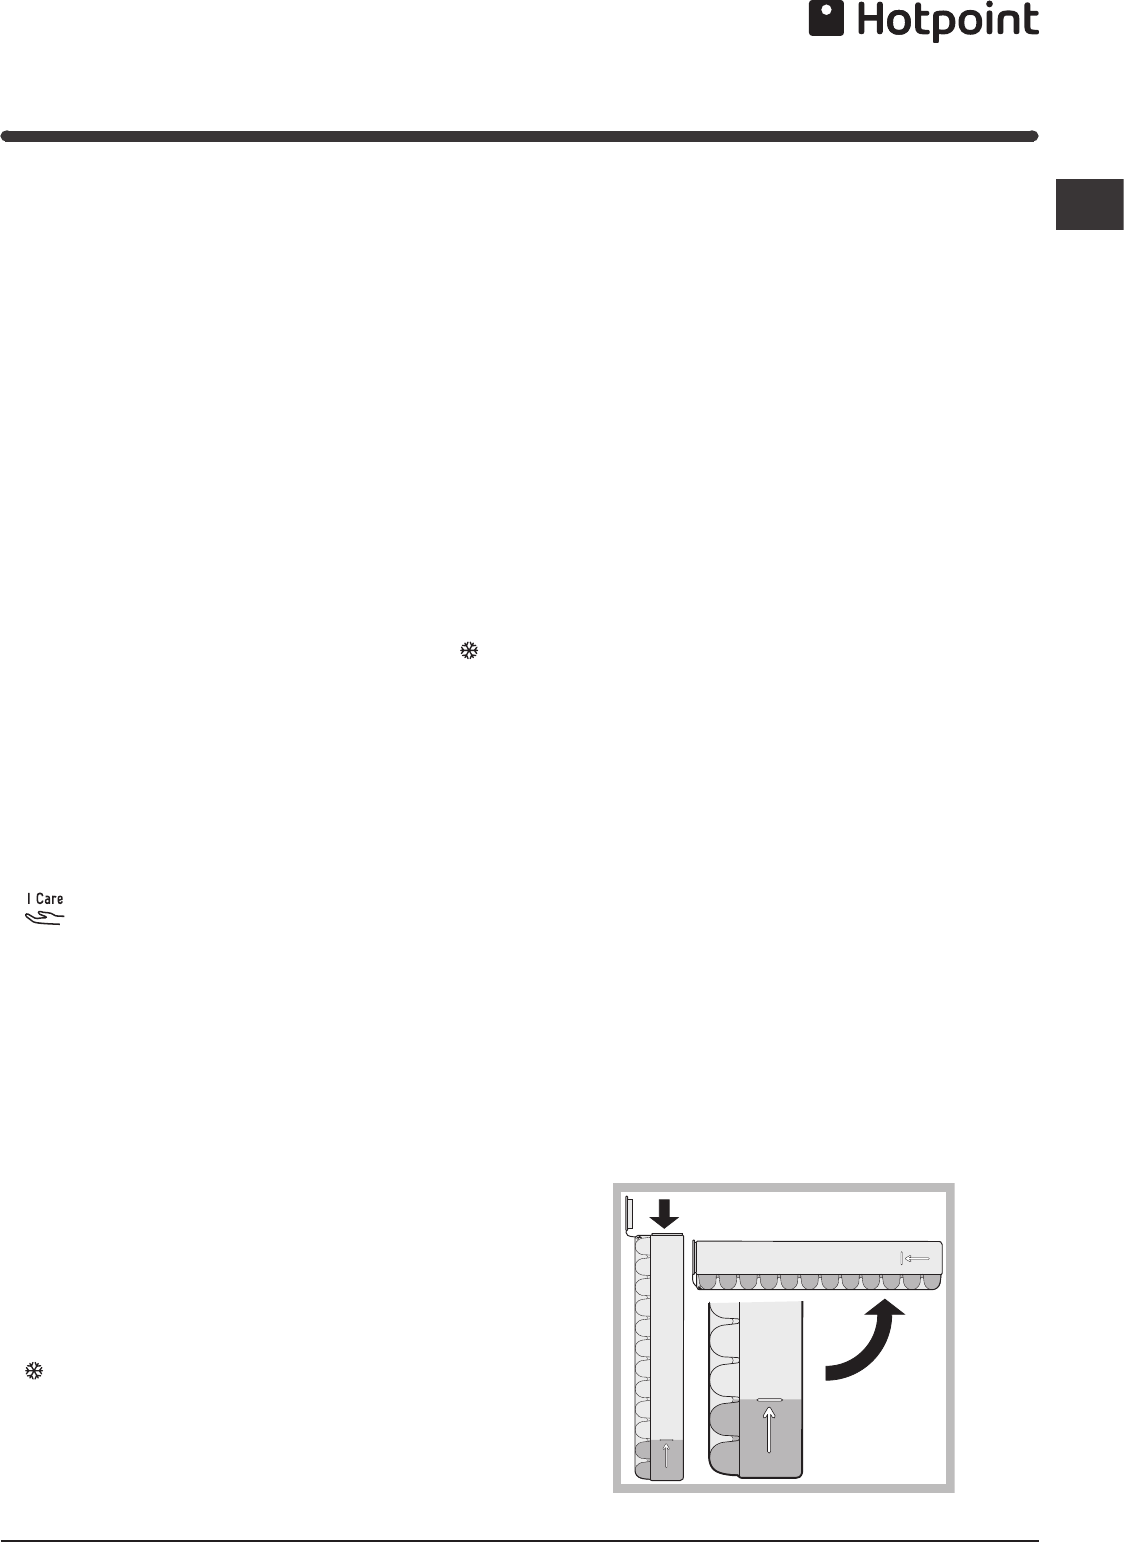
ICE tray
The fact that they are situated on the top part of the
freezer drawers ensures greater cleanliness: the ice no
longer comes into contact with the food placed inside
the freezer compartment; furthermore, the dripping of the
water during filling is avoided (a lid to cover up the hole
after filling with water is also provided).
1. Pull out the tray by pushing it up. Check that the tray
is ompletely empty and fill it with water through the
opening provided.
2. Take care not to exceed the level indicated (MAX
WATER LEVEL). Excess water prevents the ice
cubes from dispensing (if this happens, wait for the
ice to melt and empty the tray).
3. Turn the tray 90°: due to the connected
compartments each mould fills with water (see
diagram).
4. Close the opening with the lid provided and put the tray
back.
5. When the ice has formed (minimum time
approximately 8 hours) knock the tray against a hard
surface and wet the outside so that the ice cubes
come loose and take them out through the opening.
WATER LEVEL
MAX
WATER LEVEL
MAX
WATER LEVEL
MAX


