


36
B
C
A
A
B
C
A
B
C
D
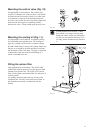
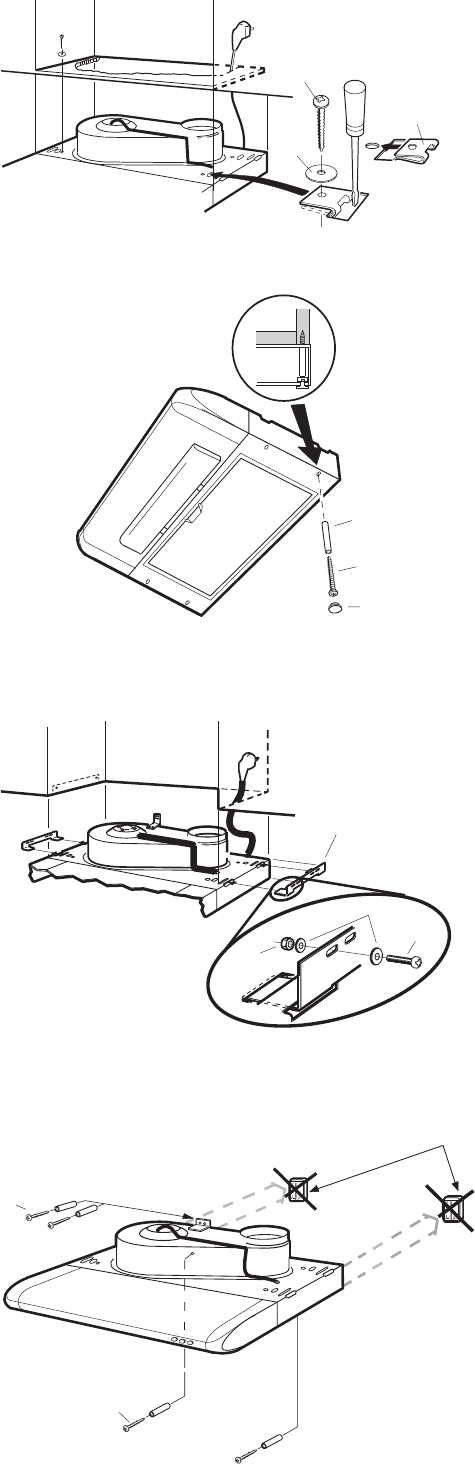
Mounting of cooker hood in a
cupboard, Alt. 2 (Fig. 7):
Cut an opening in the underside of the cupboard.
Use the template printed on the packaging.
Mount the cooker hood with two screws (A) and the
spacers (B).
Fit the plastic covers (C).
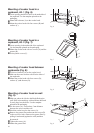
Mounting of cooker hood between
cupboards (Fig. 8):
Fit the two brackets (A) on the cooker hood.
Mark out the exact location to drill in the sides of
the cupboards.
Mount the cooker hood with four screws (B),
washers (C) and the nuts (D).
Fig. 8
Fig. 9
Mounting of cooker hood on wall
(Fig. 9):
Mark out where the 4 holes shall be drilled on the
wall. Drill in the markings with an Ø8 mm drill and
fit rawl plugs into the holes. Use the template
printed on the packaging.
Fix the screws (A). Leave about 5 mm distance
between the screws and the wall.
Hook the cooker hood on the screws (A).
Remove the grease filter and mount the screws (B)
in the two lower holes. Remove the grease filter by
pulling it backwards (against the wall) and then
downwards.
Tighten the screws (A).
Mount the grease filter.
Fig. 7
Mounting of cooker hood in a
cupboard, Alt. 1 (Fig. 6):
Cut an opening and drill 4 holes in the underside of
the cupboard. Use the template printed on the
packaging.
Mount the locknuts (A) on the cooker hood.
Mount the cooker hood with four screws (B) and
washers (C).
1
2
A
B
C
Fig. 6